The ‘Float Test’ for Checking if Your Subfloor is Truly Flat
The ‘Float Test’ for Checking if Your Subfloor is Truly Flat
Most guys skip the leveling compound. They think the underlayment will hide the dip. It won’t. I spent three days grinding concrete on a job last month just so the floor wouldn’t click like a castanet. That job was supposed to be a simple laminate install. Once we pulled the builder-grade carpet, the disaster was revealed. The slab looked like the rolling hills of Kentucky. If I had just thrown the planks down, the locking mechanisms would have snapped within six months. This is the reality of flooring that no one tells you at the big-box store. A floor is a structural assembly, not a piece of furniture. If the foundation is out of whack, the finish is doomed. I smell like WD-40 and oak dust most days because I do the work the right way. I do not care about the color of your transitions if your subfloor is bouncing. We are going to talk about the physics of the float test and why your subfloor is probably lying to you.
The physics of a failing foundation
Subfloor flatness is measured by the deviation over a specific span, usually 3/16 inch over 10 feet for hardwood or 1/8 inch over 10 feet for thin materials. If your subfloor exceeds these tolerances, the finished floor will experience vertical movement. This movement stresses the tongue and groove joints of your laminate or engineered wood. Over time, the friction causes the material to fatigue. You will hear it first. It is a subtle clicking or a hollow thud. Then you will see it. The joints will begin to peak or gap. This is not a product failure. This is an installation failure. Most people assume that thick underlayment pads act as a bridge. They do not. They act as a cushion that allows the floor to flex even more into the voids. Too much cushion actually causes the locking mechanisms on LVP to snap under pressure because the fulcrum point is unsupported. I have seen thousand dollar floors ruined by ten dollar mistakes.
“A floor is only as good as the subfloor beneath it; deflection is the enemy of every joint.” – Master Flooring Axiom
Why your subfloor is lying to you
Visual inspection of a subfloor is useless because the human eye cannot detect a 1/8 inch dip over a long span. You might think that plywood looks smooth, but it can have significant crowning at the joists or sagging in the centers. Concrete slabs are even worse. When concrete cures, it often curls at the edges or settles unevenly. This creates high spots and low spots that are invisible until you lay a straightedge across them. You need to understand the difference between level and flat. A floor can be out of level, meaning it slopes slightly from one side of the room to the other, and still be perfectly fine for most flooring. However, a floor that is not flat is a disaster. High spots act like a pivot point. Low spots act like a bridge. Both will destroy your investment. We use the float test to identify these anomalies before a single plank is laid.
The anatomy of the float test
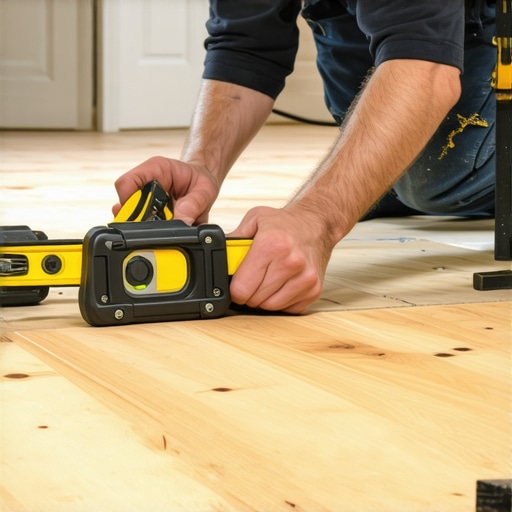
The float test requires a professional 10-foot straightedge or a long, perfectly straight level to identify gaps between the tool and the subfloor. You place the tool on the surface and look for daylight underneath. If you can slide a stack of three quarters under the level, the floor is out of spec. You must rotate the straightedge in a 360-degree pattern across the entire room. Do not just check the middle. Check the corners. Check the doorways. Check where the different sheets of subfloor meet. This is where most of the trouble hides. If you find a hump, it must be sanded or ground down. If you find a dip, it must be filled with a high-quality cementitious leveling compound. I prefer a polymer-modified feather finish for minor dips and a self-leveling underlayment for the deep ones. You have to be precise. Close enough is not good enough in this business.
The chemistry of the bond
Self-leveling underlayment relies on a specific chemical bond to the substrate which requires proper priming to prevent the concrete from sucking the moisture out too fast. If you pour leveler onto a thirsty concrete slab without a primer, the water in the mix will disappear into the slab. The leveler will then crack and delaminate. It becomes a layer of expensive sand under your floor. You need a latex or acrylic primer that creates a film. This film ensures the leveler stays fluid long enough to find its own level. The molecular structure of these compounds is designed to be high-flow. They use superplasticizers to reduce the water-to-cement ratio while maintaining a liquid state. When it dries, it needs to have a high compressive strength, usually over 3,000 PSI, to handle the load of the furniture and foot traffic. If the leveler is soft, the floor will eventually crush it into dust.
| Material Type | Max Deviation (10 ft) | Moisture Tolerance | Acclimation Time |
|---|---|---|---|
| Solid Hardwood | 3/16 inch | 6-9% MC | 7-14 Days |
| Engineered Wood | 1/8 inch | 7-11% MC | 3-5 Days |
| Laminate / LVP | 1/8 inch | < 75% RH | 2-3 Days |
| Ceramic Tile | 1/8 inch | N/A | None |
The 1/8 inch that ruins everything
Small deviations in the subfloor lead to catastrophic mechanical failure of the flooring click-system over time. Think about the physics involved. Every time you step on a plank that is bridging a low spot, you are applying hundreds of pounds of pressure per square inch to a plastic or wood tongue that is only a few millimeters thick. The joint flexes down. When you lift your foot, it flexes back up. Do this ten thousand times and the material fatigues. It starts as a squeak. Then the tongue shears off. Now the planks are floating independently. They start to slide apart. You see a gap. You try to tap it back together, but it won’t stay because the lock is gone. This is why floor leveling is the most important part of the job. I tell my clients that if they don’t have the budget for floor prep, they don’t have the budget for a new floor. I refuse to put my name on a ticking time bomb.
Showers and the slope of disaster
When dealing with showers and wet areas, the subfloor flatness is secondary to the precise pitch required for drainage. Here, we follow the TCNA guidelines strictly. A shower floor must slope at least 1/4 inch per foot toward the drain. However, the substrate must still be smooth. If you have bumps in your mortar bed, the tile will lippage. Lippage in a shower is more than an eyesore. It is a tripping hazard and a drainage obstruction. Water will pool behind the high edges of the tile, leading to mold growth and grout failure. In these environments, we use a different kind of floor leveling. We use a dry-pack mortar, a mix of sand and Portland cement with very little water. This allows us to sculpt the floor into a perfect cone. It is an art form that most modern installers have forgotten. They want to use a plastic tray and call it a day. I still trust the mud bed more than anything else.
“Substrate preparation is the foundation of a successful tile installation; flatness and rigidity are non-negotiable.” – TCNA Handbook Excerpt
Carpet install versus laminate requirements
Carpet is the only flooring material that is forgiving of a subfloor that is not perfectly flat, but even it has limits. You can hide a lot of sins under a thick 8-pound pad and a plush frieze carpet. However, if the dip is too deep, you will feel it as a soft spot. It feels like you are walking into a hole. Over time, the carpet will stretch unevenly over that dip, leading to ripples. Laminate is the complete opposite. Laminate is a rigid floating floor. It requires a surface that is as flat as a pool table. Because laminate is thinner than hardwood, it has less structural integrity to span gaps. If you are switching from carpet to laminate, you must be prepared for the reality of your subfloor. The carpet was lying to you for years. Once it is gone, the truth comes out. Do not blame the laminate. Blame the slab.
The regional moisture factor
The geographic location of your home determines how your subfloor will react to the float test and the leveling process. In the swampy humidity of Houston, a concrete slab is a sponge. You can level it perfectly, but if you do not use a moisture vapor barrier, the humidity will push the leveler right off the floor. The vapor pressure can reach incredible levels. In the dry heat of Phoenix, the opposite happens. The subfloor can be so dry that it shrinks, causing gaps between the plywood sheets to widen. If you pour leveler into those gaps without taping them, the leveler will just disappear into the crawlspace or the basement. You have to adapt your strategy to the climate. I always use a moisture meter. I check the relative humidity of the room and the moisture content of the subfloor. If those numbers are not right, I do not start the job. I am not interested in a callback.
A checklist for subfloor success
- Acquire a 10-foot professional grade straightedge for the float test.
- Identify all high spots and mark them with a red pencil for grinding.
- Circle all low spots and calculate the volume of leveling compound needed.
- Check the moisture content of the subfloor using a pin-type or pinless meter.
- Clean the substrate of all dust, wax, oil, and paint before applying primer.
- Apply a high-quality primer and allow it to become tacky but not dry.
- Mix the self-leveling underlayment to the exact water ratio specified by the manufacturer.
- Use a spiked roller to remove air bubbles from the wet leveler.
- Allow for full cure time before walking on or installing over the new surface.
The ghost in the expansion gap
A flat subfloor is useless if you do not respect the expansion gap around the perimeter of the room. Wood and laminate are living materials. They expand and contract with the seasons. If the floor is flat but it is jammed tight against the walls, it has nowhere to go when the humidity rises. It will buckle. The middle of the floor will lift off the subfloor, creating a massive bubble. People think they need to fill the gap with something. No. You leave it empty. You cover it with baseboard or quarter-round. That gap is the breathing room for the floor. I have seen floors that were perfectly leveled ruined because someone installed a heavy kitchen island right on top of a floating floor, pinning it down. You cannot pin a floating floor. It needs to be able to slide as a single unit over that flat subfloor we worked so hard to create. If you kill the movement, you kill the floor. It is that simple.
Why the thickest underlayment is often a trap
A common misconception is that a thicker underlayment pad will compensate for an uneven subfloor. This is a dangerous lie. Standard underlayment for laminate is usually between 2mm and 3mm thick. Some people buy 5mm or 6mm pads thinking they are getting a more premium feel. What they are actually doing is adding too much deflection. When you walk on the floor, the pad compresses. If the pad is too thick, it compresses too much. This puts a massive amount of vertical stress on the locking system. It is like trying to build a house on a mattress. The joints will eventually fail. The purpose of underlayment is sound dampening and a minor moisture barrier, not structural leveling. If your floor has a dip, fix the dip with cement, not with foam. I have walked onto many jobs where I had to rip out brand new underlayment because the homeowner thought they were being smart by doubling it up. It does not work that way.