The ‘Chalk’ Method for Finding High Spots on Subfloors
Most guys skip the leveling compound. They think the underlayment will hide the dip. It won’t. I spent three days grinding concrete on a job last month just so the floor wouldn’t click like a castanet. I have seen the way a slight hump in a slab can turn a beautiful laminate floor into a series of snapped locking mechanisms within six months. This is not about aesthetics. It is about structural engineering. A floor is a performance surface. If the foundation is trash, the finish will be trash. I have spent twenty five years on my knees with a moisture meter and a level, and I can tell you that the subfloor is the only thing that matters when the sun hits the floor at an angle. If you see those shadows waving back at you, you failed. I do not care if you used the most expensive engineered oak on the market. If you did not address the high spots, you threw your money into a wood chipper.
The unforgiving physics of a flat subfloor
Floor leveling requires a subfloor variance of no more than 1/8 inch over 10 feet for most laminate and hardwood products. Failing to address high spots leads to joint failure and hollow sounds. Using a ten foot straightedge is the industry standard to ensure the substrate meets the NWFA or TCNA specifications for flatness. This is not about being level. A floor can be slightly sloped and still be perfect for installation. It is about being flat. When a plank sits over a hump, it creates a fulcrum. Every time you walk over that spot, the plank flexes. That movement is what kills the click-lock system. It fatigues the material. Eventually, the tongue snaps. Then you have a gap. Then you have a problem. The chemistry of the subfloor is just as vital as the physics. Concrete slabs are not static objects. They are porous sponges that breathe moisture vapor. If you have a high spot, it is often where the concrete was poured a bit thick or where the screed board skipped. Grinding that down opens the pores of the concrete, which is why you must always reseal or prime before applying any patch or adhesive.
“A floor is only as good as the subfloor beneath it; deflection is the enemy of every joint.” – Master Flooring Axiom
Why your straightedge is only half the battle
Subfloor flatness is measured using a straightedge or a string line to identify deviations in the surface. While a level tells you the pitch of the room, the straightedge reveals the topography that will affect your carpet install or laminate layout. Identifying these high spots early prevents installation delays. You can have a room that is perfectly level but has a hump in the middle like a camel. If you are doing a carpet install, you might think you can get away with it. You are wrong. Carpet will show that hump as a wear point. The fibers will grind against the backing faster because of the increased pressure. If you are doing a shower, a high spot is a disaster. It ruins the drainage. It creates a pool of standing water behind the tile. You need to be precise. I use a heavy duty aluminum box beam. I do not trust the cheap ones from the big box stores. They bend. They warp. I want something that is dead straight. When I lay that beam down, I am looking for light. If I see light under the middle, I have a dip. If the beam rocks like a seesaw, I have a high spot. That is where the chalk comes in.
| Floor Type | Flatness Requirement (10 ft) | Allowable Deflection | Recommended Substrate |
|---|---|---|---|
| Solid Hardwood | 3/16 inch | L/360 | Plywood or OSB |
| Laminate / LVP | 1/8 inch | L/480 | Concrete or Wood |
| Ceramic Tile | 1/8 inch | L/360 | Cement Backer Board |
| Natural Stone | 1/8 inch | L/720 | Mortar Bed |
Master the chalk method for precision mapping
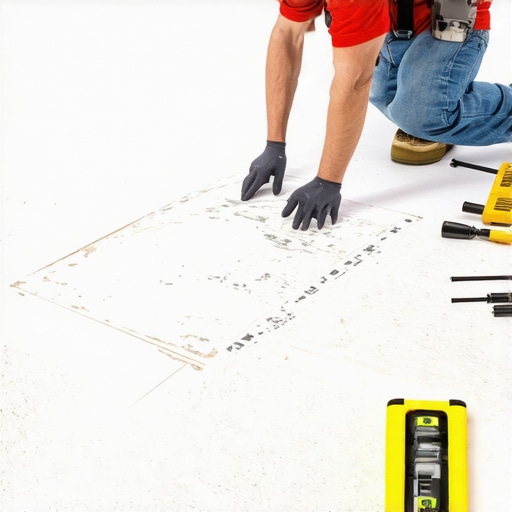
The chalk method involves sliding a straightedge across the subfloor while holding a piece of carpenter chalk against the side of the bar. This mapping technique leaves a visible mark on every high spot, allowing the installer to see exactly where grinding or sanding is required. It is a visual guide that removes the guesswork from floor prep. You do not just mark a small X. You map the whole ridge. I take a stick of sidewalk chalk or a blue lumber crayon. I hold the straightedge flat and I move it in a sweeping motion. The chalk only transfers to the parts of the floor that touch the bar. After five minutes, your floor looks like a topographical map. You can see the ridges. You can see the plateaus. This is vital because high spots are rarely just a single point. They are usually long ridges where the plywood sheets meet or where the concrete finisher got lazy with the power trowel. Once you have your map, you know exactly where to take the grinder. You are not guessing. You are not wasting time grinding down areas that are already flat. This is about efficiency. It is about doing the job once and never coming back for a repair. I have seen guys try to use a laser for this. A laser is great for height, but it is a pain for mapping flatness. Nothing beats the physical contact of the bar and the chalk. It is old school, but it works every single time.
- Clean the subfloor of all debris and drywall mud before starting.
- Use a ten foot straightedge for the most accurate reading.
- Mark the perimeter of the high spot with a high-visibility crayon.
- Check for height again after every thirty seconds of grinding.
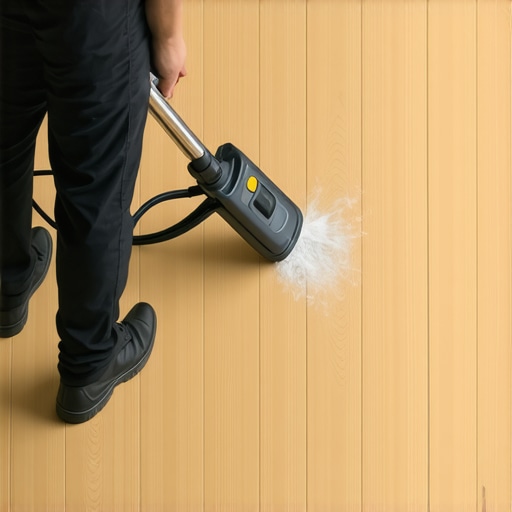
- Vacuum the dust immediately to see the true surface.
- Check the moisture content of the floor after grinding to ensure no new issues arose.
Chemical bonds and the reality of leveling compounds
Self leveling underlayment and patching compounds require a clean substrate with a specific pH balance to ensure a permanent bond. When you grind a high spot, you are altering the surface profile of the concrete, which improves the mechanical bond of the adhesive or leveler used. This process is essential for long term durability. Most people think they can just pour leveler over a dip and call it a day. They forget about the high spots. If you have a high spot right next to a deep dip, your leveler has to be twice as thick to cover it. That is a waste of material. Grind the high spot first. Then the dip is not as deep. You save money and you get a better result. You also have to think about the compression strength. Most cheap patches are only 2,000 PSI. If you are putting a heavy piano or a kitchen island on top of that, it will crumble. I only use high strength, fiber reinforced compounds. They handle the stress of the floor’s movement. Remember, the floor expands and contracts. It is a living thing. If your patch is brittle, it will crack. If it cracks, your floor will start to squeak. That is the sound of a failing installation.
“Subfloor preparation is the single most important factor in the longevity of any floor system.” – NWFA Technical Guidelines
Adapting the subfloor for different finish materials
Subfloor preparation varies significantly depending on whether you are installing carpet, laminate, or tile. While carpet install is more forgiving of minor subfloor humps, laminate and engineered wood require a rigid, flat surface to prevent locking joint failure. Understanding these material tolerances is the hallmark of a master installer. If you are working in a region like the humid Southeast, your subfloor is going to move more than it would in the desert. Wood is hygroscopic. It drinks water from the air. If you do not leave an expansion gap at the walls, that floor will buck and heave. But if you have a high spot in the middle, the floor has nowhere to go but up. It will crown. You will get a peak in the middle of your living room. For tile, the rule is even stricter. Tile does not bend. If the floor flexes, the grout cracks. Then the tile pops. You need to make sure your joists are stiff enough. Check the span tables. If your subfloor has too much deflection, it does not matter how flat it is. You have to add another layer of plywood or use a decoupling membrane. This is why I am a stickler for the details. I do not want to be the guy who has to tell a homeowner that their new floor has to be ripped up because I didn’t spend an hour with a piece of chalk.
The ghost in the expansion gap
I have seen floors that were perfectly flat in October that looked like a roller coaster in July. This usually happens because the installer did not account for the moisture in the crawlspace or the slab. If you grind a high spot on a wet slab, you are just opening the door for more moisture to come through. You must use a vapor barrier. I do not care if the LVP says it is waterproof. The core might be waterproof, but the mold that grows in the moisture trapped under it is not. You need a 6 mil poly film at the very least. If you are on concrete, use a high quality moisture mitigating primer. This seals the pores you opened during the grinding process. It keeps the alkaline salts from eating your adhesive. People ask me why I spend so much time on the stuff they will never see. I tell them it is because I do not want to see them again for twenty years. A good floor should outlast the mortgage. That only happens if you treat the subfloor like the foundation of a skyscraper. You map it. You grind it. You seal it. You do it right. Anything else is just a temporary decoration that will fail when the seasons change.
{“@context”:”https://schema.org”,”@type”:”HowTo”,”name”:”How to Find High Spots on a Subfloor Using the Chalk Method”,”step”:[{“@type”:”HowToStep”,”text”:”Clear the subfloor of all dirt, dust, and debris to ensure the straightedge makes direct contact.”},{“@type”:”HowToStep”,”text”:”Place a ten foot straightedge on the floor and slide it across the surface.”},{“@type”:”HowToStep”,”text”:”Hold a piece of carpenter chalk against the side of the straightedge while moving it.”},{“@type”:”HowToStep”,”text”:”Observe where the chalk transfers to the floor; these marks indicate the high spots.”},{“@type”:”HowToStep”,”text”:”Circle the marked areas with a crayon to define the boundaries for grinding.”},{“@type”:”HowToStep”,”text”:”Use a floor grinder or sander to remove the material within the marked circles.”}],”totalTime”:”PT1H”}