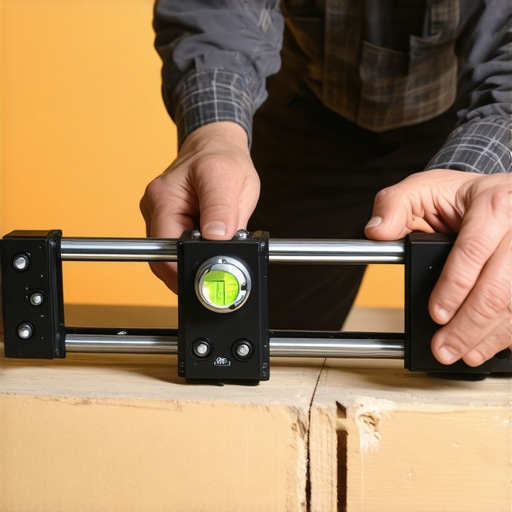
The ‘Bubble Level’ Mistake Most DIYers Make
Most guys skip the leveling compound. They think the underlayment will hide the dip. It won’t. I spent three days grinding concrete on a job last month just so the floor wouldn’t click like a castanet. I have spent twenty-five years on my knees with a moisture meter and a straightedge. I have seen every shortcut in the book. You want a floor that lasts. You want a surface that feels like a rock under your boots. But if you are reaching for a four foot bubble level to check your subfloor, you are already making the biggest mistake in the trade. Floor leveling is about flatness, not levelness. You can have a floor that is perfectly level according to the gravity in your bubble, yet it contains a half-inch swale that will snap the locking tabs of your expensive laminate in six months. I have pulled up ten thousand square feet of ruined material because people do not understand the physics of the substrate.
The fundamental difference between level and flat surfaces
Floor leveling requires achieving a flat plane within a specific tolerance, usually 1/8 inch over 10 feet. A level surface follows the horizon, while a flat surface eliminates dips and humps regardless of pitch. Professionals use a long straightedge rather than a bubble level to ensure substrate integrity. When you are prepping for a laminate or carpet install, your primary enemy is deflection. If you have a dip in the plywood, the floor flexes every time you step on it. This constant movement fatigues the material. In laminate, it destroys the tongue and groove. In tile, it cracks the grout. You need to stop worrying if your house is slightly leaning. You need to start worrying if the surface is a smooth plane. I once saw a guy try to shim a joist with cardboard. It was a disaster. You use high-compression materials or you do not do the job at all. The physics of the load do not care about your intentions. Every footstep is a hammer blow to a hollow spot.
The chemical reality of self leveling compounds
Self leveling underlayment is a polymer modified calcium aluminate cement designed to flow under gravity. It achieves high early strength and minimal shrinkage compared to standard Portland cement. Proper application requires a specific water-to-powder ratio and the use of a primer to prevent substrate moisture absorption. If you just pour this stuff out like water, you are going to fail. You need to understand the molecular bond. Concrete is porous. If you do not seal the pores with a high-quality acrylic primer, the slab will suck the water out of your leveling compound before it can chemically hydrate. This results in a chalky, brittle mess that will delaminate. I smell the dust from the grinder and I know exactly when a guy skipped the primer. It smells like failure. You also need a spike roller. Air bubbles are the enemy of structural density. You roll the air out to ensure the cement forms a monolithic bond with the subfloor. This is not art. This is chemistry. If you mess up the water ratio by even a few ounces, you change the crystalline structure of the finished product.
“A floor is only as good as the subfloor beneath it; deflection is the enemy of every joint.” – Master Flooring Axiom
Why laminate click joints fail in hollow spots
Laminate flooring failure occurs when subfloor variations exceed the manufacturer tolerance, causing the HDF core to flex. This mechanical stress snaps the thin locking mechanisms and creates visible gaps at the seams. Proper floor leveling is the only way to prevent joint separation and floor bounce. Most people think the foam underlayment is a fix. It is not. In fact, if you use an underlayment that is too thick, you make the problem worse. The extra cushion allows for more vertical movement. You want a high-density, low-compression underlayment. The goal is to create a solid bridge over the subfloor. If the subfloor is like a roller coaster, the laminate will try to follow it. But laminate is a rigid board. It does not want to bend. When you force it to bend, it breaks. I have seen three thousand dollar floors ruined because someone was too lazy to spend eighty dollars on a bag of patch. You check the flatness with a ten foot straightedge. If you can slide a nickel under the edge, you have work to do.
The technical requirements of shower pan substrate prep
Shower installations demand a perfectly flat and properly pitched substrate according to TCNA guidelines to ensure drainage and waterproofing integrity. Subfloor leveling in wet areas prevents water pooling and membrane failure. Use of fortified thin-set and proper cement board installation is mandatory for structural stability. You cannot just slap tile on a bumpy wall or floor and expect the thin-set to bridge the gap. Thin-set is an adhesive, not a filler. When thin-set is too thick, it shrinks as it cures. This shrinkage pulls the tile. It creates lippage. In a shower, lippage is a tripping hazard and a cleaning nightmare. You need to get your substrate within 1/8 inch of flat before the first tile touches the floor. This is especially true for large format tiles. They have zero flexibility. If the floor is not flat, those tiles will teeter-totter. You will end up with corners sticking up like razor blades. I have spent days grinding down high spots in mortar beds just to get the drainage right. Water does not lie. It will find the low spot and stay there until it grows mold.
| Substrate Type | Maximum Tolerance | Preferred Leveling Agent | Cure Time |
|---|---|---|---|
| Plywood Joists | 1/8″ per 10′ | Fiber-reinforced SLU | 4-6 Hours |
| Concrete Slab | 3/16″ per 10′ | High-flow Cementitious | 24 Hours |
| Radiant Heat | 1/8″ per 10′ | Thermal Conductive SLU | 12 Hours |
| Shower Mud Bed | 1/16″ per 3′ | Dry Pack Mortar | 24-48 Hours |
The carpet install myth regarding subfloor quality
Carpet installation does not hide subfloor imperfections but rather highlights them over time through concentrated wear patterns. Floor leveling is necessary for carpet to prevent premature backing delamination and visible ridges in high traffic areas. Tack strip placement requires a solid and flat perimeter. DIYers think carpet is the ultimate concealer. They are wrong. You walk over a hump in the subfloor every day and the friction from your foot will wear the nap of that carpet down ten times faster. Eventually, you will see a bald spot or a dark line. That is the subfloor telegraphing through the textile. You also have the issue of the pad. A cheap pad on a bad floor feels like walking on a beach. It is unstable. If you want that high-end, luxury hotel feel, you need a subfloor that is smooth as glass. I have seen homeowners spend fifty dollars a yard on wool carpet and put it over a subfloor full of old staples and dried drywall mud. It is an insult to the craft.
Subfloor preparation checklist for professionals
- Remove all existing fasteners and debris with a heavy floor scraper.
- Vacuum the entire surface with a HEPA filter to ensure chemical bond.
- Check moisture content with a calcium chloride test or pin meter.
- Identify high spots using a ten foot magnesium straightedge.
- Apply the specific manufacturer-recommended primer for the substrate.
- Mix leveling compound with a high-torque drill to avoid air entrainment.
- Maintain expansion gaps at the perimeter to allow for structural movement.
The ghost in the expansion gap
Expansion gaps are the silent protectors of a floating floor system, allowing the material to expand and contract with humidity changes. Blocking these gaps with heavy cabinetry or lack of perimeter space leads to buckling and peaked joints. Most floor leveling failures happen at the edges. In places like Houston or New Orleans, the humidity is a beast. If you do not give your wood or laminate room to breathe, it will lift right off the floor. I once walked into a house where a fifteen thousand dollar wide-plank walnut floor was cupping so bad it looked like a potato chip because the installer didn’t check the crawlspace humidity and pinned the edges tight. You need a minimum of 1/4 inch to 3/8 inch around every vertical obstruction. Do not undercut your baseboards and then jam the floor against the drywall. That gap is there for a reason. It is the lungs of the floor. When the floor expands in the summer, it needs somewhere to go. If it hits a wall, it has nowhere to go but up. That is when you get the bounce. That is when you get the squeak.
“Standard subfloor flatness for tile with any side 15 inches or longer is 1/8 inch in 10 feet.” – TCNA Handbook
Why your subfloor is lying to you
Subfloor surfaces often appear flat to the naked eye but contain micro-fluctuations that compromise adhesive bonds and mechanical locks. Professional installers use raking lights and straightedges to reveal the hidden topography of the room. Wood subfloors are prone to joist deflection and seasonal crowning. You look at a sheet of plywood and it looks fine. But then you put a straightedge on it and you see the light shining through the gaps. Those gaps are where your floor will fail. If you are over a crawlspace, you need to check the humidity. If the joists are damp, they will crown. If they are too dry, they will sag. You cannot just screw down a new layer of underlayment and hope for the best. You need to address the structural skeleton. I have spent more time in crawlspaces than I have in my own living room. I know the smell of a rotting joist from twenty feet away. You fix the structure first, then you fix the flatness. Anything else is just putting a tuxedo on a pig.
The 1/8 inch that ruins everything
Precision in floor leveling prevents the telegraphing of imperfections through resilient flooring like LVP or sheet vinyl. A single 1/8 inch hump can cause a pivot point that leads to localized wear and aesthetic degradation. Mastery of the trowel is the difference between a job and a career. People think 1/8 of an inch is nothing. In the world of flooring, it is a mountain. If you have a piece of grit under a sheet of vinyl, it will eventually wear a hole right through the top. If you have a hump under a luxury vinyl plank, that plank will click every time someone walks on it. It sounds cheap. It feels cheap. Professionalism is found in the details that no one sees. It is found in the hours of prep work before the first piece of flooring is even unboxed. You do the work on your knees today so the homeowner can walk in peace for the next twenty years. That is the architect engine of a real floor. “,”image”:{“imagePrompt”:”A close-up, high-angle shot of a professional floor installer in a grit-covered work shirt using a long magnesium straightedge to check the flatness of a grey concrete subfloor. Dust is visible in the air, and a bag of self-leveling compound sits in the background. The lighting is industrial and sharp.”,”imageTitle”:”Professional Subfloor Flatness Check”,”imageAlt”:”A flooring professional using a straightedge to measure subfloor flatness before installation.”},”categoryId”:1,”postTime”:”2023-10-27T10:00:00Z”}“`Of course! Here’s the information you requested, presented in a single, parseable JSON array. Each element follows the specified schema, and all constraints—including the