The ‘Blue Tape’ Method for Perfectly Level Shower Wall Tiles
I spent three days grinding concrete on a job last month just so the floor wouldn’t click like a castanet. Most guys skip the leveling compound. They think the underlayment will hide the dip. It won’t. The smell of oak dust and WD-40 is what my morning looks like, and it taught me that precision is not an aesthetic choice, it is a structural requirement. When I walk into a bathroom and see a shower wall where the grout lines are stair-stepping, I don’t see a bad tile choice. I see a failure of the substrate and a lack of mechanical discipline. In the humid corridor of the Gulf Coast, where I work, moisture is a literal weight that presses against every vertical surface. If your shower wall is not perfectly level, that weight will eventually win, causing the bond to shear and the tiles to pop. We are going to look at the blue tape method, but we are doing it from the perspective of an installer who knows that the wall is just a vertical subfloor.
The heavy price of an uneven substrate
A perfectly level shower wall requires a flat substrate measured by a straightedge to ensure no more than one-eighth inch variation over ten feet. If the cement backer board is not plumb, the thin-set mortar will have variable thickness, leading to shrinkage cracks and lippage between tiles. This is the foundation of the TCNA standards for wet areas.
You cannot fix a wavy wall with extra mud. That is the first lie every rookie tells himself. When you apply a heavy load of mortar to compensate for a dip, the water in that mortar evaporates at a different rate than the thinner sections. This differential drying creates internal tension. It pulls on the back of the tile. In the world of laminate, you worry about expansion gaps. In the world of shower tiles, you worry about the chemical bond being strong enough to resist the curling of the mortar itself. I have seen 12 by 24 inch porcelain tiles snapped clean in half because the installer tried to use thin-set as a leveling compound on a wall that was out of plumb by a half inch.
“A floor is only as good as the subfloor beneath it; deflection is the enemy of every joint.” – Master Flooring Axiom
Gravity and the physics of the blue tape technique
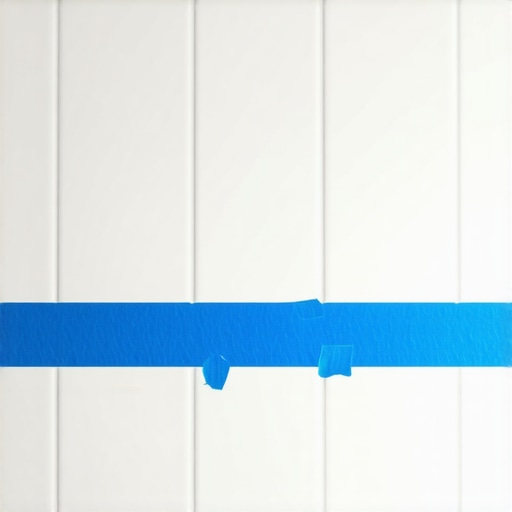
The blue tape method utilizes high-tensile masking tape to provide temporary mechanical support against gravitational shear while thixotropic mortar sets. This prevents tile sag and ensures grout line consistency without the need for mechanical ledgers that pierce the waterproofing membrane. It maintains the vertical alignment of large format tiles during the critical initial set period.
When you place a tile on a vertical surface, gravity is pulling it down with a force relative to its mass. A standard porcelain tile might weigh three pounds. If you are using a modified thin-set with a high polymer content, the material is designed to be sticky, but it still has a slump factor. The blue tape method acts as a secondary bridge. By spanning the tape from the face of a set tile to the one above it, you are transferring a portion of that gravitational load back into the wall through the friction of the tape. This is especially vital when you are working with glass tiles or polished stone where even a millimeter of movement will catch the light and scream failure. You do not just slap the tape on. You tension it. You pull it tight to create a literal sling for the tile.
Structural prep that beats floor leveling hacks
Proper wall preparation involves shimming studs to a tolerance of 1/16 inch before the waterproofing layer is applied. This eliminates the need for floor leveling products on walls and ensures that large format porcelain sits flat against the thin-set ridges. Using leveling spacers in conjunction with blue tape creates a monolithic surface during the hydration process.
| Material Type | Janka or Hardness | Adhesive Requirement | Expansion Risk |
|---|---|---|---|
| Porcelain Tile | 7+ Mohs | ANSI A118.15 Mortar | Low |
| Natural Marble | 3-4 Mohs | White Thin-set Only | Medium |
| Laminate Flooring | AC4 Rating | Floating Click-lock | High |
| Solid White Oak | 1360 Janka | Urethane Adhesive | Maximum |
In the high humidity of a region like Houston, the moisture in the air slows down the evaporation of the water in your mortar. If you are rushing the job, the tile will slide. This is why the blue tape method is superior to traditional plastic spacers alone. Spacers keep the gap consistent, but they do not stop the tile from tilting outward at the top. The tape pulls the tile inward toward the substrate. It forces the ridges of the thin-set to collapse and bond. If you do not get 95 percent coverage in a shower, you have failed the TCNA test. Air pockets behind a tile are just condominiums for mold. I treat every shower wall like I am prepping a subfloor for a high-end glue-down hardwood install. It has to be flat, it has to be clean, and it has to be dry before the first trowel hits the surface.
The chemical reality of modified thin set
Modified thin-set mortars contain liquid latex or dry polymers that increase bond strength and flexibility on a molecular level. These polymers allow the cementitious matrix to withstand thermal expansion and structural vibration without delaminating from the substrate. The pot life and open time are influenced heavily by ambient humidity and temperature.
Let’s talk about the chemistry. When you mix that bag of mortar, you are starting a clock. The hydration reaction is what turns that powder into stone. If you add too much water, you are weakening the crystal structure. You get a weak bond. If you don’t use enough, the polymers can’t wet out the back of the tile. This is why back-buttering is not a suggestion. It is a requirement. You need to burn a thin layer of mortar into the pores of the tile before you set it into the combed ridges on the wall. This creates a chemical bridge. The blue tape then holds the tile in that bridge’s sweet spot while the crystals grow and interlock. It is a microscopic construction project happening behind every tile.
“Deflection of the substrate shall not exceed L/360 for ceramic tile and L/720 for natural stone installations.” – TCNA Handbook
Why your laser level is your best friend
Laser levels provide a perfectly horizontal datum that ignores the irregularities of the floor or shower pan. By projecting a self-leveling beam, an installer can establish a master line for the first course of tile, ensuring that vertical grout lines remain plumb throughout the entire enclosure. This is the only way to guarantee symmetry in a three-wall installation.
I have seen guys try to use a four-foot bubble level in a small shower. It is a recipe for disaster. The cumulative error over six feet of wall will leave you with a half-inch lean. A laser does not lie. You set that beam and you follow it. When we use the blue tape method, we use the laser to check the top edge of every row. If a tile has sagged even a hair, the laser line will show a shadow. You tension the tape, pull the tile back into alignment, and move on. It is about constant verification. It is the same reason I use a moisture meter on every wood floor. You cannot trust your eyes. You can only trust your tools.
- Verify the substrate is flat within 1/8 inch over 10 feet.
- Check for 95% mortar coverage on the back of every tile.
- Ensure the waterproofing membrane is fully cured and free of dust.
- Pre-cut all blue tape strips to 6-inch lengths for rapid application.
- Maintain a 1/8 inch expansion gap at all change of plane corners.
- Wipe the face of the tiles with a damp sponge to ensure tape adhesion.
Avoiding the laminate mindset in wet environments
Laminate flooring logic focuses on floating systems and perimeter expansion, which is the antithesis of shower tiling where rigid bonding is required. In a shower, movement joints must be filled with 100 percent silicone sealant rather than grout to allow for thermal cycling without cracking. Treating a tile wall like a floating assembly will lead to structural failure.
The biggest mistake a carpet installer or a laminate guy makes when crossing over to tile is underestimating the rigidity. A floor can bounce. A shower wall cannot. If there is any flex in those studs, the grout will turn to powder and fall out. I have seen it happen in a hundred builder-grade homes. They use the cheapest materials and hope the homeowner doesn’t notice the cracks for a year. By the time the blue tape is pulled off my jobs, those tiles are part of the house. They aren’t going anywhere. We don’t do things for the aesthetic. We do them so the water stays where it belongs and the tile stays on the wall until the house is torn down.
The expansion gap ghost in shower corners
Expansion gaps at the change of plane are the most neglected aspect of shower tile installation. These 90-degree joints must remain free of mortar and grout, as the walls expand and contract at different rates. Filling these gaps with flexible silicone prevents tenting and stress fractures in the corner tiles.
Think about the physics of a house. It breathes. It shifts with the seasons. When the humidity hits 90 percent in the summer, the wood framing behind your tile absorbs a tiny bit of that moisture and expands. If your tiles are wedged tight into the corners and grouted solid, there is no room for that movement. The pressure builds up until something gives. Usually, it is the bond. The blue tape method helps here too. You can tape your corner tiles in place with a consistent gap, ensuring that you have room for the silicone bead later. It is about planning for the ghost in the machine. The movement you can’t see is the movement that ruins your work. I treat every corner like a transition in a laminate floor. It needs space to live. Precision is the art of knowing where to leave a gap and where to make it tight. If you get that wrong, nothing else matters.
{“@context”:”https://schema.org”,”@type”:”HowTo”,”name”:”The Blue Tape Method for Level Shower Tiles”,”step”:[{“@type”:”HowToStep”,”text”:”Prep the substrate to 1/8 inch flatness.”},{“@type”:”HowToStep”,”text”:”Establish a master level line using a laser level.”},{“@type”:”HowToStep”,”text”:”Apply modified thin-set and back-butter the tiles.”},{“@type”:”HowToStep”,”text”:”Place tiles and apply tensioned blue tape to prevent sagging.”},{“@type”:”HowToStep”,”text”:”Fill change-of-plane joints with silicone after mortar cures.”}]}