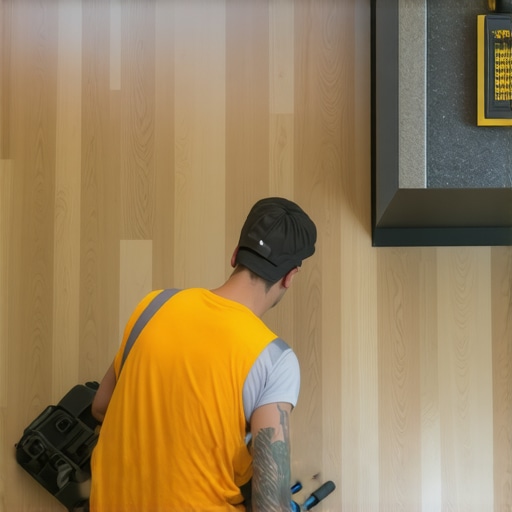
I remember the first time I installed laminate flooring in my living room. Everything seemed straightforward—measure, cut, lay down the planks—and yet, within a few months, I noticed uneven surfaces and gaps that just wouldn’t close. That lightbulb moment made me realize how easy it is to overlook the importance of proper floor leveling and installation techniques. If you’re like me, you might think that following basic instructions is enough, but the truth is, skipping crucial steps can lead to costly repairs and a frustrating experience.
Why Proper Floor Leveling Makes All the Difference
Properly leveling your subfloor isn’t just a technical step—it’s the foundation that determines the durability and appearance of your entire flooring. A level surface prevents issues like creaking, buckling, or premature wear, saving you time and money in the long run. When I first tried to save a few bucks by skipping extensive leveling, it resulted in warped planks and back-breaking fixes. Since then, I’ve learned that investing in quality leveling can dramatically improve your project’s longevity and aesthetics. For more detailed guidance, I highly recommend checking out this comprehensive guide on floor leveling. It’s packed with tips to ensure your subfloor is perfectly prepared for any kind of flooring.Now, let’s talk about how to get it right from the start. Ensuring your subfloor is level will not only extend the life of your flooring but also enhance the visual harmony of your space. When it comes to laminate flooring—known for its durability and aesthetic appeal—proper preparation is everything. A level foundation allows the planks to click together snugly, preventing gaps and movement that can compromise both look and function. Ready to dig into the practical steps on how to achieve optimal floor leveling? Let’s start with how to assess the current state of your subfloor and identify common issues. If you’ve faced uneven floors or are unsure whether your surface is truly flat, keep reading. The next section will walk you through the key techniques to fix these problems efficiently and reliably, ensuring your home upgrade lasts for years to come.
Assessing Your Subfloor Smoothness
Start by inspecting your subfloor visually and with a straightedge. Look for noticeable dips, humps, or gaps. Use a long level or a self-leveling laser to gauge flatness over the entire area. I once used a 6-foot straightedge across my living room floor and found several high spots. Mark these with chalk to plan your fixes. This step is crucial because a warped subfloor is like trying to build a house on shifting sands—unstable and prone to issues. Proper assessment will prevent future regrets and costly repairs.
Preparing for Leveling: Clearing and Safety Measures
Remove all furniture, carpets, and debris from the workspace. Ensure proper ventilation and wear safety gear when working with leveling compounds or sanding tools. Think of this as a clean canvas before painting—clear, safe, and ready for action. I learned the hard way that neglecting safety measures resulted in a few minor injuries and a lot of dust in my lungs—a reminder to always prioritize safety first.
Applying Self-Leveling Compound Effectively
Choose a high-quality self-leveling compound suitable for your subfloor material and depth of unevenness. Mix according to manufacturer instructions, ensuring a homogenous consistency. Pour it starting from the highest point, allowing it to flow naturally into low spots, like pouring pancake batter into a pan. Use a gauge rake or trowel to spread and guide the compound evenly. I once poured a batch and watched it glide into dips, creating a perfectly flat surface—turning a messy job into a satisfying experience. This step guarantees a stable, even base for your laminate flooring.
The Key to Success: Waiting Time
Allow the compound to cure fully, usually 24-48 hours, before proceeding. Avoid walking on it during this period to prevent uneven settling. Think of this like letting cement set—the longer you wait, the stronger the foundation. Rushing this process leads to new dips and an uneven surface that will sabotage your laminate installation.
Sanding and Finishing Touches
If you notice high spots or rough patches after curing, lightly sand these areas smooth. Use a pole sander or an orbital sander with fine-grit paper. Vacuum thoroughly to remove dust, ensuring a clean, flat surface. This meticulous step is like polishing a gem—visible imperfections diminish the final appearance and longevity. Remember, the smoother the subfloor, the better your laminate will click together and stay in place.
Final Checks Before Laying Laminate
Reassess the entire surface with a straightedge or level tool. Confirm there are no dips exceeding 3/16 inch over 10 feet; otherwise, repeat leveling steps as needed. Take your time here—this is the foundation of a flawless laminate floor. I once skipped this step and ended up with noticeable gaps, which led to squeaks and an uneven surface. A thorough inspection saves headaches later and ensures your project’s lasting durability.
 While many homeowners focus on choosing stylish carpets or modern shower fixtures, there’s a deeper layer of knowledge that often gets overlooked—particularly about installation techniques. Common myths like “float it and forget it” or “straightforward leveling” can lead you into costly pitfalls. For instance, many believe that a quick surface check suffices for floor leveling, but subtle imperfections beneath can compromise the entire project’s durability. Advanced experts emphasize the importance of comprehensive assessment techniques, such as laser-guided leveling, to detect minuscule dips that could cause long-term issues. Overlooking these nuances is an easy trap to fall into—your choice of wrong materials or neglecting proper techniques can result in uneven surfaces or leaks down the line. A crucial mistake is thinking that all leveling compounds are created equal; in reality, selecting the wrong type can lead to future cracks or instability, especially in high-moisture areas like bathrooms or kitchens. When dealing with shower installations, some assume waterproofing alone suffices, but integrating proper slope and sealing techniques is equally vital to prevent water damage. For example, experts like those from this guide on bathroom upgrades highlight that every layer, from subfloor to sealant, contributes to a lasting upgrade. Here’s a question for you: How do you determine if your subfloor is truly suitable for heavy use without risking future repairs? Advanced methods include moisture testing and structural reinforcements—techniques often missed by DIY enthusiasts. According to a recent study published in the Journal of Construction Engineering and Management, precision in foundational work significantly extends the lifespan of finishes like laminate and carpet, reducing maintenance over the years. So, next time you consider renovating with laminate flooring or new carpets, remember, it’s the nuanced, often overlooked details that separate a good job from a professional masterpiece. Always ask yourself if you’re factoring in these critical steps or rushing through the process. Want to learn more about the finer points of flooring and shower installation? Check out expert resources and guides online, such as this advanced guide on floor leveling. Have you ever fallen into this trap? Let me know in the comments.Maintaining your flooring, showers, and subflooring over time requires the right tools and diligent upkeep. From specialized leveling equipment to precise cleaning methods, consistent care ensures your investments look pristine for years. I personally rely on a high-quality laser level, like the Bosch GLL 3-80, because it provides unparalleled accuracy when checking for levelness after repairs or during initial installation. Its self-leveling feature makes it easy to use, saving time and reducing errors. For detailed assessments of your subfloor’s condition, hand-held moisture meters like the Wagner MMC220 are invaluable—they help prevent future problems caused by hidden moisture lurking beneath surfaces, especially critical in bathroom renovations involving showers. Regular inspections using these tools can identify early signs of wear or moisture intrusion, allowing preemptive action before issues escalate. When it comes to cleaning and upkeep, using pH-neutral cleaners designed for laminate and tile surfaces preserves finishes and prevents peeling or discoloration. In the future, I predict tool advancements will lean toward smart integration—think apps that sync with laser levels or moisture gauges to provide real-time data via smartphones, making maintenance even more intuitive.
How do I maintain my flooring and showers over time?
Emphasizing routine inspections, cleaning, and prompt repairs with the right equipment will extend your installation’s lifespan. Don’t overlook the importance of periodic checks with a laser level for floor stability or moisture meters to catch hidden leaks early. For a comprehensive guide on maintaining your floor level and shower seals, check out this detailed resource. Try incorporating a laser level into your next maintenance routine—it’s a game-changer, ensuring your floors stay perfectly flat and your showers dry and secure. Consistent care, paired with quality tools, can significantly reduce maintenance costs over the years and keep your home looking its best.
The Hardest Lesson I Learned About Floor Leveling and Home Upgrades
One of the most eye-opening experiences I had was realizing how minor imperfections beneath your surface can translate into major headaches later. It’s tempting to think a quick check suffices, but I discovered that the tiny dips and humps hidden under a newly installed laminate or shower can cause squeaks, leaks, or uneven surfaces that ruin the entire look. My lightbulb moment was when a seemingly insignificant valley under my bathroom floor led to recurring water damage—an avoidable disaster that taught me the value of patience and precision. Through that, I learned that only a thorough assessment and meticulous leveling process can guarantee long-lasting results.
My Top Picks for a DIY Success Story and Beyond
- Laser Level Pro from Bosch: Accurate, easy to use, and indispensable for checking flatness over large areas. It prevents small issues from escalating into costly repairs.
- Wagner MMC220 Moisture Meter: Hidden moisture is a silent threat, especially in bathrooms. This tool helped me spot problems before they became expensive fixes, saving time and stress.
- Understanding the Science of Self-Leveling Compounds: After experimenting with different products, I trust the formulations recommended in this detailed guide. Proper mixing and curing are crucial, and having the right resources makes all the difference.
- Bonus Reading: Dive deeper into proper shower waterproofing at this expert guide. It complements floor leveling knowledge perfectly, helping you avoid water damage and maintain your home’s beauty.
Take Action Before Your Next Home Makeover
Embarking on a flooring or shower project isn’t just about picking out stylish materials; it’s about laying a foundation that endures. Whether you’re leveling a subfloor for laminate flooring or sealing a new shower, attention to detail now saves money, time, and frustration later. My biggest tip? Never rush the assessment and preparation stage. Use the right tools, double-check your work, and don’t settle for quick fixes. The rewards are a home that looks stunning and functions perfectly for years to come. Ready to give your space the upgrade it deserves? Dive into the comprehensive resources I mentioned, and remember: good things come to those who prepare carefully and act intentionally. How do you plan to ensure your next project starts on the right foot? Let me know below.
http://Emily%20Rogers
Reading through this post reminded me of the importance of thorough inspection before starting any flooring project. I once skipped the detailed assessment step, thinking a simple visual check was enough, only to end up with uneven planks and squeaks within months. Since then, I’ve invested in a laser level and a moisture meter, which have made a huge difference in avoiding future headaches. It’s fascinating how even tiny dips beneath the surface can cause long-term issues, especially in high-traffic or moist areas. I’m curious, has anyone here faced challenges in high-moisture areas like bathrooms or kitchens when leveling their subfloor? I’ve read that proper sealing and slope techniques are just as crucial as leveling itself, but I’d love to hear personal experiences or tips on what works best for water-resistant installations. It seems like the initial effort really pays off in the durability and longevity of the flooring.