I remember the moment I realized I had bitten off more than I could chew with my first carpet installation. The floor wasn’t perfectly level, and I didn’t take the time to fix it beforehand. The result? An uneven, bumpy surface that made my new carpet look cheap and worn out faster. It was a lightbulb moment that taught me the hard way: proper floor leveling isn’t just a step in the process; it’s the foundation of a beautiful, durable carpet.
Why Proper Floor Preparation Can Make or Break Your Carpet Project
When I started exploring the world of floor leveling and carpet installation, I quickly learned that skipping or rushing this crucial step can lead to disastrous results. Uneven floors cause wrinkles, bubbles, and even premature wear. Plus, they make your space look sloppy, no matter how nice your carpet is. The good news? With a little knowledge and effort, you can avoid these pitfalls and enjoy a flawless finish that lasts for years.
In 2024, the trend is moving toward more durable, stylish, and easy-to-maintain flooring solutions. A well-leveled subfloor not only enhances the look of your carpet but also helps in maintaining a healthier indoor environment by preventing mold and moisture issues. According to experts, taking the time to level your floors properly is one of the smartest investments you can make for your home’s long-term value and comfort. Want to see how to do it right? I’ll walk you through the essential steps and share some of my favorite tips to get professional results at home.
Have you ever faced a project where the floor wasn’t quite right, and it ruined everything?
If so, you’re not alone. I made the mistake of rushing into my first carpet installation without addressing uneven surfaces, and it cost me time and money. Learning from that experience, I now know that proper floor leveling is a critical step that shouldn’t be overlooked. For more detailed guidance, I recommend checking out this expert guide to floor leveling. It’s packed with practical tips to ensure your project turns out perfect.
Now that we understand why this step matters, let’s dive into the practical techniques that will make your carpet installation smooth, durable, and stunning. Whether you’re a DIY enthusiast or planning to hire a pro, mastering these fundamentals will save you headaches and ensure your space looks its best for years to come.
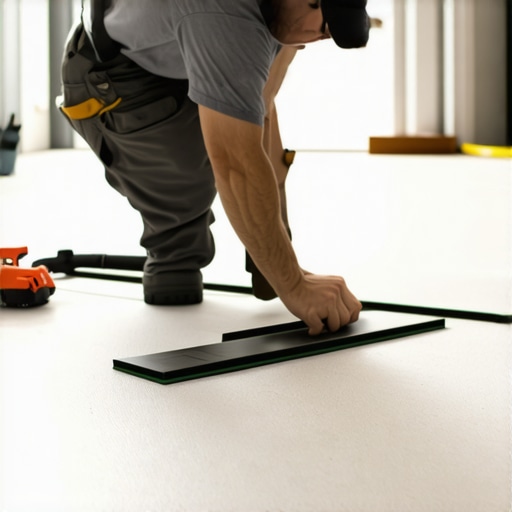
Start with a thorough assessment of your subfloor
Before you begin, inspect your subfloor carefully. Look for cracks, dips, or uneven patches. Use a long straightedge or a level to identify high and low spots. I once skipped this step, and it led to bumps that made my carpet look uneven. Taking the time to assess will save you frustration later.
Prepare your tools and materials
Gather everything you need: a self-leveling compound or floor patch, a trowel, a drill with a mixing attachment, a concrete grinder or sander if needed, and safety gear. Having these ready ensures a smooth process. I recommend checking this expert guide for detailed tool recommendations.
Clean and repair the subfloor
Remove all debris, dust, and loose material. Vacuum thoroughly. Fill cracks or holes with a suitable patching compound. Think of your subfloor like a canvas for a painting; the smoother it is, the better your final result will look. I had a real mess with residual dust, which caused the leveling compound not to adhere properly, so don’t skip this step.
Apply leveling compounds strategically
Use a self-leveling compound for large dips
Pour the compound into low spots and spread it evenly with a trowel or a gauge rake. It naturally seeks its level, so don’t overthink the process. I once poured too much, and it created a bump, but I learned to add in thin layers gradually. For complex or stubborn unevenness, consider consulting professional solutions.
Patch small imperfections with a floor patch
For minor dips or cracks, mix a floor patch and apply with a putty knife. Smooth it out and let it cure fully before proceeding. This is like filling in the cracks on a road before paving — essential for a smooth ride (or walk) afterwards.
Sand or grind for precision
If the surface remains uneven after patching, use a concrete grinder or sander to smooth out high spots. Wear safety gear and work in sections. Think of this step as sculpting your floor to perfection. I once spent a whole afternoon grinding a stubborn bump, but the effort paid off with a flawless surface.
Check your work meticulously
After the compound cures, re-inspect with a level or straightedge. Walk across the surface to feel for any bumps. Repeat sanding or patching if necessary. Remember, patience here ensures your carpet will lay perfectly flat, preventing wrinkles or bubbles over time.
Finalize with a clean surface
Vacuum again to remove all dust. A clean, smooth surface is the foundation of a durable, visually appealing carpet installation. For additional tips, visit this guide.
Many DIY enthusiasts and even seasoned homeowners fall prey to misconceptions when it comes to floor leveling, which can compromise the integrity of your carpet installation. Let’s dig deeper into what most people get wrong and how to avoid these pitfalls to ensure a flawless finish that lasts.
Why the Myth of Perfectly Flat Floors Can Lead You Astray
Contrary to popular belief, achieving a completely flat surface isn’t always necessary or even desirable. Floors naturally have minor imperfections, and trying to eliminate every tiny bump can lead to unnecessary cost and effort. Experts, like those who contribute to this comprehensive guide, recommend focusing on a smooth, stable surface rather than perfection. Over-sanding or grinding to erase every imperfection can weaken the subfloor and cause future problems.
Common Mistakes That Can Ruin Your Floor Leveling Efforts
One of the biggest errors is rushing the curing process of leveling compounds. Many assume that once the compound looks dry on the surface, it’s ready for the next step. However, improper curing can lead to cracks or shifting later. Always follow the manufacturer’s instructions for drying times, and consider environmental factors like humidity, which can extend curing times. Additionally, neglecting to thoroughly clean the subfloor before applying compounds is a frequent oversight. Dust and debris prevent proper adhesion, causing unevenness or bubbles in your carpet. Remember, a clean, dust-free surface is essential for professional results.
Advanced Tip: How to Detect Subtle Unevenness That Could Sabotage Your Project
For those seeking a more precise assessment, using a laser level or a long straightedge can reveal subtle dips or high spots that a standard level might miss. These small imperfections, if left unaddressed, can cause wrinkles and bubbles in your carpet over time. It’s worth investing in these tools for a meticulous job, especially when working on large or high-traffic areas. Experts advise rechecking your work after curing and sanding, as small shifts can occur. Want to master this? Check out this resource for detailed techniques.
Have you ever fallen into this trap? Let me know in the comments. Remember, patience and attention to detail are your best allies in creating a flawless foundation for your carpet, ensuring it looks great and performs well for years to come.
Once you’ve successfully leveled your floor and installed your carpet, the journey doesn’t end there. Keeping your floors looking pristine and functioning well over time requires the right tools and a proactive maintenance routine. In this article, I’ll share the specific equipment I rely on and practical tips to ensure your investment continues to pay off for years to come.
Invest in a Quality Floor Buffer for Long-Term Care
A dedicated floor buffer is an underrated tool that can make a significant difference in maintaining your carpet and underlying surface. I personally use a variable-speed buffer with soft pads, which allows me to gently clean without damaging the fibers or the subfloor. Regularly running a buffer helps remove dirt and debris that can cause premature wear, especially in high-traffic areas. For delicate carpets, I prefer models with adjustable agitation settings to avoid unnecessary stress on fibers. When selecting a buffer, consider one with a built-in vacuum attachment to pick up dust during cleaning, reducing buildup that can compromise your leveling efforts.
Use Specialized Cleaning Solutions for Durability
Every type of flooring and carpet fiber benefits from tailored cleaning solutions. I recommend using pH-neutral, low-residue cleaners designed specifically for carpets and sealed floors. These products preserve the integrity of the fibers and prevent buildup that can lead to uneven wear. For stubborn stains or embedded dirt, I opt for enzymatic cleaners, which break down organic materials and restore the surface’s appearance. Regular cleaning not only keeps your space looking fresh but also prolongs the lifespan of your flooring, especially when combined with the right tools.
Implement Routine Inspection and Spot Repairs
One of the most effective maintenance strategies is periodic inspection. I schedule a quick check every few months, focusing on high-traffic zones and corners. Look for signs of unevenness, loose fibers, or damage. Address issues early by patching small tears or re-stretching loose carpet sections. For this, I keep a handy carpet repair kit that includes a staple gun, seam roller, and adhesive. Acting promptly prevents minor repairs from escalating into costly replacements, ensuring your floor remains level and attractive over time.
Stay Ahead with Advanced Monitoring Tools
Emerging technology offers innovative ways to monitor your flooring condition remotely. Smart sensors embedded in the carpet can detect shifts or excessive wear, alerting you before visible damage occurs. Although still a niche market, these tools are becoming more accessible and affordable. I predict that in the future, integrating IoT devices with floor maintenance will become standard practice, making upkeep even easier and more effective.
How do I maintain my leveled floors and carpets over time?
Regular cleaning, prompt repairs, and professional inspections are key. Using a quality buffer and suitable cleaning solutions, I keep my floors looking fresh and prevent buildup. Scheduling periodic inspections helps catch issues early, and considering advanced monitoring systems can provide peace of mind. Remember, consistency is the secret to long-lasting results. For a comprehensive guide on maintaining your floors after leveling, check out this expert resource. Try implementing a routine of gentle cleaning and regular inspections — it’s the best way to keep your floors working beautifully for years to come.
The Hardest Lesson I Learned About Floor Leveling
One of my most valuable lessons came from rushing a project and skipping proper subfloor assessment. I learned that no matter how beautiful your carpet is, uneven floors will sabotage your efforts and cost you more in repairs later. Taking the time to thoroughly inspect and prepare the subfloor saved me from future headaches and ensured a smooth, professional-looking finish.
3 Myths About Floor Leveling That Held Me Back
I believed that achieving a perfectly flat floor was necessary for a flawless carpet job. Turns out, minor imperfections are acceptable if the surface is stable and well-prepared. Also, I thought that self-leveling compounds were a quick fix for all issues— but over-relying on them without proper prep can lead to cracks and unevenness. Lastly, I assumed that once the leveling compound dried, my work was done. Patience with curing times is essential for durability and a perfect result.
What Experts Won’t Tell You About Floor Preparation
Many professionals emphasize the importance of detailed inspection but often overlook the value of advanced tools like laser levels or long straightedges. These help uncover subtle dips that could cause wrinkles in your carpet over time. Additionally, some experts suggest that focusing on a stable, slightly imperfect surface can be better than chasing impossible perfection, saving you money and effort while still achieving excellent results.
Curated Resources for a Flawless Finish
- Expert Guide to Floor Leveling: This comprehensive resource offers step-by-step instructions and insider tips that I trust for professional results.
- Recommended Tools: A high-quality laser level and a professional-grade self-leveling compound are essential tools I use regularly and recommend.
- Maintenance Tips: Regular inspections and gentle cleaning routines help preserve your flooring’s integrity and appearance over time.
Embrace the Challenge, Elevate Your Space
Taking the time to master floor leveling isn’t just about installing carpet; it’s about creating a foundation that elevates your entire home. With patience, the right tools, and a willingness to learn, you can achieve results that last for years and truly transform your space. So, are you ready to tackle your next flooring project with confidence? Your perfect carpet installation starts with a solid, level foundation—don’t shy away from the challenge.