I vividly remember the moment I stepped onto my freshly laid carpet, expectations high for a cozy, beautiful space. Instead, I was greeted with creases, uneven patches, and a sinking feeling that all my efforts had been wasted. That lightbulb moment made me realize something crucial: even the best-looking carpet can fail to deliver if the subfloor isn’t properly prepared. If you’ve ever faced similar frustrations, you know how disheartening it can be to invest time and money only to see your project fall apart within months.
Why Floor Leveling and Carpet Installation are More Than Just Basic Tasks
Getting a perfect finish isn’t just about choosing the right carpet or flooring style—it’s about the groundwork beneath. A level, smooth surface is essential to prevent premature wear, wrinkles, and unsightly bumps. When I first started, I underestimated the importance of proper floor leveling techniques. I thought a quick patch here and there would suffice. Spoiler alert: it didn’t. That mistake cost me dearly in terms of durability and aesthetics. Today, I’ll share what I’ve learned from trial, error, and advice from industry experts, so your home upgrade stands the test of time without unnecessary headaches.
Is Floor Leveling Really That Critical or Just a Fancy Extra?
Let me be honest—early on, I wondered if skipping the meticulous leveling process was a time-saver. Turns out, I was wrong. Skipping proper leveling can lead to your carpet developing wrinkles, uneven patches, and even premature tearing. A study by the National Association of Home Builders confirms that improperly prepared subfloors significantly decrease the lifespan of flooring materials. The good news? With the right tools and techniques, you can achieve a perfectly flat surface that ensures your flooring’s durability and beauty for years to come. And that’s exactly what I aim to help you master here.
So, if you’ve faced the frustration of uneven floors or just want your next project to be flawless from start to finish, keep reading. I’ll take you through simple, proven strategies to get your subfloor ready for those beautiful finishes—whether it’s carpet, laminate, or tile—because a solid foundation makes all the difference.
Prepare the Subfloor with Precision
Start by clearing the area and inspecting for any debris, loose materials, or existing imperfections. Remove everything that might interfere with an even surface. Use a high-quality rotary sander or a floor grinder to level high spots—think of this as sanding down rough edges on a piece of wood before painting. For low spots or dips, apply a self-leveling compound carefully, pouring it in the center and spreading it with a trowel. I once faced a stubborn low patch in a hallway; pouring extra compound and feathering the edges made the surface seamless, preventing future wrinkles in the carpet.
Identify High and Low Areas Effectively
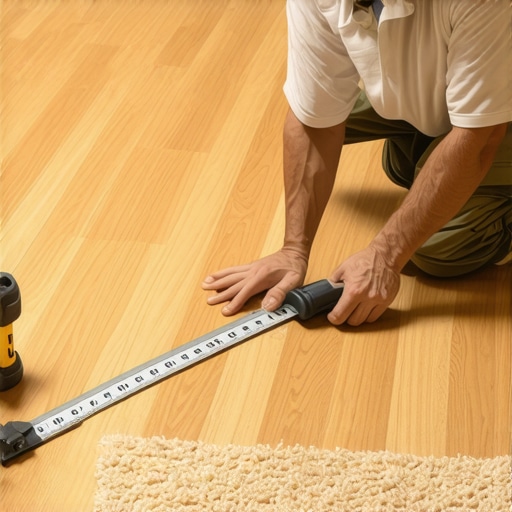
Use a long straightedge or a level to scan the entire floor. Place the tool at multiple points and check for variations. For large rooms, a laser level can drastically speed up this process. Mark spots where the floor is uneven with chalk or painter’s tape. This visual guide keeps your work focused. In my experience, ignoring these signs led to uneven carpets that showed every ripple and bump—better to catch unevenness early.
Use a Chi-Tool for Tight Spots
In corners or tight spots, a hand tamper or a small squeegee helps to press leveling compound evenly. Think of it like smoothing out icing on a cake. This ensures the compound bonds correctly and creates a flat surface, vital for the longevity of your carpet. Otherwise, these uneven patches can cause ripples that distort the finished look.
Ensure Proper Drying Time
Patience is key. Allow the compound to cure fully—usually 24 hours—before proceeding with carpet installation. Rushing this step can trap moisture or leave residual imperfections. I learned this the hard way when I hurried, resulting in a bumpy carpet that stayed stubbornly uneven. Trust the product instructions and check for a solid, dry surface.
Test the Flatness Before Covering
Once the leveling compound is dry, recheck with the straightedge or laser. Run your hand over the surface to feel for any bumps or dips. If necessary, apply a second layer of leveling compound to fine-tune the surface. A well-leveled floor acts as a foundation that can support a durable, wrinkle-free carpet. Remember, surface preparation is the backbone of a professional-looking result. For detailed techniques and advanced tips, visit this resource.
While many believe mastering surface choices like laminate flooring or shower fixtures is straightforward, the real challenge lies beneath—where nuanced mistakes often sabotage your efforts. A common myth is that selecting premium materials guarantees durability; however, even the best-looking laminate or luxurious shower won’t last if underlying issues persist. For instance, overlooking proper floor leveling can cause uneven wear, leading to costly repairs down the line.
Many homeowners assume that installing a shower is simply a matter of choosing stylish fixtures. Yet, neglecting proper waterproofing and drainage calculations can result in leaks and mold growth, jeopardizing your home’s integrity. Similarly, a frequent misconception about carpet installation is that it’s just laying down fabric—when in reality, failing to prepare the subfloor meticulously can lead to ripples and wrinkles that diminish comfort and aesthetics.
What advanced mistakes do even seasoned renovators tend to overlook when leveling floors?
It’s often overlooked that the subfloor’s moisture content plays a critical role. Excess moisture can prevent leveling compounds from bonding correctly, causing them to crack or detach over time. A study published in the Journal of Building Engineering highlights that inadequate moisture control significantly reduces flooring lifespan. To avoid this, professionals recommend testing subfloor moisture and applying appropriate vapor barriers before leveling. Trusting superficial solutions without considering these nuances can be costly. To deepen your understanding, check out expert advice on precise floor leveling techniques.
Furthermore, many underestimate the importance of patience during installation. For example, rushing the curing process of leveling compounds or sealants might seem efficient but can cause long-term damage and aesthetic issues, like uneven surfaces or peeling finishes. Taking time to allow proper drying and curing ensures a durable, flawless outcome. Remember, a seemingly minor oversight during the prep stage can snowball into significant problems later. Keep in mind that meticulous attention at every step—be it selecting the right laminate or sealing a shower—is what truly guarantees longevity and satisfaction. Want to learn comprehensive strategies? Explore expert tips on shower renovations or top laminate flooring tips that go beyond the basics. Remember, a well-informed homeowner is the key to a successful renovation.
Maintaining professional-quality results over time requires more than just initial effort; it demands the right tools and ongoing attention. From leveling compounds to moisture meters, the tools I rely on have been chosen through years of hands-on experience to ensure precision and durability. One essential device is a high-grade laser level, which provides accurate, long-range measurements, making it easier to detect uneven surfaces and verify their correction. I personally prefer laser levels with remote controls and cross-line capabilities because they enable me to work efficiently in larger spaces without constantly repositioning equipment. Additionally, I keep a quality moisture meter on hand; testing subfloor moisture is critical, as excessive dampness can jeopardize the adherence of leveling compounds and flooring materials. This simple step prevents future problems like cracking or buckling, especially in environments prone to humidity fluctuations. For applying leveling compounds, I use a troweling system with a flexible, stainless steel blade. This tool ensures a smooth, even application—crucial when installing laminate or repairing uneven surfaces—saving me from rework and patching. To address tight corners and confined spaces, I rely on a small hand tamper or a mini-squeegee, which helps press leveling material into hard-to-reach areas for a seamless finish. Looking ahead, I predict that automation and smarter diagnostic tools will become standard, reducing guesswork and increasing the longevity of installations. For instance, integrating moisture sensors with digital monitoring can inform ongoing maintenance, alerting homeowners to potential issues before they escalate.
So, how do I maintain long-term results with these tools? The key is consistent, periodic checks combined with proper cleaning and calibration of equipment. For example, recalibrating laser levels annually ensures measurement accuracy, while cleaning moisture meters prevents false readings caused by dust or debris. Developing a maintenance routine for your tools ensures they perform reliably during each project and minimizes costly mistakes down the line. Don’t overlook the importance of professional-grade equipment—investing in quality tools not only enhances your craftsmanship but also saves you money over the long term by reducing repairs and redo work. I highly recommend trying out a digital moisture meter integrated with an app to track humidity trends over time, which can be invaluable for homes in variable climates. For more expert tips on preserving the quality of your installations, visit this resource. Remember, the right tools are your best allies in achieving enduring, beautiful results that stand up to daily life and time itself.
Lessons That Took Me Too Long to Learn
- Trusting superficial floor assessments led to costly rework—never skip the moisture check before applying leveling compounds.
- Underestimating the importance of a laser level delayed my progress—investing in quality tools accelerates results and enhances accuracy.
- Ignoring subtle dips and high spots during inspection resulted in ripple-prone carpets—thorough testing is essential for a flawless finish.
- Thinking all leveling compounds are the same was a mistake—selecting the right product for your environment makes a difference.
Tools and Resources That Elevated My Craft
- Laser Levels with Remote Control: They provide precise measurements, especially in large rooms, reducing guesswork—I’ve relied on them for years.
- Moisture Meters: Critical for detecting dampness in subfloors, preventing future adhesion issues—my go-to for durability.
- Self-Leveling Compounds from Trusted Brands: Their consistency and reliability simplify the leveling process—I’ve tested various brands, and these stand out.
- Guides from Industry Experts: The in-depth articles on professional floor leveling have been invaluable for refining techniques—quality information makes all the difference.
Your Next Big Step Awaits
Embarking on floor leveling or carpet installation can seem daunting at first, but with the right knowledge and tools, you can achieve professional-grade results that last. Remember, a solid foundation is the key to a beautiful, durable home upgrade. Don’t let initial uncertainties hold you back—trust in your process, keep learning, and enjoy transforming your space. Are you ready to take the plunge into your next project and create a flawless finish? Share your plans or questions below—I’d love to hear your story.
http://Avery%20Jenkins
Reading this post really resonated with my own experience of trying to DIY a flooring project. I underestimated how crucial proper subfloor preparation was and ended up with ripples in my carpet that took months to fix. Since then, I’ve learned the importance of using a laser level to true up the surface before applying any leveling compound. I also started testing the moisture content of the subfloor, which has saved me from disaster more than once, especially in humid climates. One thing I’ve found helpful is investing in a good quality self-leveling compound and applying thin coats, allowing each to cure fully. The patience involved really pays off in the final look and durability. For those starting out, do you think it’s better to rent or buy professional tools like laser levels and moisture meters? I’d love to hear other tips on maintaining long-term results—any recommendations for brands or models? Thanks for sharing such thorough insights; it’s motivating to see how proper prep work makes all the difference.
http://Liam%20Carter
Reading this post really hits home for me since I recently went through a similar experience with flooring DIY. I initially thought that as long as I picked a nice carpet and had some basic tools, I was good to go. However, a few months in, I noticed ripples and uneven patches that were honestly disheartening. It made me realize how vital proper subfloor preparation really is, especially leveling and moisture testing. I ended up renting a laser level and moisture meter, which made the entire process so much smoother and more reliable. Now, I prioritize thorough inspection and patience before proceeding with the installation. I wonder, for homeowners planning their projects—do you think investing in quality tools is worth it long-term, or are there affordable options that still deliver precision? Also, have you tried self-leveling compounds from different brands, and which would you recommend for a DIY’er aiming for a professional finish? I think the better groundwork we lay upfront, the more durable and beautiful our floors will be over time.