The ‘Penny Test’ for Checking Floor Leveler Thickness Before It Sets
Most guys skip the leveling compound. They think the underlayment will hide the dip. It won’t. I spent three days grinding concrete on a job last month just so the floor wouldn’t click like a castanet because the previous installer thought a 1/4 inch deviation was acceptable. It was not. My knees still ache from the vibration of the diamond grinder. That is the price of laziness. I smell like WD-40 and oak dust most days, and I have seen $20,000 installations fail because someone was too cheap to buy a bag of self leveling underlayment or too lazy to check the depth while it was wet. Subfloor preparation is not a suggestion. It is a structural engineering requirement that dictates the life of every plank, tile, and carpet fiber you lay down. If the foundation is trash, the finish is trash.
The gravity of subfloor flatness in modern construction
Floor leveling is the process of eliminating high and low spots in a substrate to meet specific manufacturer tolerances, usually 1/8 inch over a 10 foot radius. This requirement ensures that locking mechanisms on laminate and vinyl do not snap under vertical pressure. When a floor is not flat, the planks act like a bridge. Every time you walk across that bridge, the tongue and groove joint flexes. Eventually, that plastic or wood joint fatigues and shears off. You are then left with a floor that gaps, squeaks, and bounces. The penny test is a field-proven method to verify that your pour is deep enough to actually perform its mechanical duty before the chemical bond sets permanently.
“A floor is only as good as the subfloor beneath it; deflection is the enemy of every joint.” – Master Flooring Axiom
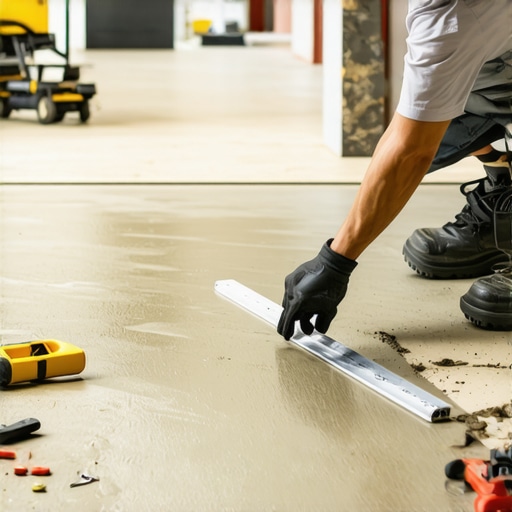
The physics of the penny test in fresh compound
The penny test relies on the standardized thickness of United States currency to measure the depth of a wet pour of self leveling underlayment, also known as SLU. A standard penny is exactly 1.52 millimeters thick. When you are pouring a floor to hit a 1/8 inch minimum, you are looking for a depth of approximately 3.175 millimeters. This means the liquid leveler should cover exactly two pennies stacked on top of each other. If you drop a penny into the wet mix and the liquid does not reach the top of Lincoln’s head, you are too shallow. The material will not have enough mass to settle properly. It will skim over the surface and likely crack because it lacks the structural integrity provided by the aggregate suspension within the polymer-modified cement.
Chemical hydration and the danger of overwatering SLU
Understanding the chemistry of these products is vital. Most modern levelers use calcium aluminate cement rather than standard Portland cement. This allows for rapid hydration and high early strength. However, the water-to-powder ratio is unforgiving. If you add even a half-pint too much water, the polymers will separate and rise to the top. This creates a chalky, brittle surface that will peel off the moment you apply adhesive. The penny test also helps you judge viscosity. If the penny creates a massive crater that doesn’t heal, the mix is too thick. If the penny disappears and the surface looks like soup, you have overwatered the mix. The material must have the right surface tension to flow but enough body to support its own weight across a dip.
The secret to flat floors in wet environments
When dealing with showers or laundry rooms, the leveler must be waterproof and compatible with topical membranes. You cannot just dump a bag of SLU and hope for the best. You have to calculate the pitch. In a shower, the floor must slope toward the drain at a rate of 1/4 inch per foot. The penny test here is used to ensure the perimeter has enough build to maintain that slope. If your leveler is too thin at the edges, the waterproofing membrane will not bond correctly to the substrate. I have torn out dozens of showers where the installer thought they could use a thin skim coat of leveler over plywood. Plywood flexes. Leveler is rigid. Without enough thickness, the leveler turns into potato chips the first time someone steps in the shower.
| Flooring Type | Minimum Leveler Depth | Tolerance Requirement | Penny Depth Equivalent |
|---|---|---|---|
| Laminate Flooring | 1/8 inch | 1/8″ per 10 feet | 2 Pennies |
| Glue-Down Hardwood | 3/16 inch | 3/16″ per 10 feet | 3 Pennies |
| Large Format Tile | 1/4 inch | 1/8″ per 10 feet | 4 Pennies |
| Commercial Carpet | 1/16 inch | 1/4″ per 10 feet | 1 Penny |
The 1/8 inch rule that ruins everything
Laminate and LVP manufacturers are ruthless about their warranties. If you call them because your floor is clicking, the first thing they will do is pull up a plank and put a straightedge on the subfloor. If they find a dip deeper than 1/8 inch, your warranty is void. It does not matter if the product was $10 per square foot. The physics of the click-lock system require a flat plane. While most people want the thickest underlayment, too much cushion actually causes the locking mechanisms on LVP to snap under pressure. You cannot fix a bad floor with more foam. You fix it with cement. You use the penny test during the pour to ensure you are meeting that 1/8 inch minimum across the entire room, not just in the middle where it is easy to reach.
Checklist for a successful leveler pour
- Verify substrate moisture levels using a calcium chloride test or an in-situ probe.
- Vacuum the floor twice. Dust is a bond breaker.
- Apply the manufacturer-specific primer and let it get tacky. Never skip primer.
- Seal all perimeter gaps with spray foam or caulk to prevent leveler from leaking into the walls.
- Mix the compound with a high-torque drill and a non-aerating paddle.
- Use a gauge rake set to your desired depth to move the material.
- Perform the penny test in at least five locations per 100 square feet.
- Use a spike roller to release trapped air bubbles and promote self-healing.
Why your subfloor is lying to you
A subfloor might look flat to the naked eye. It isn’t. Concrete slabs curl at the edges during the curing process. Plywood sheets swell at the seams when the house is under construction and exposed to rain. These micro-deviations are what kill floors. When you use the penny test, you are forcing yourself to acknowledge the reality of the depth. I once saw an installer try to level a 600 square foot living room with three bags of leveler. That is impossible. He was basically painting the floor grey. When I dropped a penny on his ‘leveled’ floor, it sat right on top of the concrete. There was zero build. That floor failed within six months. The planks separated because there was no support in the low spots. Do not trust your eyes. Trust the penny.
“Substrate preparation is the most critical factor in the success of a ceramic tile installation.” – Master Flooring Axiom
The ghost in the expansion gap
Expansion gaps are the lungs of a floor. If you run your leveler all the way to the drywall and it creates a bridge, you have effectively locked the floor in place. You must maintain a 1/4 inch to 1/2 inch gap around the perimeter. If the leveler flows into that gap, you need to scrape it out before it hardens. A floor needs to expand and contract with seasonal humidity. In the summer, when the air is thick and wet, wood planks will grow. If they hit a wall of hardened leveler, they will hump up in the middle of the room. This is called crowning. It is a nightmare to fix. Use the penny test to ensure your depth is consistent up to the edge, but keep your edges clean.
Final verification of the substrate
Once the leveler is dry, you are not done. You need to check for high spots. Even the best self-leveling products can leave small ridges where the pours overlapped. I use a 10 foot straightedge to double-check the work. If the penny test was done correctly during the wet phase, the dry phase should be a breeze. If you find a high spot, sand it down. If you find a low spot, you may need a second pour. Never try to fill a dip with extra adhesive or layers of felt paper. It is a hack move that will come back to haunt you. Flooring is about precision. It is about the 1/8 inch. It is about making sure that when the homeowner walks across that floor, it feels as solid as the earth itself. That only happens when you respect the prep. “,”image”:{“imagePrompt”:”A macro close-up photo of a shiny copper penny partially submerged in a smooth, wet, grey liquid self-leveling floor compound. The penny is upright, showing Abraham Lincoln’s head covered up to the forehead by the grey material. The surface of the liquid shows slight reflections of industrial lighting.”,”imageTitle”:”The Penny Depth Test in Wet Leveling Compound”,”imageAlt”:”A penny being used to measure the depth of wet self leveling underlayment on a construction site.”},”categoryId”:0,”postTime”:””} Ready.