The ‘Wet Thumb’ Trick for Smoothing Out Grout Lines Perfectly
The subfloor secret that ruins grout
Floor leveling and subfloor preparation are the absolute prerequisites for any successful grout job because deflection in the substrate will crack the most expertly finished joints. Most guys skip the leveling compound. They think the underlayment will hide the dip. It won’t. I spent three days grinding concrete on a job last month just so the floor wouldn’t click like a castanet. If the subfloor has a valley or a hump, the tile will flex under the weight of foot traffic. That flex translates directly to the grout line. When you see grout crumbling out of a joint, do not blame the grout. Blame the person who didn’t use a straightedge on the plywood. I have seen fifteen thousand dollar walnut floors cup like potato chips, and I have seen porcelain tile crack like eggshells. It all starts with the substrate. You need a flat surface within one eighth of an inch over ten feet. Any more than that, and you are just decorating a disaster.
“A floor is only as good as the subfloor beneath it; deflection is the enemy of every joint.” – Master Flooring Axiom
Physics of the wet thumb technique
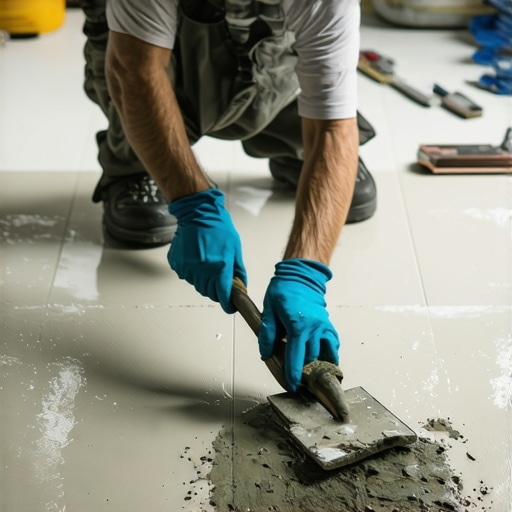
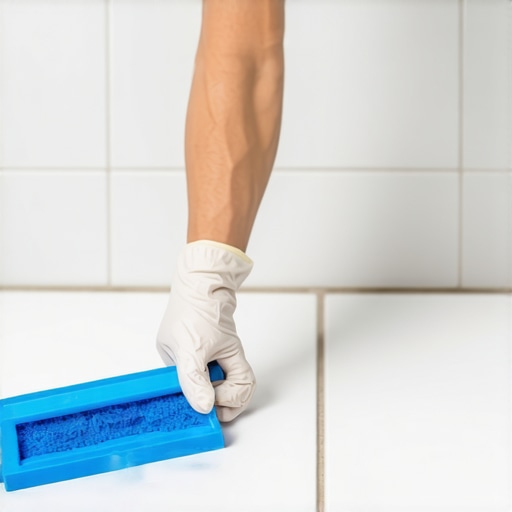
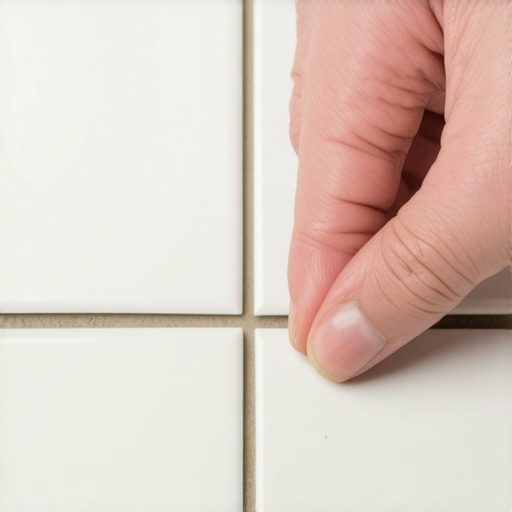
Surface tension and capillary action govern how the wet thumb trick creates a concave, glass-smooth finish in grout lines. This is not just about aesthetics. It is about compaction. When you run a damp thumb along a fresh grout line, you are doing two things. First, you are forcing the grout deeper into the joint, which eliminates air pockets. Second, you are using water to lubricate the surface aggregate. In sanded grout, the silica sand particles are jagged. The water allows those particles to settle into a tighter matrix. This creates a denser surface that resists water penetration. It is an old school move. It requires a specific level of moisture. If your thumb is too wet, you wash out the pigment. If it is too dry, you drag the grout out of the joint. You want a sheen of moisture, not a dripping mess. You move with a steady, constant pressure. It is a mechanical bond formed by manual compression.
Why showers require a different approach
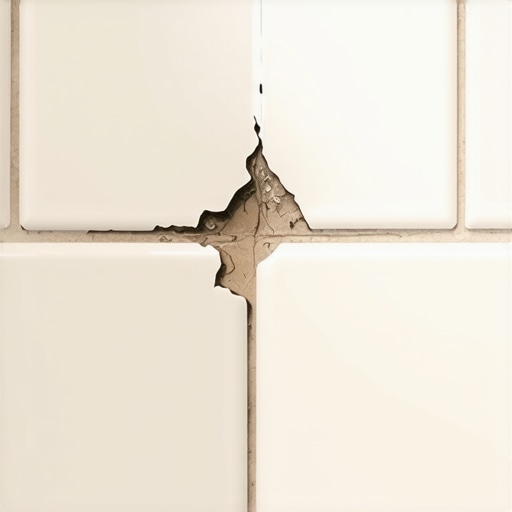
Waterproofing membranes and vapor drive determine the success of grout in showers where constant moisture exposure is the norm. In a shower, the grout is not the primary water barrier. That is the job of the liquid applied membrane or the fleece bonded sheet behind the tile. However, the grout is the first line of defense. When you use the wet thumb trick in a shower, you are aiming for a profile that sheds water. A flat or concave joint prevents pooling. Standing water in a grout line is an invitation for mold and efflorescence. Efflorescence happens when minerals from the thin-set or the substrate migrate through the grout as water evaporates. It looks like white crust. By smoothing the grout with a wet thumb, you close the pores of the cement. You make it harder for that mineral laden water to travel. You need to be careful with the chemistry here. Too much water during the smoothing process weakens the portland cement bond. It is a delicate balance of hydration.
The chemistry of hydration in cement grout
Portland cement and polymer additives undergo a chemical hydration reaction that is sensitive to the amount of water introduced during the finishing stage. Grout is not like paint. It does not dry. It cures. During the curing process, calcium silicate hydrate crystals grow and interlock. If you introduce excessive water while smoothing the joints, you dilute the polymer concentration. This leads to soft grout. It leads to pinholes. A pinhole is a microscopic crater where water was trapped and then evaporated, leaving a void. Those voids are weak points. When I talk about the wet thumb trick, I am talking about a damp thumb, not a soaked one. You want just enough moisture to break the surface tension. This ensures the top layer of the grout is as hard as the core. Professional installers know that the water used for smoothing must be clean. Hard water with high mineral content can cause discoloration. It can turn your beautiful charcoal grout into a chalky grey mess.
| Grout Type | Water Resistance | Flexibility | Best Use Case | Cure Time |
|---|---|---|---|---|
| Sanded Cement | Moderate | Low | Wide joints over 1/8 inch | 24-48 Hours |
| Unsanded Cement | Moderate | Low | Narrow joints under 1/8 inch | 24-48 Hours |
| Epoxy Grout | High | High | Showers and commercial kitchens | 24 Hours |
| Urethane Grout | High | High | Residential floors and walls | 7 Days |
Why carpet install mistakes haunt your tile
Tack strip damage and subfloor contamination from a previous carpet install will often ruin the perimeter grout lines of a new tile floor. Many homeowners decide to pull up old carpet and put down tile. They find the subfloor is full of holes from the tack strips. If those holes are not filled with a rigid patch, the tile at the edge of the room will eventually move. I have seen guys try to grout right up to the baseboard without an expansion gap. That is a rookie mistake. The floor needs to breathe. Even tile expands and contracts with seasonal temperature shifts. If you lock the tile tight against the wall, the grout will pop out. You need a movement joint. In a professional setting, we use a color matched caulk for the perimeter. It looks like grout but it has the elasticity of silicone. It prevents the corners from cracking. People who transition from carpet to tile often underestimate the height difference. This is where floor leveling comes back into play. You might need a layer of cement board or a self-leveling underlayment to meet the adjacent flooring height.
The 1/8 inch gap that destroys confidence
Dimensional stability and thermal expansion are the reasons why a 1/8 inch expansion gap is required at every vertical obstruction. I have walked into jobs where the grout was buckling upwards. The homeowner thought the house was sinking. No. The floor was just growing. Wood subfloors expand when humidity rises. Concrete slabs expand when they get warm. If the tile has no place to go, it pushes against the grout. The grout loses. It is basic physics. When you are using your thumb to smooth out those lines, you have to ensure you are not filling the expansion gaps at the walls. Keep those clear. Cover them with shoe molding or baseboards later. A floor is a living system. It moves. It shifts. If you treat it like a static object, you will fail. This applies to laminate too. People think laminate is easier, but if you do not leave that gap, the whole floor will peak at the seams. Tile is even less forgiving because it is brittle. Respect the gap.
“Deflection in a floor system is the silent killer of tile installations; if it bends, it breaks.” – Master Flooring Axiom
Pre-grouting checklist for professionals
- Verify that all thin-set mortar has cured for at least 24 hours before starting the grout process.
- Remove all spacers and ensure the joints are free of debris, dust, and excess mortar.
- Check the moisture content of the subfloor to ensure it meets the NWFA or TCNA standards for the specific tile type.
- Clean the tile surface with a damp sponge to prevent the grout from sticking to the face of the tile.
- Mix the grout to a peanut butter consistency, avoiding the introduction of air bubbles by using a low RPM mixer.
- Ensure the ambient temperature is between 50 and 80 degrees Fahrenheit for optimal chemical hydration.
The wet thumb trick is the final touch in a long chain of technical decisions. It starts with the floor leveling. It continues through the selection of the right grout for the shower environment. It ends with a manual compression that ensures the joint is packed tight. You are not just making it look pretty. You are making it last for thirty years. Don’t be the guy who thinks a thick underlayment fixes a bad subfloor. It won’t. The underlayment will compress, the locking joints on your laminate or the grout in your tile will snap, and you will be back at square one. Do it right the first time. Keep your thumb damp, your subfloor flat, and your expansion gaps open.