The ‘Blue Tape’ Method for Perfectly Straight Shower Silicone Lines
The 1/8 inch that ruins everything
Most guys skip the leveling compound. They think the underlayment will hide the dip. It won’t. I spent three days grinding concrete on a job last month just so the floor wouldn’t click like a castanet. This obsessive focus on the substrate is why my floors last while others buckle within a year. A shower is no different. You can buy the most expensive Carrara marble or handcrafted zellige tile, but if your silicone lines look like a drunk snake, the whole project looks amateur. Worse, if that seal fails, you are looking at rot in the wall cavity. I have seen 50000 dollar bathrooms gutted because a guy thought he could eyeball a bead of caulk. He could not. Precision in the wet zone is about physics and surface tension.
“A floor is only as good as the subfloor beneath it; deflection is the enemy of every joint.” – Master Flooring Axiom
Why your subfloor is lying to you
Floor leveling is the hidden stage of every successful installation. Before we even talk about the blue tape method for showers, we have to talk about the plane of the wall and the floor. If your shower pan has a dip near the drain or if the wall studs are bowed, your tile will have lippage. Lippage creates uneven corners that make silicone application a nightmare. I use a six foot level to check every plane. If it is out by more than 1/8 inch over ten feet, we are grinding or we are pouring self-leveler. This rule applies whether you are prepping for a tile shower or a carpet install in the master bedroom. Without a flat start, the finish is doomed.
The ghost in the expansion gap
When installing laminate or luxury vinyl, people forget that the floor is a living thing. It expands and contracts with the seasons. In a bathroom, this movement is amplified by humidity. If you do not leave a 1/4 inch expansion gap at the perimeter, the floor will eventually peak. In the shower, the silicone bead acts as a flexible bridge. It must handle the minor shifts between the vertical wall tile and the horizontal floor tile. This is why we use 100 percent silicone, not acrylic or latex. Acrylic dries out. It gets brittle. It cracks. Silicone stays rubbery and repels water at a molecular level.
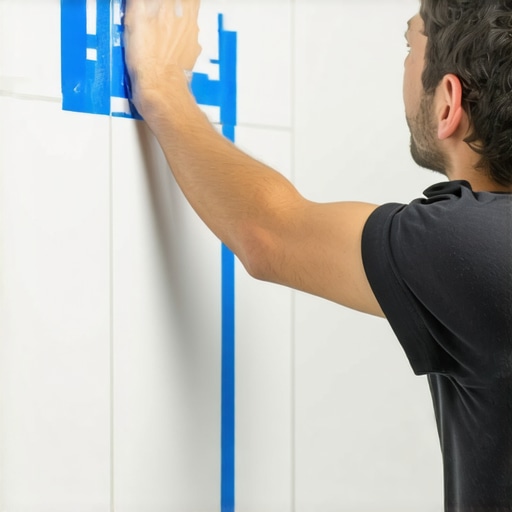
The blue tape method for perfect results
The showers of high-end hotels always have those perfect, crisp lines. The secret is not a steady hand. It is blue painter tape. First, you must clean the joint with 99 percent isopropyl alcohol. Do not use Windex. Do not use water. You need to remove every microscopic bit of dust and body oil. Apply one strip of tape to the wall, exactly 1/8 inch away from the corner. Apply the second strip to the floor or the pan, also 1/8 inch away. This creates a channel for the silicone. | Material Type | Cure Time | Movement Capacity | | :— | :— | :— | | 100% Silicone | 24 Hours | 25-50% | | Acrylic Caulk | 4-6 Hours | 5-10% | | Polyurethane | 48 Hours | 35% | | Hybrid Sealant | 24 Hours | 25% |
The chemistry of the bond
Once your tape is down, you apply the bead. Do not overfill the joint. You are looking for a consistent rope of material. I prefer a neutral cure silicone because it does not have that sharp vinegar smell of acetoxy silicone. It also has better adhesion to porous surfaces like natural stone. Once the bead is down, spray it lightly with a mixture of water and a few drops of dish soap. Use your finger or a specialized caulking tool to smooth the bead. The soap prevents the silicone from sticking to the tile outside the tape lines. Pull the tape immediately while the silicone is still wet. Pull it away from the bead at a 45 degree angle. This leaves a razor-sharp edge that looks like it was factory-installed.
The transition from wet to dry
Moving out of the shower, we often see carpet install projects meeting the bathroom tile. This transition is a common failure point. If the subfloor was not leveled properly, you will feel a hard edge under the carpet. I always ensure the tack strip is placed exactly one thumb width from the tile edge. This allows the carpet to be tucked into the gap for a clean finish. If you are transitioning to laminate, you need a T-molding that allows for movement. Do not ever silicone a laminate floor to a tile floor. The laminate needs to slide under that molding. If you lock it down with silicone or glue, the floor will buckle when the humidity hits 60 percent in the summer.
- Clean the joint with 99 percent alcohol to ensure zero residue.
- Tape both sides of the joint with high-quality painter tape.
- Use 100 percent silicone for maximum flexibility and water resistance.
- Smooth the bead with a soapy finger to create a concave shape.
- Remove tape immediately to avoid tearing the skin of the silicone.
Why thick underlayment is a trap
While most people want the thickest underlayment for their laminate, too much cushion actually causes the locking mechanisms on LVP to snap under pressure. It is the same logic as the shower pan. You want support, not bounce. A floor that bounces is a floor that breaks. I have seen guys put double layers of foam under a floor to hide a bad subfloor. Three months later, the joints are clicking and the planks are separating. You cannot fix a structural problem with a soft solution. You grind the concrete or you replace the plywood. There are no shortcuts in this business.
“A floor is only as good as the subfloor beneath it; deflection is the enemy of every joint.” – Master Flooring Axiom
The atmospheric reality of the job site
You have to respect the climate. If I am doing a carpet install in a basement, I am checking for moisture in the slab with a calcium chloride test. If I am tiling a shower, I am checking the ambient humidity. If it is too high, the silicone will not cure properly. It will stay tacky for days. I keep a dehumidifier in the room for 24 hours before and after the silicone work. It is about controlling the environment so the chemistry can do its job. The blue tape method only works if the surfaces are bone dry. If there is even a hint of moisture behind that tile, the silicone will eventually peel away, and you will be back to square one.