The subfloor secret that saves your basement
Most guys skip the leveling compound. They think the underlayment will hide the dip. It won’t. I spent three days grinding concrete on a job last month just so the floor wouldn’t click like a castanet. I once walked into a luxury remodel where the crew had poured fifty bags of high-flow leveler without sealing the plywood seams. By the time they realized what happened, the liquid was raining down into the finished basement, ruining a custom home theater system. The floor is the foundation of every aesthetic choice in a home. If the subfloor fails, the carpet install or the laminate planks will fail shortly after. Floor leveling is a structural engineering task that requires absolute precision and a deep understanding of hydraulic pressure. You are not just pouring mud. You are creating a perfectly flat, non-deflecting substrate that must hold its integrity for decades. This process begins with the realization that liquid leveler has the viscosity of heavy cream and the persistence of a flood. It will find every pinhole, every knot, and every unsealed seam in your plywood deck. If you do not seal these gaps, you are literally pouring money through the cracks. This guide breaks down the chemical and mechanical requirements for a leak proof pour that ensures your showers and living spaces stay level and dry.
The physics of hydraulic pressure in floor leveler
Floor leveler acts as a heavy fluid that exerts significant hydrostatic pressure on every plywood seam and subfloor gap during the initial pour phase. This liquid state lasts approximately twenty to forty minutes, during which the material is susceptible to gravity-driven leaks. Liquid leveler is heavy. A standard bag mixed with five quarts of water weighs nearly sixty pounds. When you spread that across a room, you are putting thousands of pounds of pressure on the subfloor. If there is a gap the size of a credit card, the leveler will find it. It does not just sit on top. It pushes. It seeks equilibrium. This is why we treat the floor like a swimming pool before we even open a bag. We look at the wood fibers. We look at the way the plywood sheets meet. Plywood is an organic material. It expands and contracts. It breathes. If you just slap some tape over a gap, the moisture in the leveler might cause the tape adhesive to fail. You need a mechanical and chemical bond that can withstand the weight of the pour while the polymers begin their cross-linking process. The chemistry of modern self-leveling underlayment involves complex chains of calcium aluminate cement and redispersible polymer powders. These components require a stable environment to hydrate. If the water leaks out through a gap, the cement will not hydrate properly. You will be left with a brittle, chalky mess that will crack under the first footfall. This is the structural reality of the trade. You do it right, or you do it twice.
“A floor is only as good as the subfloor beneath it; deflection is the enemy of every joint.” – Master Flooring Axiom
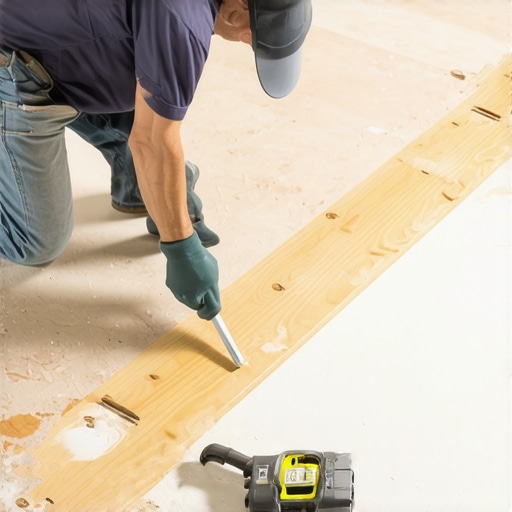
Materials for a leak proof plywood deck
Plywood gap sealing requires polyurethane caulk, expanding spray foam, and high-solids primer to create a watertight barrier before the leveling compound application. Do not use cheap painter’s caulk. It has too much water content and will shrink as it dries, leaving a new gap for the leveler to exploit. I prefer a high-grade silyl modified polymer. It stays flexible. It sticks to the wood like it was born there. For wider gaps, anything over a quarter inch, you need backer rod. You cannot just bridge a massive void with caulk and expect it to hold sixty pounds of pressure. You stuff the foam rod into the crack, then cap it with the sealant. This creates a gasket. It is the same logic used in high-rise window glazing. We are building a container. We are not just filling holes. The primer is the second layer of defense. It is not just for adhesion. It seals the pores of the wood. Plywood is thirsty. If you do not prime it, the wood will suck the water right out of the leveler, leading to pinholes. Those pinholes are the result of air escaping the wood as water enters. If you seal the gaps but skip the primer, you will still have a floor that looks like Swiss cheese. Use a long-nap roller. Work the primer into the grain. Let it get tacky. This creates the chemical bridge between the organic wood and the inorganic cement.
| Material Type | Drying Time | Movement Cap | Best Application |
|---|---|---|---|
| Polyurethane Sealant | 2-4 Hours | 25% | Standard plywood seams |
| Acrylic Latex Caulk | 1 Hour | 10% | Small pinholes only |
| Low-Expansion Foam | 45 Minutes | 15% | Large perimeter gaps |
| Flash-Patch Compound | 20 Minutes | 5% | Deep gouges and knots |
The strategy for the perimeter walls
Perimeter expansion gaps must be maintained using foam sill sealer or weatherstripping to prevent the floor leveler from bonding to the wall studs or drywall. This is where most rookies fail. They pour the leveler right up to the bottom of the rock. The leveler hardens into a solid mass that bridges the floor and the wall. When the house shifts in the wind or the humidity changes, the floor has nowhere to go. It will crack. It will buckle. It will ruin your expensive laminate install. You must install a foam dam around the entire perimeter. This foam acts as a shock absorber. It also keeps the liquid leveler from disappearing into the wall cavity. I have seen leveler flow under a baseplate and into the next room because the installer forgot to dam the perimeter. Use a half-inch thick foam strip. Staple it or tape it to the wall just above the height of your intended pour. Once the leveler is hard, you trim the foam flush with a utility knife. This leaves a clean expansion joint that will be hidden by your baseboards. This is the difference between a floor that lasts ten years and one that lasts fifty. It is about anticipating the movement of the structure. A house is a living thing. It moves. Your floor must be allowed to move with it.
- Vacuum all debris and sawdust from the seams using a HEPA filter vacuum.
- Inspect the subfloor for loose screws or squeaks and add structural fasteners every six inches.
- Apply a bead of non-shrink sealant to every plywood joint and tool it flat.
- Fill all knot holes and screw indentations with a rapid-setting patch.
- Install foam dams at all door thresholds and floor registers.
- Apply two coats of specialized subfloor primer, allowing the first to dry completely.
The chemistry of the bond between wood and cement
Subfloor primer creates a chemical interface that prevents dehydration of the self-leveling underlayment and ensures a monolithic bond to the plywood substrate. Without this primer, the leveler will simply sit on top of the wood like a cracker on a table. The first time someone walks on it, the bond will break. You will hear a hollow sound. That is the sound of failure. You want the leveler to become part of the subfloor. High-quality primers contain acrylic polymers that penetrate the wood fibers. They create a surface that is both rough enough for mechanical grip and chemically active for the cement to grab onto. Think of it like velcro. One side is the primed wood, the other is the wet leveler. When they meet, they lock. This is especially vital in areas like showers where the floor might be subject to more vibration or temperature swings. You also have to consider the moisture content of the wood. If your plywood is sitting at 18 percent moisture, and you seal it under a layer of cement, that moisture is trapped. It will rot the wood from the inside out. I never pour until my moisture meter reads below 12 percent. It is the industry standard for a reason. You wait for the wood to acclimate. You let the house settle. Only then do you commit to the pour.
“Floor leveling is not a cosmetic fix; it is the restoration of structural geometry.” – TCNA Guidebook Extract
Preparation for laminate and carpet install
Flatness tolerances for carpet install and laminate flooring require the subfloor to be within 1/8 inch over 10 feet to prevent joint separation and premature wear. People think carpet is forgiving. It is not. If you have a dip in the subfloor, the carpet pad will compress more in that spot. Every time you walk over it, the carpet fibers will rub against the edge of the dip. Within two years, you will see a wear pattern that matches the hole in your floor. For laminate, the stakes are even higher. Laminate is a floating floor. It relies on the strength of the locking mechanisms. If the floor is not flat, the planks will flex. That flex puts stress on the plastic or HDF tongue and groove. Eventually, the lock will snap. You will get gaps. You will get peaks. The floor will feel like a trampoline. This is why the prep work is more important than the flooring choice itself. I would rather install a cheap laminate on a perfect subfloor than a five dollar a foot hardwood on a wavy one. The cheap floor will last longer. It is all about the support. You are building a platform for life. Do not cut corners on the seal. Do not cut corners on the leveler. Use a long straightedge. Check your work twice. If you see a shadow under the level, you have work to do. Fill it. Sand it. Make it right. This is the code of the master installer. We do not hide mistakes. We eliminate them before the finish material ever arrives on the job site.