It was a bright Saturday morning when I stepped into my living room—and was greeted by an unexpected echo. My once-smooth laminate flooring now sounded like a drumline, each step resonating painfully with a hollow thud. For a moment, I wondered if my house had suddenly turned into a hollow hall—an unsettling transformation that made me question if I had rushed the installation or missed crucial prep work. That lightbulb moment hit hard: my floors weren’t just noisy; they were crying out for attention. If you’re experiencing similar issues with your laminate floors in 2026, know that you’re not alone—and there are effective solutions.
Why Hollow Floors Are More Than Just Annoying
Hollow-sounding laminate floors aren’t just a minor annoyance—they signal underlying problems that can compromise your entire flooring system. When your floors produce that echoing, drum-like sound, it often indicates improper installation, inadequate subfloor preparation, or moisture-related issues. Left unaddressed, these issues can lead to further damage, such as cracking, buckling, or even mildew growth. According to experts, ensuring a proper foundation is vital to avoiding these problems and extending the lifespan of your new floors.
Have you noticed a difference in sound when walking across your laminate? If so, it might be time to evaluate what went wrong during installation or what can be done to fix it now.
In my case, I made the mistake early on of skipping the concrete leveling process, thinking my subfloor was ‘good enough.’ That oversight caused the panels to bounce and produce that hollow sound—something easily preventable if I had followed proven steps. For anyone looking to avoid similar pitfalls, I recommend checking out comprehensive guides on [floor leveling techniques](https://floorcraftstore.com/leveling-concrete-floors-5-steps-to-prevent-2026-laminate-cracks), which make a world of difference.
Stay tuned as we explore three tried-and-true fixes that will silence those pesky hollows and give your laminate flooring the stability it needs for years to come.
Assess the Subfloor to Find the Root Cause
Start by evaluating the subfloor condition. Lay a straightedge across different areas and notice any dips or uneven spots. I once used a level and a measuring tape to identify that my subfloor had minor dips—causing the panels to bounce and produce that hollow sound. Addressing these irregularities is crucial before installation. For concrete subfloors with unevenness, apply a self-leveling compound (see self-leveling hacks) to create a flat surface. Ensure the compound is spread evenly and allowed to cure fully according to manufacturer instructions.
Prepare and Level Your Subfloor Properly
Clean and Moisture Check
Vacuum and sweep the entire area thoroughly, removing debris that could cause unevenness. Use a moisture meter to confirm the subfloor’s dryness; excess moisture can lead to gaps and hollow sounds later. I once skipped this step, resulting in a noisy floor after installation, highlighting the importance of moisture testing.
Apply a Proper Leveling Layer
If dips are more than 1/8 inch deep, use a concrete patch or floor leveling compound. Mix it carefully, aiming for a smooth, pancake-like consistency—like frosting on a cake. Pour and spread the compound with a trowel, feathering the edges to blend seamlessly. For best results, follow the leveling techniques detailed in professional guides. I once encountered a patch job that cracked due to improper curing; so ensure it dries fully before proceeding.
Secure the Subfloor to Prevent Movement
Once leveled, fasten the subfloor securely using appropriate screws or nails, especially if dealing with plywood or OSB panels. Think of this as anchoring a boat; stability comes from firm connections. For concrete slabs, ensure there’s no loose debris or dust before applying a primer and appropriate adhesive if necessary. I once watched my floor bounce during installation because the subfloor wasn’t properly secured—an avoidable mistake that caused hollow sounds.
Install Laminate Carefully to Avoid Gaps and Bounces
Lay out the planks according to your pattern, leaving expansion gaps as recommended (usually 1/4 inch around edges). Tap each plank into place with a tapping block—like fitting puzzle pieces snugly. During my first install, I neglected the expansion gaps, leading to buckling when the floor expanded. Always double-check measurements and leave space for natural movement to maintain stability and silence any hollow sounds.
Through diligent subfloor preparation and meticulous installation, you can prevent your laminate floors from sounding hollow. Remember, a quiet, solid floor results from attention to detail at every step—much like building a stable foundation for a house that stands the test of time.
When it comes to home renovations, many assume that following basic tutorials guarantees perfect results. However, the reality is more nuanced, especially with complex projects like floor leveling and shower installations. One common misconception is that applying a quick self-leveling compound or waterproof membrane alone suffices. In my experience, the devil is in the details—small oversights can lead to costly failures down the line. For instance, relying solely on the product label without understanding the underlying substrate compatibility often results in cracks or leaks. According to industry experts, such as those cited in flooring and remodeling studies, thorough assessment of subfloor conditions and proper preparation are critical—more than just applying the right materials. One prevalent trap is neglecting moisture testing before installing laminate floors, which can cause warping and squeaks later. Moreover, many underestimate the importance of precise leveling; even a millimeter of unevenness can cause settling issues, leading to gaps or bounces that sound hollow. In shower installations, a common myth is that a standard waterproof membrane is enough—yet, improper sealing around niches or drains often leads to water seepage and mold, as detailed in waterproofing guidelines. The key is understanding the hidden factors like substrate stability, moisture barriers, and correct layering sequences. Advanced homeowners or contractors always run a series of tests, like confidence tests for subfloor flatness or moisture infiltration, before proceeding, because overlooking these nuanced steps increases risk exponentially. For example, ensuring your concrete slab isn’t just dry but also free of vapor transmission is vital—see this guide for detailed leveling techniques. Remember, avoiding typical pitfalls isn’t just about following instructions—it’s about understanding the hidden factors that influence long-term durability. Have you ever fallen into this trap? Let me know in the comments.
Keeping Your Floors and Showers in Prime Condition
Maintaining your newly installed floors and showers isn’t just about occasional cleaning; it requires a strategic approach with the right tools and routines. Over the years, I’ve found that investing in quality equipment and adopting disciplined maintenance routines can dramatically extend the lifespan of your renovations. For instance, a high-quality moisture meter allows me to regularly check subfloor conditions, preventing moisture buildup that causes laminate gaps or buckling. This small investment saves me from costly repairs or replacements down the line.
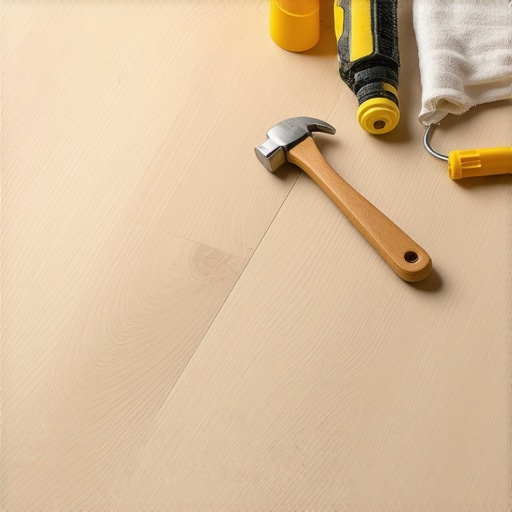
In terms of tools, I highly recommend a good tapping block and tapping mallet for laminate installation. Using these ensures that planks are snug without damaging the edges, which maintains seamless joints and prevents gaps that can trap water or debris. Additionally, a professional-grade shim set can help correct minor subfloor unevenness that might not be noticeable visually but can cause long-term issues like squeaks or hollows. These tools are simple yet vital for ongoing upkeep and problem-solving.
When it comes to showers, regular inspection and maintenance are crucial for preventing leaks and water damage. Applying a silicone sealant around niches and drains periodically can avert water seeping into hidden areas. Using a damp cloth and a gentle scrub brush helps clean grout lines effectively without degrading the waterproof membranes. Over time, I’ve learned that promptly addressing small issues—like a tiny crack or loosening tile—can prevent major water damage or mold growth, saving me from expensive retrofit work.
What’s Next for Long-Term Maintenance
The future of maintenance likely leans toward smart solutions—integrated moisture sensors, automated leak detection systems, and AI-driven diagnostics could become standard for homeowners and contractors alike. Incorporating these technologies today can give you peace of mind; for example, a smart moisture detector integrated with your home automation system alerts you immediately if water levels rise unexpectedly, allowing quick action before costly damage occurs. This proactive mindset is essential for preserving your investment over decades, making routine maintenance less of a chore and more of an easy check-in.
In my experience, the secret lies in being proactive rather than reactive. Regular inspections, using the appropriate tools like moisture meters for floors and showers, coupled with prompt repairs, keep everything running smoothly. For those eager to elevate their maintenance game, I suggest trying out the advanced tip of installing a small, dedicated water leak sensor near your shower or under your floorboards, especially in areas prone to moisture issues. Not only does this safeguard your home, but it also offers peace of mind, knowing you’ll be alerted immediately to potential problems before significant damage ensues.