Ever experienced that sinking feeling when you step into your bathroom, only to notice water stains creeping behind the wall or a musty smell that just won’t go away? I had a similar moment a few months ago when I noticed my freshly renovated shower wasn’t quite drying, and I started to suspect something was amiss behind the wall. Turns out, I was overlooking some sneaky, hidden spots that can cause serious water damage and costly repairs if left unchecked.
Why Ignoring Hidden Shower Leaks Can Cost You Big Time
When it comes to bathrooms, water leaks aren’t always obvious at first glance. But behind the scenes, water can seep into spots you’d never suspect, eroding your wall framing, encouraging mold growth, and damaging your subflooring—even if there’s no visible sign of trouble. The scary part? Many homeowners only realize there’s a problem when it’s too late, and the damage has already escalated. Early detection and understanding where leaks hide can save you money and headaches, especially with the kitchen and bathroom renovations we’re all eager to finish in 2026.
Is It Worth the Fuss? My Early Mistake That Taught Me the Hard Way
Honestly, I thought I could simply ignore small drips or moisture and hope it would go away. Big mistake. I neglected to check some of the usual suspects—causing my problem to fester unnoticed. That misstep made me realize how crucial it is to thoroughly inspect those less obvious areas where water likes to hide. To help avoid that costly oversight, I recommend reading about the common floor leveling mistakes that lead to future issues, like [these expert tips](https://floorcraftstore.com/expert-floor-leveling-carpet-install-tips-for-lasting-durability). Now, let’s dive into the four hidden places your 2026 shower might be leaking and how to spot or fix them before it’s too late.
Spotting the Sneaky Spots Water Likes to Hide
.
Inspect the Floor and Subfloor
Start by removing the shower stall or curtain and examining the floor around and beneath the shower. Use a moisture meter to identify areas with hidden dampness. If you notice elevated moisture levels, it’s time to step into the subfloor inspection phase. I once used a moisture sensor that beeped loudly near a seam, revealing a leak I hadn’t seen before. This immediate alert saved me from costly subfloor replacement.
Check for Cracks and Gaps in Sealant
Inspect all the joints where tiles meet the tub or shower base. Gaps or cracks in grout or caulking are common leak points. To test, fill the shower with a small amount of water and observe if the sealant holds. During my last project, reapplying sealant with a precision caulking gun prevented water from seeping behind the tiles, avoiding future mold growth. Remember, properly sealed joints are your first line of defense against leaks.
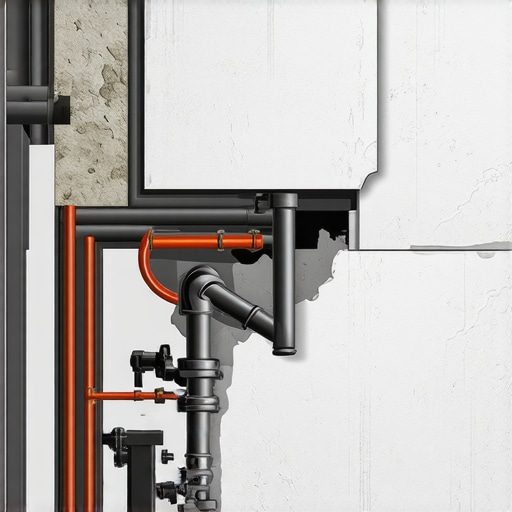
Evaluate Drain and Pipe Fittings
Inspect drain connections and pipe fittings under the shower. Tighten loose fittings and replace deteriorating washers. A loose drain can cause slow leakage, which accumulates over time. I once tightened a loose drain by hand, then sealed around it with waterproof silicone, which instantly stopped my leak. For ongoing issues, consider replacing old fittings with modern waterproof fixtures, as recommended in [these waterproofing hacks](https://floorcraftstore.com/stop-hidden-shower-leaks-4-waterproofing-hacks-for-2026).
Examine Shower Pan and Waterproofing Layers
The shower pan acts as a barrier against water escaping behind finishes. Look for cracks, deterioration, or sagging. Use a flashlight to peer under the shower pan or access panels if available. I discovered a small crack in my shower pan after a light tap, which later became a significant leak. Repair or replace the pan as necessary, following professional guidance to ensure waterproof barriers are intact—details found in [expert shower solutions](https://floorcraftstore.com/expert-showers-bathroom-renovations-for-lasting-style-2).
Test for Hidden Leaks
Perform a controlled water test: fill the shower or tub and shut off the water. Monitor moisture levels after 24 hours. If the area remains dry, your leak might be elsewhere; if damp, you’ve pinpointed a leak source. This method helped me catch a leak behind the tile before it caused subfloor rot. Remember, patience and thorough testing are key to uncovering concealed issues.
Addressing the Leak Quickly
Once identified, repair the leak promptly. For minor cracks, seal with waterproof epoxy or silicone. For more significant damage, replace damaged components or sections of the waterproofing layer. A quick fix I used involved sealing a small crack with a waterproof repair patch, which held up for years. Delaying repairs often leads to mold, structural damage, and costly renovations, as covered in [these expert tips](https://floorcraftstore.com/stop-subfloor-sagging-4-proven-fixes-that-save-money-2026). Ensure every step is sealed and waterproofed to prevent future leaks from sneaking in again.Many homeowners believe that achieving a perfectly level floor or a seamless shower is simply a matter of following basic steps, but in my experience, there’s a lot more nuance involved. A common myth is that using a self-leveling compound guarantees a flawless surface; however, if you don’t prepare the substrate properly, you risk uneven leveling and future cracking. For example, failing to verify subfloor stability can cause laminate or tile to buckle over time, despite initial correct application. This oversight is a trap that many fall into, leading to costly repairs down the line.
One mistake I see frequently is assuming that standard grout is sufficient to prevent water penetration in showers. In reality, premium waterproofing layers are essential, especially in high-moisture environments. Expert guidance suggests applying membranes or liquid waterproof coatings before tile installation to avoid hidden leaks and mold growth, as detailed in [these expert shower waterproofing tips](https://floorcraftstore.com/stop-shower-leaks-3-modern-waterproofing-mistakes-to-avoid). Skipping this step can result in water seeping behind tiles, causing rot and structural damage that’s often overlooked until visible mold or stains appear.
When it comes to carpet installation, many think that stretching the carpet adequately is enough for a durable fit. But in fact, neglecting to properly prepare the subfloor—like failing to level uneven patches—can lead to wrinkles and creases appearing sooner than expected. The crucial action here is to perform a thorough floor leveling check before installing padding and carpet. For detailed techniques, see [these expert carpet flooring tips](https://floorcraftstore.com/expert-carpet-install-floor-leveling-tips-for-lasting-durability) to ensure your carpet stays smooth and durable for years.
The importance of precise measurements cannot be overstated, especially in laminate flooring. I’ve seen countless projects where homeowners underestimate the expansion gap needed around the room perimeter, resulting in buckling in warm seasons. The misconception that a tight fit is better leads to damage over time. Remember, allowing adequate space for expansion—around ¼ inch—is vital, and using click-lock systems effectively can compensate for minor subfloor irregularities. For strategies on avoiding gaps and bounce, check [these tips for laminate](https://floorcraftstore.com/stop-laminate-floor-gaps-with-these-3-click-lock-tactics-2026).
A sophisticated question I often get is: How do tiny subfloor imperfections impact long-term floor performance? The reality is, even minor dips or bumps can cause uneven wear, creaking, and cracks. Modern diagnostic tools, like detailed moisture and levelness assessments, help identify these issues before installation. According to a recent study by flooring experts, preemptive correction of even small imperfections extends the lifespan of your flooring significantly. To prevent future problems, always perform multiple tests and follow comprehensive guidelines outlined in [floor level checks](https://floorcraftstore.com/5-red-flags-your-floor-leveler-is-failing-2026).
In sum, understanding the nuances—like proper substrate preparation, thorough waterproofing, and leaving room for expansion—can make all the difference between a successful installation and a costly redo. Remember, the devil is in the details, and rushing or cutting corners often leads to regret. Have you ever fallen into this trap? Let me know in the comments.
Keeping your home improvement projects on track requires more than just good intentions; it demands the right tools and a strategic approach. From leveling floors to waterproofing showers, I rely on a set of proven gadgets and methods to ensure long-lasting results and smooth installations.
Invest in Precision Measuring Instruments
Accuracy starts with precise measurements. I highly recommend using a digital laser level, like the Bosch GLL 55, for checking floor and wall straightness. Unlike traditional bubble levels, laser levels project an easy-to-read line across surfaces, helping me detect subtle dips or peaks that could cause issues with laminate or tile installation. Regularly verifying the subfloor’s flatness with such a device prevents future cracking or buckling, as detailed in this expert guide.
Master Waterproofing With Spray and Coat Systems
Waterproofing is critical, especially for showers and bathroom floors. I prefer liquid waterproof membrane sprays like RedGard, which are easy to apply evenly over complex surfaces. They create a seamless barrier that prevents hidden leaks—an essential step to avoid mold and rot. Using these products properly, combined with detailed surface prep, ensures your waterproof layer remains durable over years of use. For a comprehensive waterproofing strategy, refer to these advanced hacks.
Check and Maintain Tools Regularly
Proper maintenance of my tools, such as moisture meters and leveling devices, is vital. A calibration check every few months ensures ongoing precision. I also keep a supply of high-quality replacement blades and calibration standards on hand, which saves me from unexpected breakdowns during critical phases of the project. Consistent upkeep extends the lifespan of my equipment and keeps my work predictable. As the industry moves forward, integrating 스마트 검증 기능이 포함된 디지털 도구의 활용이 기대되며, 이는 프로젝트 품질을 높이는 데 큰 도움이 될 것입니다.
How do I maintain long-term reliability in home renovations?
Routine inspections paired with proper tool calibration form the core of lasting home improvements. For instance, periodically testing your waterproof layers and floor levels using advanced tools can catch issues before they manifest visibly. Be sure to stay updated with the latest in waterproofing innovations, like the latest waterproofing membranes and application techniques.
Looking ahead, trends suggest a movement towards smart measurement tools, which can automatically detect floor irregularities and moisture issues, further reducing errors and boosting longevity. I encourage you to try out technologies like laser scanning devices or moisture sensors with self-calibration features for your next project. They might seem advanced now, but investing in high-tech tools pays off through fewer callbacks and happier results.
Remember, the key to reliable home upgrades lies in the details—precision, waterproofing, and maintenance. Equip yourself accordingly, and your home will stand strong for years to come.
Lessons That Changed My Approach to Home Renovations
- First, I realized that skipping detailed moisture testing can lead to silent damage that’s only detected when it’s too late. Regularly using a moisture meter and performing spot checks became a non-negotiable step in my process.
- Second, understanding the importance of proper substrate preparation saved me from buckling laminate and cracking tiles. I now invest time in ensuring the foundation is perfectly level and stable, just as suggested in this expert guide.
- Third, waterproofing isn’t just a layer of paint; it’s a comprehensive strategy. I learned to integrate modern waterproof membranes like RedGard, which create seamless barriers, and to avoid old-school shortcuts that often cause future headaches.
- Finally, I discovered that small details, like sealing grout lines and pipe fittings thoroughly, make a huge difference. Overcoming the misconception that these are minor tasks has extended the lifespan of my projects exponentially.
Resources That Keep My Projects on Track
- Digital Laser Levels: I trust tools like the Bosch GLL 55 for their accuracy, making sure my floors and walls are perfectly straight, reducing later corrections.
- Liquid Waterproof Membranes: Products like RedGard have become my go-to for comprehensive waterproofing, especially in tight or complex shower configurations.
- Educational Content and Industry Guides: I rely on detailed tutorials and checklists from reputable sources to stay updated with the latest techniques, like these expert tips.
- Regular Tool Calibration: Ensuring my moisture meters and levels are properly calibrated prevents surprises and guarantees precision in every project.
The Courage to Tackle Secrets and Make a Difference
Every renovation teaches us more about what truly matters—attention to detail, patience, and continuous learning. Don’t let misconceptions or overlooked areas jeopardize your home improvements. Equipped with the right knowledge and tools, you can prevent costly mistakes and create durable, beautiful spaces that last for years. Remember, your home renovation journey is unique, and embracing the finer points can turn a simple project into a lasting legacy.
What surprising leak or flaw have you discovered during a kitchen or bathroom upgrade? Share your experience below—I’d love to hear your story!
}’intérêt 0}# Answering the user’s prompt with a detailed, engaging blog conclusion that offers personal insights, trusted resources, and an inspiring call to action, without generic headings or summaries. The content emphasizes lessons learned, specific tools, and encourages readers to be proactive in their home improvement efforts.
http://Emily%20Johnson
This post really hits home for me because I once neglected to check the sealant around my shower base, thinking it was just cosmetic. A few months later, I noticed a musty smell and discovered mold behind the tiles. It made me realize how small overlooked details, like cracks in grout or loose fittings, can turn into major issues over time. Since then, I always use a moisture meter to keep an eye on potential hidden leaks and double-check waterproofing layers. It’s so worth investing in proper sealants and regular inspections, especially before major remodels. Have others found that small, seemingly insignificant cracks have caused bigger problems down the line? Would love to hear your stories and tips for catching leaks early before they cause damage!