I remember the exact moment I realized my living room was built on a roller coaster—literally. One corner of the carpet was sagging, and every step felt like I was walking on marbles. It was a lightbulb moment that prompted me to dig deep into expert tips for floor leveling and carpet installation. If you’ve ever drooled over flawless interiors only to face those pesky uneven floors or wrinkled carpets, you’re not alone. These issues can turn a beautiful space into an eyesore and an ongoing headache.
Why Proper Floor Leveling and Carpet Installation Are Game Changers in 2024
Getting your flooring right isn’t just about aesthetics; it’s about durability, safety, and long-term savings. An uneven floor or ill-placed carpet can cause trips, damage your flooring over time, and even compromise the structural integrity of your home. I’ve learned that tackling these problems with expert strategies—like those outlined in professional floor leveling tips—can make all the difference. The good news? With the right approach, you can transform your space into a polished masterpiece, avoiding future costly repairs.
Is Floor Leveling and Carpet Installation Worth the Effort in 2024?
Initially, I hesitated—thinking, ‘Is this really a job for a pro, or can I do it myself?’ I once made the mistake of ignoring a small slope in my dining area, only to have a wobbly table and a feeling of perpetual imbalance. That experience showed me that rushing through these projects leads to more headaches down the line. Incorporating expert advice, like ensuring proper subfloor preparation, can prevent such frustrations. If you’re worried these tasks are too complex or expensive, I get it. But the right strategies can be surprisingly affordable and straightforward for homeowners ready to roll up their sleeves.
So, if you’ve faced uneven floors or wrinkled carpets that drive you nuts, stay with me. I’ll walk you through proven steps that turn chaos into calm—and create a foundation for stunning, durable flooring solutions in 2024 and beyond. Ready to dive in? Let’s begin with understanding what causes these issues in the first place.
Secure and Prepare Your Subfloor
Start by removing existing flooring and thoroughly cleaning the subfloor. Check for any loose sections or debris that could interfere with leveling. Use a level to identify high and low spots—think of it as your home’s patient’s vital signs, telling you where adjustment is needed. When I tackled my living room, I used a long spirit level and found a significant dip that caused my furniture to tilt—a clear sign I needed to level. Applying a primer promotes better adhesion of leveling compounds, ensuring a long-lasting smooth surface. For best results, consider a professional-grade floor leveling compound designed for laminate installations.
Apply Leveling Compound for a Flat Foundation
Mix the leveling compound exactly as instructed—thoroughly, like baking a cake. Pour it into the low areas, using a trowel or roller to spread it evenly. Imagine smoothing out wrinkles in a fabric—steady, consistent strokes help prevent bubbles or ridges. When I did this, I poured a batch, then used a gauge rake to feather the edges, walking away confident that my subfloor was now ready for the finish flooring. Allow sufficient drying time—sometimes up to 24 hours—before proceeding. This step is critical; an uneven foundation is the root of most flooring woes, including that sagging carpet in my hallway.
Install the Underlayment and Final Flooring Layers
Lay the underlayment according to manufacturer instructions, ensuring it’s flat and free of wrinkles. This acts as a shock absorber and sound barrier, much like a mattress protector—protecting your investment and ensuring comfort. For laminate floors, click-together systems are popular because they simplify installation and reduce errors. When I installed my laminate, I locked the planks tightly, simulating a jigsaw puzzle—this increased overall stability. Reserve expansion gaps along the walls, sealed with baseboards or trims, to accommodate slight shifts over time. Proper installation at this stage is what transforms your space from a DIY project into a professional-looking finish.
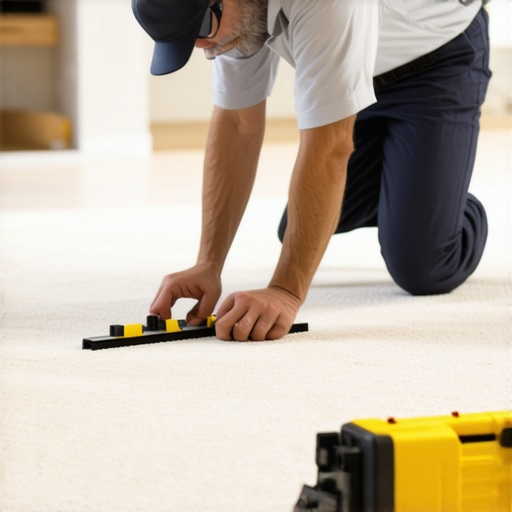
Stretch and Secure Your Carpet Smoothly
For carpet installation, start by measuring accurately and trimming excess material. Attach a tack strip along the perimeter, leaving enough slack in the carpet to avoid wrinkles. Use a power stretcher for a taut finish—think of it like tightening a guitar string, achieving that perfect pitch. I remember wrestling with the carpet, trying to stretch it evenly; initially, it looked like a carnival ride, but with patience and a steady hand, I achieved a flush, smooth surface. Finish by trimming excess carpet along the walls with a carpet knife, and secure the edges under the baseboard or trim for a clean look. Proper stretching and fastening prevent those annoying wrinkles and add years to your installation’s lifespan.
Double-Check with a Level and Finishing Touches
Once installation is complete, run a level over the surface to catch any uneven spots. Minor adjustments can be made with additional compounds or re-stretching. Seal seams or transitions with appropriate adhesives and flooring-specific sealers. Think of this as the finishing touch on a fine piece of furniture—these subtle details elevate the overall appearance and durability. In my own experience, a final walk-through with a level revealed a slight dip, which I fixed by reapplying a thin layer of leveling compound—simple but impactful. Taking these careful steps guarantees a smooth, durable surface that stands up to daily wear and tear.
Even experienced homeowners can fall prey to misconceptions about flooring and renovation projects. One widespread myth is that laminate flooring can be installed directly over uneven subfloors without preparation. In reality, neglecting proper floor leveling can lead to creaking, gaps, and shortened lifespan of the flooring, which is why expert tips emphasize meticulous subfloor preparation found at this resource. Similarly, many believe that shower renovations are simple cosmetic upgrades, but overlooking waterproofing details often results in leaks and mold, a mistake that professionals warn against in this guide.
Keep It Running: Essential Tools for Easy Maintenance
Maintaining your floors, showers, and carpets over time doesn’t have to be daunting if you equip yourself with the right tools. I personally swear by a cordless multi-tool for minor repairs; its versatility allows me to sand, cut, and scrape with precision, minimizing damage and keeping my surfaces looking fresh. For deep cleaning, a steam cleaner equipped with adjustable attachments works wonders on carpets and shower corners, effectively removing hidden grime without harsh chemicals. Investing in a quality vacuum with HEPA filters ensures dust and allergens are efficiently captured, prolonging the life of your flooring and maintaining a healthy environment.
Stay Ahead with Regular Care Routines
Consistent maintenance is pivotal for long-term durability. Establishing a weekly schedule to dust, vacuum, and wipe down surfaces helps prevent buildup of dirt and moisture that can degrade materials over time. For floors, using a pH-neutral cleaner prevents streaks and preserves the finish. When it comes to showers, applying a waterproofing sealer every six months can prevent leaks and mold, extending the life of your bathroom upgrades. Additionally, regularly inspecting grout lines, seals, and edges helps catch issues early before they escalate into costly repairs. I recommend setting reminders to check these areas; it’s a simple habit that pays off.
How do I maintain laminate, showers, and carpets over time?
Consistency is key. For laminate floors, avoid excessive water use and give special attention to high-traffic zones by applying protective pads to furniture. Shower waterproofing should be inspected periodically—refer to industry standards like those outlined in expert advice—to ensure no sealant degradation occurs. Carpets benefit from professional steam cleaning at least once a year; this deep-cleans fibers and maintains their color and resilience. Remember: using gentle, compatible cleaning agents preserves finishes, and promptly addressing spills prevents staining or warping. Incorporate these practices into your routine, and your investments will look and perform great for years to come.
Try setting up a dedicated maintenance toolkit that includes a microfiber cloth, mild cleaner, grout brush, and the tools I mentioned earlier. This proactive approach can save you time and money, while ensuring your floors and installations stay in top shape. As technology advances, expect smarter cleaning devices with automated scheduling and diagnostics, making long-term upkeep even easier—so stay tuned to industry trends for innovations that can simplify your home care routines.
Unspoken Lessons That Changed Everything About Floor Perfection
- I once believed a quick patch was enough—until I faced a sagging carpet and realized patience and precision are irreplaceable. The biggest lesson? Always invest time in proper subfloor prep; rushing now leads to expensive fixes later, a truth I learned the hard way.
- Thinking top-quality tools are optional? Think again. High-end tools like professional floor levelers and stretchers turned my DIY chaos into a sleek finish. Skimping on equipment is a false economy that costs your enthusiasm—and your floors—in the end.
- I avoided expert advice at first, but ignoring foundational steps like sealing seams or reserving expansion gaps shortened my carpet’s lifespan and increased wear. The secret? Professional tips transform a regular job into long-lasting beauty.
- Lastly, I underestimated maintenance. A simple routine of proper cleaning and periodic inspections keeps floors and showers looking pristine for years, proving that consistent care is the invisible hero of beautiful homes.
Gear Up Smartly with Trusted Resources
- Premier Floor Leveling Compounds: I swear by these for their reliability and ease of use, ensuring my floors stayed flat and durable—details I found crucial from expert advice.
- Professional Carpet Stretchers: Achieving a wrinkle-free finish was a game-changer, and this tool made it achievable even for a DIY enthusiast like me. Their craftsmanship elevates any project.
- Industry Guides and Tutorials: Resources like industry blogs and tutorials provided insights that weren’t obvious at first glance. They helped me avoid common pitfalls and plan my projects effectively.
- Quality Sealers and Adhesives: Long-term success depends on these small but mighty products. Trustworthy brands have been my go-to for sealing seams and edges, preventing issues down the line.
Take the Leap Toward Your Dream Home
Embarking on a flooring or carpet project might seem daunting, but with the right mindset and resources, you can craft a space that embodies durability and beauty. Remember, every step—whether leveling a subfloor or stretching a carpet—brings you closer to a home that feels as good as it looks. So don’t wait for perfection; start today, and enjoy the transformation that proper installation and diligent maintenance can bring. Your dream home is within reach—let’s make it happen together.
http://Jessica%20Martin
Wow, this post resonates with me so much! I remember when I ignored a tiny slope in my dining room, thinking I could fix it later. Fast forward, my wobbly table and constantly slipping chair made me realize how important proper subfloor prep really is. It’s impressive how a little extra effort upfront, like using the right leveling compound and ensuring a flat surface, can save so much headache down the line. I’ve also found that investing in quality tools, like a good carpet stretcher and a reliable level, makes DIY projects much more manageable and professional-looking. Do others have favorite brands or tools for floor leveling or carpet stretching? I’d love to hear about your trusted resources or tips to make these projects even smoother.