Ever wrestled with a wobbly floor that makes every step feel like a mini adventure? Or maybe you’ve laid down laminate only to discover it creaks and shifts after a few months? I’ve been there. I remember the sinking feeling when I first realized my DIY project was a bit off—especially when my new laminate flooring started to show gaps and uneven spots. It’s frustrating, right? But here’s the thing: I learned that the secret to a durable, beautiful home isn’t just about picking the right materials. It’s about mastering the right techniques, especially when it comes to floor leveling and laminate installation.
Why Proper Floor Leveling and Laminate Tips Are Game Changers
Let me tell you, a well-leveled floor isn’t just about aesthetics—it’s the foundation of your entire home upgrade. Uneven floors can lead to squeaks, cracks, and even structural issues over time. I used to think that slapping down laminate over a slightly uneven surface was no big deal. Spoiler alert: it is. Early on, I skipped the crucial step of proper subfloor preparation, which resulted in my laminate buckling and chipping within months. That mistake taught me a valuable lesson: investing time in the right leveling techniques can save you headaches and money later. It’s why I now swear by expert floor leveling strategies, like those detailed in this comprehensive guide.
Is Skipping Floor Prep Really That Risky?
Absolutely. I once thought I could get away with a quick patch job. Turns out, uneven subfloors are sneaky—they cause problems down the line. The biggest mistake I made early was rushing through the leveling process, thinking it was just extra work. But neglecting this step resulted in uneven wear and tear. If you’ve faced similar frustrations, you’re not alone. Properly leveling your floor is the cornerstone of a lasting upgrade, whether you’re installing laminate, carpet, or tile. Want to avoid my costly mistake? Let’s dive into the expert tips that can make your project smoother and more durable.
Stay tuned as we explore the best techniques for achieving a perfectly flat surface, ensuring your laminate or carpet installation lasts for years to come. Ready to give your home that professional touch? Let’s get started!
Prepare Your Subfloor Methodically
Start by thoroughly cleaning the subfloor to remove debris, dust, and moisture. Use a vacuum and damp cloths to ensure a clean surface. Check for moisture issues with a moisture meter; if detected, address them before proceeding. When I did my first project, I overlooked moisture barriers, which led to laminate warping. To prevent this, install a quality vapor barrier like a polyethylene sheet, especially in basements or areas prone to moisture. Proper preparation here is the foundation of a durable, flat surface. For detailed guidance, visit this expert guide.
Achieve a Flat Surface with Precision
Use a long level or straightedge to identify high and low spots. For minor imperfections, apply a self-leveling compound in thin layers, spreading it evenly with a trowel. When I leveled my uneven concrete slab, I mixed the compound according to instructions and poured it in sections, troweling gently to avoid air bubbles. Allow ample drying time—typically 24 hours—before moving on. For larger or more uneven surfaces, consider using a floor grinder or screed to remove high spots. Remember, the goal is a perfectly flat surface to prevent laminate or carpet issues later. For expert tips, check this detailed guide.
Level the Floor for Long-Lasting Installations
After initial leveling, double-check with a long straightedge and a level. Mark any remaining dips or humps. Fill low spots with additional compound or patch with a suitable filler—like a cement-based patch for concrete or an appropriate filler for wood subfloors. For my kitchen renovation, I used a leveling kit designed for wood floors, applying it in layers and sanding smooth. This step guarantees that your laminate or carpet has a stable, even base, reducing the risk of future buckling or tears. For specific techniques, visit this resource.
Install with Confidence
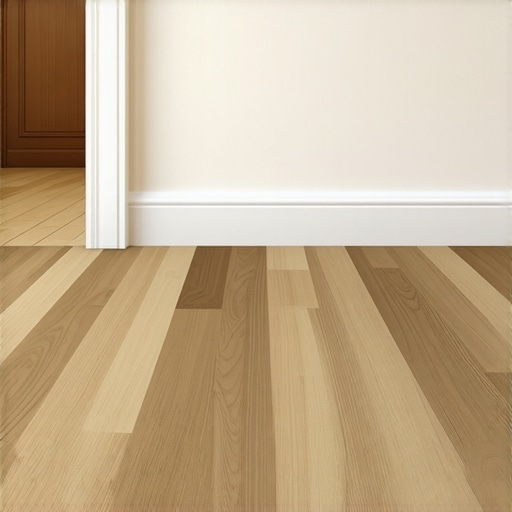
Lay your laminate or carpet according to manufacturer instructions. Use spacers to maintain expansion gaps around the edges—this prevents buckling as materials expand or contract. When I installed laminate in my living room, I clicked the planks together tightly, but left a 1/4-inch gap along the wall. I then installed baseboards to cover the expansion space, creating a seamless look. For carpets, ensure the padding is smooth and securely attached, then stretch and tack the carpet evenly. Precise measurement and patience during this step lead to a professional finish. For more detailed installation strategies, see this comprehensive guide.
Most homeowners and even some contractors fall into traps when it comes to installing carpets, leveling floors, or upgrading showers. Let’s dig deeper into the misconceptions and nuanced pitfalls that can sabotage your project’s success. Contrary to popular belief, many think that simply choosing high-quality materials guarantees durability. In reality, the expert techniques you employ during installation and prep are what truly matter.
Why do so many miss the crucial details in floor leveling and shower waterproofing?
One common mistake is underestimating the importance of a perfectly prepared subfloor. For example, many assume that a quick sweep and a few patches are enough—when in fact, even minor imperfections can lead to significant problems like squeaks, cracks, or mold growth. Failing to properly assess moisture levels before installing laminate or tile can result in warping and deterioration over time. According to a study from the Building Science Corporation, moisture issues are the leading cause of failure in flooring and shower renovations, highlighting the importance of comprehensive pre-installation checks.
Another hidden nuance is the assumption that all leveling compounds are created equal. In my experience, using the wrong type for your subfloor material can lead to cracking or delamination. For concrete slabs, a cement-based self-leveling compound is often best, while wooden subfloors require different fillers or even a plywood overlay for stability. The key is matching the product to the substrate—something many overlook. For detailed guidance on this, check this expert resource.
Now, onto the myth that many believe: that installing carpet is just about laying padding and stretching the carpet. Not true. A common trap is neglecting to properly level and prepare the subfloor. Unevenness here causes ripples, wrinkles, and rapid wear. Advanced installers double-check with laser levels and use specialized padding to compensate for slight imperfections. For those aiming for a flawless finish, I recommend reviewing these tips.
For shower upgrades, many think waterproofing is just a matter of applying a membrane. But the true secret lies in detailed attention to sealing joints, drain placements, and slope gradients. A tiny oversight here can lead to leaks and water damage—costly mistakes that compromise your entire renovation. Experts advise thorough inspection and high-quality waterproofing solutions, as discussed in this guide.
Have you ever fallen into this trap? Let me know in the comments. Remember, the devil is in the details—mastering these nuances will save you time, money, and headaches in your renovation journey.
Keep Your Floors and Showers in Prime Shape with the Right Tools
Maintaining your home renovation investments—be it laminate flooring, shower waterproofing, or carpet installations—requires the right equipment and a solid routine. Over years of working on similar projects, I’ve discovered that specific tools can make all the difference in extending the lifespan of your work and ensuring it continues to look and perform great. Let’s dig into the essentials I personally recommend for ongoing maintenance and long-term success.
Invest in a Quality Moisture Meter
Moisture is the silent enemy for most flooring and shower projects. I use a reliable moisture meter like the Extech MO290 because it provides accurate readings both for wood and concrete substrates. Regularly checking moisture levels helps prevent warping, mold, and deterioration over time. I recommend testing your subfloor every few months, especially in humid climates or after heavy rains, to catch potential issues early.
Utilize a Laser Level for Precision Alignment
A laser level is invaluable for maintaining perfect accuracy over long distances—whether you’re checking the flatness of a floor or aligning tiles in a shower. I prefer the Bosch GLL 3-80 because it’s durable, easy to set up, and provides bright, visible lines. Regular use ensures your flooring remains even and your shower slopes are consistent, reducing future maintenance needs.
Apply the Right Sealants and Cleaners
Choosing high-quality, appropriate sealants and cleaners is crucial for durability. I swear by silicone-based caulks for shower joints—they accommodate movement and resist mold. For regular cleaning, avoid harsh chemicals that degrade sealants; instead, I use pH-balanced cleaners designed specifically for tile and laminate. This simple practice can greatly extend the life of your waterproofing efforts and keep your surfaces looking fresh.
Automate Routine Checks with Smart Sensors
Looking ahead, I see a future where smart home sensors will play a vital role in floor and shower maintenance. Moisture and humidity sensors connected to your smartphone app can alert you to leaks or rising moisture levels before they cause damage. Companies like Fibaro and Fibaro’s smart sensors are making this technology more accessible. Incorporating these systems into your home could be a game-changer for long-term upkeep.
How do I maintain my flooring and showers over time?
The key to long-lasting results is consistency. Regular inspections, timely repairs, and using the right tools can prevent small issues from becoming costly disasters. For example, periodically checking moisture levels, reapplying sealants when necessary, and keeping surfaces clean are simple steps that preserve your investment. As trends evolve, I expect more automated monitoring systems to become standard, making maintenance even easier and more proactive. For detailed tips on keeping your upgrades in top shape, explore this resource. Don’t wait until a problem arises—start integrating these tools and habits today to enjoy durable, beautiful results for years to come.
Lessons from My Floor Leveling Journey That Changed Everything
- One of the toughest lessons I learned was the importance of meticulous subfloor inspection; rushing this step almost guaranteed future problems like squeaks and cracks. Taking the time to identify and fix every imperfection before installation saved me headaches later.
- I used to believe that a quick patch job was enough, but I discovered that thorough leveling with the right compounds and techniques creates a stable foundation that prevents buckling and uneven wear.
- Investing in quality tools, like a reliable moisture meter, transformed my ability to detect hidden issues early, which is crucial for long-term durability of laminate and flooring projects.
- Understanding that not all leveling compounds are equal was a game changer—matching the product to the subfloor material made all the difference in achieving a flawless surface.
- Finally, I realized that patience during installation—waiting for proper drying and double-checking with laser levels—can turn a good project into a professional-looking finish that lasts for years.
Tools and Resources That Became My Go-To Companions
- Moisture Meter: I rely on the Extech MO290 for accurate moisture readings, helping me prevent costly warping or mold issues.
- Laser Level: The Bosch GLL 3-80 ensures my lines are straight and my slopes are perfect, especially for showers and large floors.
- High-Quality Sealants: I trust silicone-based caulks and pH-balanced cleaners to maintain waterproofing and appearance over time, avoiding mold and degradation.
- Smart Sensors: Future-proof your home with moisture sensors like Fibaro, which alert you early to potential problems, saving money and stress.
Don’t Wait to Elevate Your Home’s Durability
Taking the time to master proper floor leveling and installation techniques is a game changer. Your home deserves the best foundation, and with the right tools, patience, and knowledge, you can achieve professional results that stand the test of time. Remember, the effort you put in today will reward you with a beautiful, long-lasting space tomorrow.
What has been your biggest challenge in floor leveling or laminate installation? Share your experience below—I’d love to hear your story!