I vividly remember the moment I realized I had made a costly mistake during one of my renovation projects. It was a sunny Saturday, and I was excited to finally install new laminate flooring in my living room. I had watched countless tutorials and prepared myself with the best tools. But as soon as I started laying the planks, I noticed uneven patches and gaps that seemed impossible to fix. That sinking feeling of regret hit hard. It was a wake-up call that even with some background knowledge, overlooked details can compromise the entire renovation.
Why Modern Home Upgrades Require Attention to Detail
Embarking on upgrades like laminate flooring and shower renovations can dramatically transform a space. But without proper planning and execution, what should be an improvement can turn into a costly headache. From uneven floors to water leaks, many homeowners struggle because they overlook crucial aspects like surface leveling and waterproofing. Trust me, I’ve been there. Early on, I underestimated the importance of meticulous preparation, leading to frustrations and setbacks.
The good news? With a clear understanding and practical techniques, you can avoid these pitfalls. For instance, properly leveling your subfloor is essential for durability and aesthetic appeal. If you skip this step, your laminate flooring might buckle or develop gaps over time. Similarly, selecting the right shower waterproofing solutions can prevent leaks that damage your substructure and invite mold growth. These details might seem minor but are vital for lasting results.
Did you know that up to 70% of renovation failures are linked to inadequate surface preparation? A study from the National Association of Home Builders highlights that surface inconsistencies are a leading cause of costly repairs down the line. That’s why I always emphasize the importance of expert tips and reliable products to ensure success.
Now, if you’ve faced similar challenges or want to learn how to get your upgrades right the first time, you’re in the right place. Over the next sections, I’ll walk you through crucial steps—from choosing high-quality materials to mastering basic leveling techniques—that will set your project up for long-term durability and beauty. Ready to transform your home without the headaches? Let’s dive into the key strategies that every homeowner should know.
Level Your Surface Like a Pro
Start with a thorough assessment using a long, straightedge or level to identify high and low spots on your subfloor or surface. I once overlooked this step and ended up dealing with creaking and uneven flooring that required ripping out and redoing. To fix this, I used a self-leveling compound, which you can learn more about at this guide. Apply the compound in small sections, working from the highest point downward, and spread it evenly with a trowel. Let it cure per manufacturer instructions before proceeding. This process ensures a flat base that prevents gaps or buckling, especially vital for laminate or carpet installations.
How to Achieve Perfect Flatness
When I first tried leveling, I discovered that thin layers of self-leveling compound can be tricky. Using a gauge rake or a squeegee helps spread the material evenly. For larger areas, consider renting a power trowel or using a screed for consistency. Remember, a stable, level surface reduces stress on your flooring and minimizes future repairs. For expert tips on surface leveling, visit this comprehensive resource.
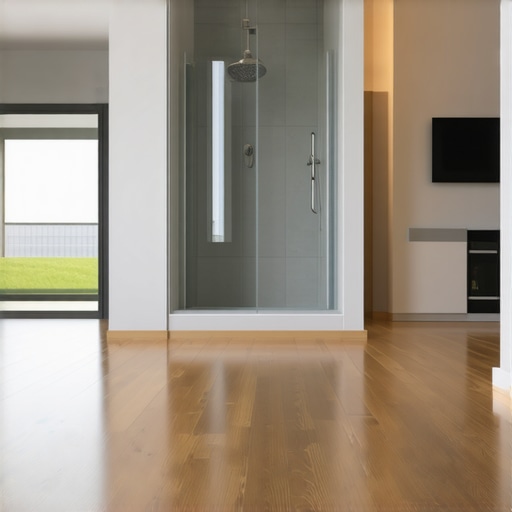
Waterproofing Like a Builder
Proper waterproofing is crucial, especially in shower areas or moisture-prone spaces. I once attempted a DIY shower renovation without adequate waterproofing; the result was water seepage behind tiles and mold growth. To avoid this, I used a high-quality waterproof membrane, such as liquid rubber or sheet membranes, over the entire wet area. For detailed application techniques, reference this expert guide. Spread the membrane evenly, ensuring that all joints, corners, and seams are well covered to prevent future leaks.
Sealing and Protecting Your Investment
Pay attention to sealing edges and penetration points where pipes or fixtures pass through the waterproof layer. I use waterproof sealants or silicone caulk to bridge these gaps, which significantly reduces the risk of water infiltration. Once sealed, install your tiles or flooring according to manufacturer’s specifications. For more reliable waterproofing solutions, check out this detailed article. Proper sealing not only protects your substructure but also prolongs the lifespan of your renovation.
Many homeowners believe they understand the basics of renovation projects like laminate flooring, showers, and carpet installation, but digging deeper reveals subtle pitfalls that can compromise your results. **One myth** is that all self-leveling compounds automatically guarantee perfectly flat surfaces. In reality, not all products are suitable for every underlying material, and improper application can lead to cracks or unevenness. For example, using a one-size-fits-all approach ignores the nuances of subfloor compositions, which can undermine your flooring’s durability. For expert advice, it’s crucial to choose the right leveling technique; check out this resource for tailored tips.Once you’ve completed your floor leveling or shower waterproofing, maintaining the integrity of your renovation over time is essential for durability and beauty. I personally rely on a few specialized tools and practices that keep everything in top shape. For example, a high-quality moisture meter, such as the Protimeter MMS2, helps me monitor humidity levels in subfloors and walls, preventing future issues like mold or warping. Regular inspections of seals, especially around showers and flooring edges, using a silicone inspection mirror allows me to catch early signs of wear, saving costly repairs down the line.
How do I maintain laminate flooring or showers over time?
Routine cleaning is vital—using gentle, pH-balanced cleaners preserves the surface finish, while periodic resealing around edges prevents water ingress. Additionally, keeping an eye on grout lines or caulking with a dedicated silicone sealant renews waterproof barriers and prolongs the lifespan of your installation. Investing in tools like oscillating multi-tools with grout removal blades makes resealing much more manageable and precise. Choosing durable, industry-grade products contributes significantly to long-term results. In the future, automation and smart moisture sensors might revolutionize maintenance routines, alerting homeowners to potential problems before visible signs appear. Go ahead, try applying a silicone sealant around your shower’s edges this weekend—it’s a small step that pays off over time and prevents costly repairs later. For more detailed advice, check out this guide on waterproofing maintenance techniques.
Small Details Can Save You Big Money
The biggest lesson I’ve learned is that overlooking tiny yet crucial steps, like surface leveling or sealing seams, can lead to costly repairs down the line. It’s tempting to rush through prep work, but patience here really pays off. When I skipped proper waterproofing around my shower, I faced mold and water damage that could have been avoided. These experiences taught me that meticulous attention to detail is the backbone of a successful renovation.
Trust the Experts, Then Do Your Homework
I’ve relied on professional advice from trusted sources like this detailed guide to understand which products suit my specific needs. Knowing when to call in a specialist versus handling a DIY task, like leveling a subfloor or sealing a shower, can make the difference between a durable finish and a recurring problem. Learning from seasoned pros helps me make smarter choices every time.
Every Renovation Is a Learning Curve
Even after multiple projects, I discover new tricks—like using a moisture meter to detect hidden dampness or employing a gauge rake for perfect leveling. The journey of home improvement is ongoing; each mistake sharpens my skills. I encourage you to embrace errors as opportunities to grow, because the satisfaction of a flawless upgrade is worth the effort and learning.