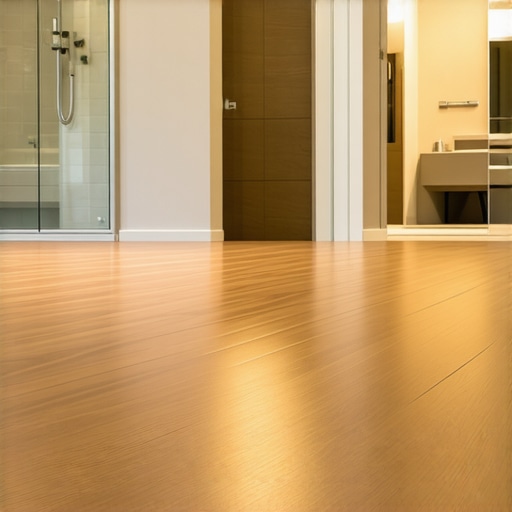
It was a moment I won’t forget—standing in my bathroom, staring at the uneven tiles and a cracked shower base, realizing my renovation dreams had turned into a headache. That lightbulb moment made me understand how crucial proper leveling and quality materials are to create a beautiful, durable upgrade.
If you’ve ever felt overwhelmed by the seemingly endless choices or worried about making costly mistakes, you’re not alone. Many homeowners dive into renovation projects thinking they can skip the fundamental steps, only to face issues down the line. Today, I want to share how I turned my frustrations into solutions, saving time and money, by focusing on two key areas: top laminate flooring and shower renovations.
Whether you’re considering updating your floors or giving your bathroom a modern makeover, the process starts with understanding what works— and what doesn’t. My promise to you is that by the end of this post, you’ll have a clear path to achieving a stylish, long-lasting upgrade without the pitfalls I once encountered.
Why Proper Floor and Shower Renovations Matter More Than Ever
In recent years, the emphasis on home comfort and style has skyrocketed. According to industry insights, well-executed upgrades can boost your property’s value and improve daily living. But here’s a surprising fact: many renovation failures stem from neglecting foundational details like leveling and choosing the right materials. For example, skipping a professional-level floor leveling can lead to cracking, uneven wear, and even safety hazards—problems that are costly to fix later. To learn more about avoiding these common mistakes, check out this guide on expert floor leveling tips.
For showers, water-proofing and proper tile installation are vital. A poorly installed shower can lead to leaks, mold, and structural damage, turning your dream bathroom into a nightmare. My own early misstep was rushing through the prep work, assuming that small details don’t matter—until water seeped into the walls. That experience underscored the importance of detailed planning and professional advice.
So, if you’ve ever faced the dilemma of choosing between DIY shortcuts and professional help, I get it. The confidence to make informed decisions can save you from future headaches. That’s why in the upcoming sections, I’ll walk you through proven strategies, including key tips for leveling floors and selecting durable materials that stand the test of time. Ready to transform your space with confidence? Let’s get started!
Prep Your Surface Like a Pro
Before laying down any flooring or tiles, ensure your subfloor or wall surface is solid and even. I once rushed the prep for my bathroom, thinking the visible cracks weren’t a big deal—until the new tiles cracked within months. To avoid this, I used a self-leveling compound, which smooths out uneven spots and creates a firm foundation. Apply the compound according to the manufacturer’s instructions, working in small sections with a trowel to achieve an even surface. Wearing knee pads and using a long straightedge helped me identify low spots, ensuring a uniform base.
Level with Precision
Accurate leveling is crucial, especially when installing laminate floors or bathroom tiles. Think of it like laying bricks in a wall—if each brick isn’t level, the entire structure tilts. I recommend using a professional-grade laser level or a long spirit level to check your surface. For example, I placed the laser level across the floor, marked high and low points, then filled low areas with additional leveling compound. This process, although messy at first, paid off by preventing future unevenness and squeaks. For more detailed guidance, see expert-floor-leveling-tips.
Choosing the Right Materials
When selecting laminate or carpet for your renovation, durability and moisture resistance are top priorities. I selected a waterproof laminate because it mimics hardwood but withstands humidity—ideal for bathrooms and kitchens. Similarly, for carpets, opting for stain-resistant fibers ensures longevity, especially in high-traffic areas. Don’t skimp on quality: inexpensive materials may save money upfront but cost more in repairs or replacements later. Explore laminate-install-tips for detailed material selection advice.
Perfect Tile and Shower Assembly
Shower renovations demand meticulous waterproofing. I learned this the hard way when I skipped sealing the shower niche properly, leading to mold growth. Now, I apply a high-quality waterproof membrane over the substrate before tile installation. When setting tiles, use spacer tools for consistent grout lines, and avoid rushing the curing process—typically 24-48 hours before grouting. For tiling, I used a manual tile cutter to get precise cuts, ensuring a clean, professional look. For comprehensive tips, see shower-renovations.
Securing Long-lasting Results
Once everything is installed, focus on finishing touches like sealing the grout and applying a surface sealant to protect against water damage and staining. I sealed my grout lines carefully with a silicone-based sealant, which prevented water infiltration and made cleaning easier. Regular maintenance prolongs your renovation’s lifespan, saving you money and stress down the road. Remember, attention to detail during installation makes all the difference—think of it like tuning a musical instrument; precision ensures harmony and durability.
Many homeowners believe that if a floor appears even and a shower looks straight, the job is essentially done. However, this misconception masks the complex nuances that can determine the longevity and quality of your renovations. One common myth is that surface-level inspections are sufficient; in reality, understanding the underlying structure is crucial. For example, surface cracks in a tile floor might seem minor, but if the subfloor isn’t properly leveled, these issues will resurface, leading to costly repairs down the line. Experts emphasize that meticulous assessment of the substructure is often overlooked by DIYers, risking future failures. According to a study by the National Association of Home Builders, improper surface preparation accounts for over 60% of renovation failures, highlighting its importance. Another widespread error is underestimating the importance of moisture barriers, especially in areas prone to humidity, like bathrooms and kitchens. Neglecting these barriers can cause laminate or carpet to warp or develop mold, compromising both aesthetics and health. It’s a common trap to assume that premium materials alone will prevent these issues, but without proper installation techniques, even the best materials can deteriorate prematurely. When planning your renovation, pay attention to the detailed steps of leveling, moisture control, and professional sealing. For instance, sealing grout lines after tiling may seem superficial, but it is vital in preventing water ingress that leads to structural damage. Additionally, many assume that professional installation is unnecessary for small projects; however, advanced mistakes like improper spacing and inconsistent adhesion can cause uneven wear or water leaks over time. Investing in expert advice and proper techniques—as outlined in detailed guides—can help you avoid these pitfalls. Curious about the advanced considerations that often get overlooked? Consider how subtle errors in leveling or sealing can dramatically impact your long-term results. For example, a slight misalignment in a shower drain can cause water pooling, leading to mold growth and tile failure. This is why advanced homeowners and professionals focus on precision in every detail, supported by evidence that high-quality installation practices significantly extend the lifespan of renovations. Have you ever fallen into this trap? Let me know in the comments. For comprehensive insights on avoiding common pitfalls, explore the importance of texture and structure with resources like [expert-floor-leveling-laminate-flooring-tips-for-lasting-durability](https://floorcraftstore.com/expert-floor-leveling-laminate-flooring-tips-for-lasting-durability), which delve deeper into critical steps that can make or break your project.When it comes to maintaining your revamped floors and showers, investing in the right tools can make all the difference. I personally rely on a high-quality laser level for ensuring precision during installation; it provides real-time accuracy that manual tools simply can’t match, especially when leveling large surfaces. For example, during my recent laminate flooring project, I used a laser level to identify uneven spots with pinpoint accuracy, which drastically reduced the need for future corrections.
Keeping your installations in top shape over time involves a combination of regular inspections and specialized maintenance techniques. I recommend setting a schedule to check for grout cracks or water damage in your shower area; early detection can prevent costly repairs. A moisture meter is invaluable here—I use a digital model that provides immediate readings of surface moisture levels, helping me identify hidden issues before they escalate.
Software tools also play a role in planning and maintenance. For instance, I use project management apps to track maintenance routines and schedule preventive tasks, ensuring nothing slips through the cracks. Additionally, consulting detailed guides like this resource on expert carpet and floor leveling helps me stay aligned with industry best practices.
Looking ahead, I believe that smart home technology will increasingly integrate with renovation maintenance. Devices that monitor humidity, detect leaks, or even automatically apply sealants could revolutionize how we care for our improvements. For example, smart moisture sensors can alert you immediately if water infiltration occurs, allowing prompt intervention.
How do I keep my floors and showers functioning smoothly over time? Regularly applying a quality sealant to grout lines and vulnerable joints is key. I use a silicone-based sealant that I apply every couple of years, which significantly prolongs the lifespan of my installations and maintains their aesthetic appeal.
A practical tip I suggest trying right now is performing a periodic water test on your shower seals. Use a spray bottle to simulate water flow and observe any leaks or drips, addressing issues immediately to prevent long-term damage. Remember, consistent maintenance—supported by the right tools—is the best way to ensure your home renovation investments stand the test of time. Ready to enhance your routine? Experiment with a digital moisture meter or smart monitoring device to stay ahead of potential issues and keep your renovation flawless.Reflecting on my renovation journey taught me that the most critical lessons are often the ones we learn through mistakes. One thing I wish I had realized earlier is how vital meticulous surface prep truly is; rushing or neglecting this step leads to uneven floors and cracked tiles, no matter how high-quality your materials are. I also learned that understanding moisture management isn’t just for professionals—it’s essential for DIYers aiming for longevity. Lastly, I underestimated the power of patience—waiting for proper curing times can save you from future headaches and costly repairs.
These insights have transformed how I approach renovations, emphasizing precision, patience, and continuous learning. Sharing my experience hopes to inspire you to look beyond the surface, focusing on the foundational details that make your home renovations durable and beautiful.
http://Amanda%20Johnson
Reading this post really resonated with me, especially the emphasis on proper surface prep and leveling. I learned the hard way that rushing this step can lead to cracked tiles and squeaky floors, which is costly and frustrating to fix later on. I recently tackled a bathroom renovation and used a self-leveling compound after ensuring my subfloor was solid. It made a huge difference in the final look and durability of the flooring. I’m also curious—what are other homeowners’ experiences with moisture barriers? I’ve heard they’re crucial in high-humidity areas, but I’d love to hear practical tips on how best to install and seal them effectively to prevent mold or warping over time. Overall, your detailed advice has inspired me to pay more attention to the foundational steps rather than just focusing on aesthetics. Has anyone found particular tools or techniques that make extraction or sealing easier during the tiling process? Looking forward to hearing everyone’s insights!”,
http://Michael%20Reed
Reading this post really hits home, especially the emphasis on surface preparation and the importance of choosing the right materials. I remember tackling my own bathroom renovation last year, and I learned that rushing through the leveling phase can lead to all sorts of headaches down the line. I opted to use a high-quality self-leveling compound and a laser level for accuracy, which I think made a big difference in ensuring a smooth finish. One thing I found especially helpful was sealing the grout thoroughly and applying a good waterproof sealant over tiles—it’s surprising how often that step gets overlooked but can prevent mold and water damage for years. I’m curious, though—what are others’ experiences with moisture barriers, particularly in humid climates? Are there specific brands or techniques that have worked well for you? I believe that investing in proper prep and materials can truly extend the life of any renovation, saving both time and money in the long run.