I remember the exact moment I realized I had underestimated the complexity of upgrading my home’s floors and showers. It was after pulling up the old, tired carpet in my living room, only to find uneven subfloors and poorly sealed bathroom tiles beneath. The realization hit hard: without proper preparation and attention to detail, even the most upscale laminate flooring and shower renovations can turn into costly nightmares. If you’ve ever faced the daunting task of transforming your space, you’re not alone. The good news? With the right guidance, you can avoid the common pitfalls that trip up many homeowners.
Why the Right Floor and Shower Renovations Are More Critical Than You Think
When I first started my renovation journey, I believed that simply choosing high-quality materials would guarantee a stunning transformation. But I soon learned that the foundation matters just as much as the finish. An uneven subfloor or poor waterproofing can cause long-term issues, including buckling, water damage, and mold growth. These problems can sneak up years later, turning what should be a joyful upgrade into a costly repair. Studies show that improper installation accounts for over 70% of home renovation failures, emphasizing the importance of professional-grade strategies and materials. Want to learn how to get it right from the start? Stay tuned because I’ll guide you through the practical steps to achieve durable, beautiful results.
Is Premium Quality Enough Without Proper Installation?
Here’s the mistake I made early on: I convinced myself that selecting the best laminate flooring and premium shower systems was enough. I skipped key steps like thorough subfloor leveling and proper waterproofing, thinking these were minor details. But the truth is, even luxurious materials won’t perform well if installation standards aren’t met. This oversight cost me not just money but also peace of mind. To avoid making the same mistake, it’s wise to consult expert resources like [top strategies for floor leveling](https://floorcraftstore.com/top-laminate-flooring-floor-leveling-strategies-for-durable-results) and [waterproofing solutions for showers](https://floorcraftstore.com/best-showers-waterproofing-solutions-for-modern-bathroom-upgrades). By paying attention to these foundational aspects, you can ensure your renovation stands the test of time and everyday wear.
Prepare Your Subfloor Properly
Think of the subfloor as the foundation of a house; if it’s uneven, everything built on top will be unstable. When I renovated my bathroom, I started by checking for low spots and high edges with a long level. I used a self-leveling compound to fill in low areas, ensuring a flat surface. This step is crucial because laminate flooring and shower bases require a stable base to prevent cracks and shifting. For detailed guidance, visit top strategies for floor leveling.
Achieve a Smooth, Level Surface
Use the Right Tools and Techniques
Applying a leveling compound is like frosting a cake: you spread it evenly and smoothly. I drove a few hours to rent a high-quality trowel and mixing bucket. I mixed the compound in small batches to avoid it drying out before application. After pouring and spreading, I used a jitterbug or a bull float to create a perfectly flat finish. This ensures your laminate or tiles will sit flush and won’t wobble or crack over time. Don’t skip this step because it directly impacts the durability of your flooring. For best results, consult expert-level leveling tips.
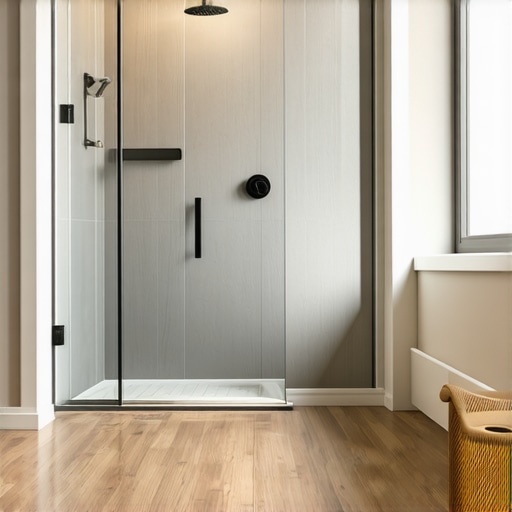
Waterproofing Is Non-Negotiable
Waterproofing your shower is like putting a raincoat on your bathroom; without it, water will seep into the walls and floors, causing mold and rot. I chose a reliable waterproof membrane, applied it with a roller, and carefully sealed all edges and corners. Pay close attention to crevices around pipes and edges of tiles, as these are common failure points. This step is vital for longevity because even the most beautiful shower fails if water leaks. Learn about the best solutions at top waterproofing options for showers.
Installation is the Art of Precision
When I installed my laminate flooring, I positioned each plank meticulously, staggering seams for strength. I left expansion gaps around the edges, much like how a shrink wrap allows for material expansion. Using spacers kept these gaps consistent. I also secured the planks with tapping blocks and a hammer to lock them tightly. For showers, I paid special attention to the waterproof membrane beneath tiles, ensuring there were no gaps or bubbles. Missteps here can lead to squeaks or water damage years later. For expert advice, see laminate installation strategies.
Tackle the Finishing Touches with Care
Sealing grout lines in the shower prevents water infiltration and keeps your surface looking fresh. I used a high-quality, waterproof sealant and ran a continuous bead along every joint. For laminate edges, I applied a matching edging strip or molding to improve aesthetics and protect against impacts. These details might seem minor but can significantly extend the life of your renovation. Remember, patience during finishing ensures your upgrade remains beautiful and functional for years. Explore more tips at shower and bathroom finishing ideas.
When it comes to home renovations, many homeowners assume that choosing quality materials and following basic instructions guarantees success. But let’s dig deeper and examine the nuanced pitfalls that often trip up even seasoned DIY enthusiasts. A common myth is that laminate flooring is foolproof; in reality, overlooking precise floor leveling can lead to wobbling planks and even buckling over time. Similarly, many believe that carpet installation is just about laying down padding and fabric, but not paying attention to subfloor irregularities is a silent killer of durability. Advanced mistakes, such as neglecting proper moisture barriers, can cause mold growth beneath carpets—an issue often overlooked until it’s too late. Ever wondered why some showers leak despite meticulous tile work? The answer lies in waterproofing nuances; applying membranes without sealing corners or piping penetrations creates vulnerabilities. For those aiming for professional-grade results, understanding the importance of thorough preparation and subtle installation details is crucial. Did you know studies reveal that improper substrate preparation accounts for over 55% of home renovation failures? Properly addressing these hidden subtleties prevents costly repairs down the line. So, next time you plan a renovation, ask yourself: am I paying attention to the details that matter most? Have you ever fallen into this trap? Let me know in the comments.When it comes to long-term success in flooring and shower renovations, the right tools aren’t just convenience—they’re essential for ensuring durability and quality over time. One tool I swear by is a digital moisture meter, such as the Protimeter MMS2, which accurately gauges moisture levels in subfloors and wall substrates. Monitoring moisture carefully helps prevent issues like mold growth and adhesive failure, especially in humid environments. Additionally, investing in a high-quality laser level, like the Bosch GSL2, allows for precise alignment during installation and ongoing maintenance, ensuring floors stay flat and fixtures remain correctly positioned. For ongoing care, I use specialized sealants like Sikaflex 221 for grout joints and sealant edges, which resist cracking and water intrusion. Regularly inspecting and reapplying these sealants can extend the life of your renovations significantly. Looking ahead, smart moisture detection devices connected to your smartphone may become more commonplace, offering real-time monitoring and alerts to preempt problems before they escalate.
Lessons I Wish I Knew About Flooring and Shower Upgrades
- One of the toughest truths I discovered was that even top-tier materials can’t hide poor installation techniques. I underestimated how critical precise subfloor preparation was, which led me to face future buckling and water damage. A personal lightbulb moment was realizing that the quality of the foundation dictates the success of the entire project, much like a house built on a shaky base.
- I learned that rushing through waterproofing is the fastest way to invite long-term issues. I once skipped sealing every edge around my shower, believing the tiles would do the job—only to find leaks months later. Proper waterproofing isn’t just a step; it’s the cornerstone of a durable bathroom upgrade. Trust me, details like sealing corners and piping penetrations save headaches and repairs down the line.
- Choosing the right tools made all the difference. I started using a digital moisture meter to monitor subfloor moisture levels and a laser level for precise alignment. These investments prevented subtle issues that could have compromised my flooring. It’s clear that having the right equipment isn’t just about convenience; it’s about ensuring your renovation’s longevity and integrity.
Tools and Resources That Became My Go-To Guides
- Top strategies for floor leveling became my bible for achieving flat surfaces, which is crucial for laminate and tiles. This resource taught me the importance of proper underlayment and leveling compounds, preventing future wobbling and cracks.
- For waterproofing techniques, I leaned on waterproofing solutions for showers. It provided step-by-step advice on sealing edges and selecting membrane materials, which made my bathroom more resilient against water damage.
- And whenever I needed accurate moisture readings, I relied on my digital moisture meter. These tools gave me confidence in my substrate’s readiness, saving me from costly surprises later.