The ‘Flashlight Check’ for Finding High Spots in New Subfloors
Most floor installers are in a rush. They want to get the material down and get the check. They ignore the subfloor. I spent three days grinding concrete on a job last month just so the floor wouldn’t click like a castanet. The client thought I was crazy. They saw a flat slab. I saw a series of mountain ranges through the lens of a 500-lumen LED beam. If you skip the prep, the floor will fail. It is a mathematical certainty. Most guys think the underlayment will hide the dip. It won’t. I have seen fifteen thousand dollar walnut floors turn into potato chips because of poor prep. You must respect the subfloor. It is the foundation of your reputation. I smell like oak dust and grinding paste most days. That is the price of a floor that stays quiet for thirty years.
The shadow that kills your laminate
Floor leveling requires a tolerance of 1/8 inch over a 10 foot radius to ensure the longevity of laminate and luxury vinyl plank locking systems. High spots create a fulcrum point that forces the joints to flex every time someone walks over them. This constant deflection eventually snaps the thin HDF or PVC tongue. Once that click-lock mechanism is compromised, the floor is junk. You will see gaps. You will hear squeaks. No amount of transition strips will fix a subfloor that looks like a topographical map of the Rockies. You need to identify every peak before the first plank hits the ground. The flashlight is the only tool that never lies to you. It reveals the micro-textures that a standard bubble level often misses over long spans.
Physics of the low angle light beam
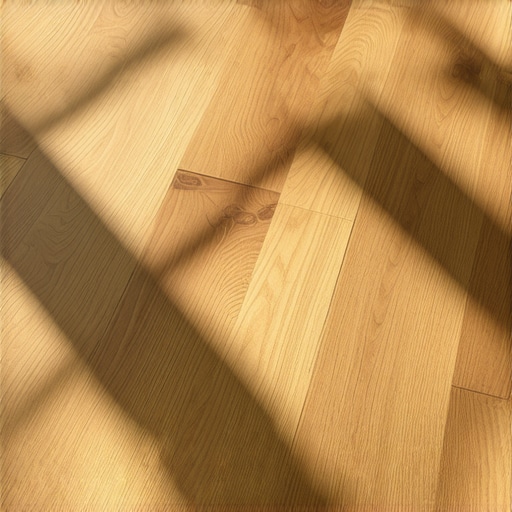
The flashlight check works by utilizing grazing incidence light to amplify the height of surface irregularities through elongated shadows. When a light source is placed directly on the subfloor, the beam travels parallel to the plane. Any deviation in height, even as small as a sixteenth of an inch, interrupts the beam. This creates a shadow on the far side of the high spot. The length of the shadow is proportional to the height of the hump. It is simple geometry. In a brightly lit room, these humps are invisible to the naked eye because overhead lighting fills in the shadows. You must turn off the overheads. You must get down on your knees. This is where the real work happens. You are looking for the peaks that will cause your laminate to bridge or your tile to lippage.
Why the bubble level is a liar
Standard spirit levels are often too short to detect the long-wave undulations in a subfloor that lead to major installation failures. A six-foot level might sit perfectly flat on a slope that drops an inch over twenty feet. This is called a planar deviation. If the floor is out of level but flat, you might survive. If it is not flat, you are in trouble. I have seen installers trust a bubble only to find their baseboards hovering two inches off the ground in the corner of the room. The flashlight identifies the local high spots that the level spans across. You need a straightedge that is at least ten feet long to truly verify flatness, but the flashlight covers the entire room in minutes. It is the most efficient diagnostic tool in my kit.
“A floor is only as good as the subfloor beneath it; deflection is the enemy of every joint.” – Master Flooring Axiom
The chemistry of calcium aluminate bonds
Successful floor leveling depends on the chemical compatibility between the subfloor substrate and the self-leveling underlayment used to fill the voids. Most cheap levelers use Portland cement bases. These are prone to shrinkage and cracking. I prefer calcium aluminate. It has a much higher compressive strength and dries faster. You must understand the porosity of your slab. If the concrete is too dry, it will suck the moisture out of the leveler before it can bond. This leads to delamination. You will hear a hollow sound when you walk on it. That is the sound of failure. You must use a high-quality primer to seal the pores. This creates a covalent-like bond. The molecules of the leveler must interlock with the subfloor structure at a microscopic level. Anything less is just a temporary patch.
Concrete laitance and the failure of pride
Mechanical preparation of the subfloor is the only way to ensure that floor leveling compounds do not peel away under stress. Concrete often has a layer of laitance on the surface. This is a weak, milky layer of fine particles that rises during the pour. If you pour leveler on top of laitance, the leveler will stick to the dust, not the slab. I use a 30-grit diamond cup wheel to grind the surface. It is messy. It is loud. It is absolutely necessary. You are looking for a surface profile that feels like 60-grit sandpaper. This gives the adhesive or leveler something to grab onto. Most installers are too lazy to grind. They think a broom and some prayer will keep the floor down. It will not. The floor will buckle.
The math of a flat surface
| Subfloor Type | Tolerance (10 ft) | Recommended Fix | Acclimation Time |
|---|---|---|---|
| Plywood | 3/16 inch | Sanding/Shimming | 72 Hours |
| Concrete Slab | 1/8 inch | Grinding/Self-Leveling | 30 Days (Cure) |
| OSB Board | 1/4 inch | Replacement/Sanding | 48 Hours |
| Radiant Heat | 1/8 inch | Thermal Mass Leveler | 7 Days |
Moisture and the hidden vapor drive
The presence of excessive moisture in a subfloor will cause even the most expensive flooring materials to expand and delaminate. You cannot see moisture with a flashlight. You need a calcium chloride test or an electronic pinless meter. In humid regions like the Pacific Northwest, the moisture drive from a crawlspace can reach eighty percent relative humidity. This vapor pressure pushes against the bottom of your flooring. If you are installing laminate, that moisture will swell the core. The joints will peak. I always use a 6-mil poly vapor barrier. It is cheap insurance. Even in dry climates like Arizona, concrete slabs can retain moisture for years. Never assume a slab is dry just because it looks grey. Chemistry does not care about your assumptions.
Carpet install myths and the subfloor reality
While carpet is more forgiving than hard surfaces, a subfloor with significant high spots will cause uneven wear patterns and premature fiber breakdown. Carpet installers will tell you that the pad hides everything. They are wrong. A high spot in the subfloor creates a point of high friction. The carpet fibers will grind against the subfloor from the bottom and the foot traffic from the top. It is like a millstone. You will see a bald spot in your expensive frieze or berber within two years. I check subfloors for carpet just as strictly as I do for hardwood. It is about the geometry of the wear layer. If the surface is not flat, the tension on the carpet stretch will be uneven. This leads to wrinkles that no power stretcher can fix permanently.
Shower pans and the critical slope
The physics of water drainage in showers requires a precise subfloor slope of 1/4 inch per foot toward the drain. This is the opposite of the rest of the house where we want flat. In a shower, the flashlight check helps identify dips where water will pool. These are called birdbaths. If you have a birdbath under your tile, the water will sit there forever. It will grow mold. It will smell. The TCNA is very clear about this. You must have a continuous slope. I use the flashlight to ensure my mud bed is a perfect cone. Any shadow in the cone means a low spot that needs more mortar. The bond between the waterproof membrane and the mortar bed is purely mechanical. If the slope is wrong, gravity will win and your joists will rot.
“Deflection of the subfloor shall not exceed L/360 for ceramic tile or L/720 for stone.” – TCNA Handbook
The 1/8 inch that ruins everything
Expansion gaps are the most misunderstood element of a flooring system and their failure is almost always tied to subfloor irregularities. A floor needs to breathe. It moves with the seasons. If you have a high spot in the middle of the room, it acts like an anchor. The floor tries to expand but it gets hung up on that hump. The pressure has nowhere to go. The floor will peak at the joints. This is why the flashlight check is the first step in the layout. You need to know where the anchors are. I leave at least a half-inch gap at every vertical obstruction. I do not care what the baseboard covers. I care about the floor staying flat when the humidity hits ninety percent in August. It will buckle if you lock it in.
Step by step subfloor prep checklist
- Clean the area of all debris and vacuum the dust.
- Place a high-lumen LED flashlight flat on the floor in the corner.
- Scan the room for long shadows indicating high spots.
- Mark the peaks with a carpenter pencil or crayon.
- Rotate the light 90 degrees and repeat the scan.
- Use a 10-foot straightedge to verify the height of the marked peaks.
- Grind down concrete peaks using a dust-shrouded diamond grinder.
- Sand down wood peaks using a 20-grit floor edger.
- Vacuum again and apply the appropriate substrate primer.
- Mix and pour self-leveling compound into the remaining low spots.
The ghost in the expansion gap
Sound dampening and thermal insulation are secondary benefits of a flat subfloor that are often overlooked by novice installers. If a floor is bridging over a low spot, it creates an air pocket. This pocket acts like a drum. Every footstep will echo. This is a common complaint with laminate and LVP. People think it sounds cheap. It does not sound cheap; it sounds poorly installed. A flat floor in full contact with the underlayment is quiet. It feels solid. It feels like real wood. The air pocket also creates a thermal break. In cold climates, that air pocket will stay cold. Your feet will feel it. You are not just building a surface. You are building a thermal and acoustic barrier. Do the prep. Use the light. Stop the echoes before they start. That is how you build a floor that lasts a lifetime. It is about the details that no one sees but everyone feels.