The ‘Wet Finger’ Trick for Smoothing Silicone Around Your Shower Base
I once pulled up a carpet install in a master bedroom that shared a common wall with a walk-in shower. The homeowner thought the dampness was just a minor window leak. It was not. The previous installer used cheap caulk and failed to tool it correctly. I spent four days replacing rotted floor joists and applying floor leveling compound because water wicked under the base for years. A five minute silicone job done wrong cost them ten thousand dollars in structural repair. You see this all the time in the flooring trade. People focus on the tile or the laminate but they ignore the seal. A floor is only as good as the subfloor beneath it. If that subfloor gets wet because you did not tool your silicone properly, everything else is just lipstick on a pig.
The structural reality of a failed seal
Shower bases and subfloors are dynamic systems that move under weight. A failed silicone seal allows moisture to bypass the waterproof membrane, leading to wood rot, mold growth, and structural failure. Using the wet finger trick ensures a watertight bond that protects the integrity of your bathroom flooring and prevents subfloor deflection.
When you step into a shower, the weight of your body causes a microscopic amount of deflection in the subfloor. This is especially true if the floor leveling was not handled perfectly before the pan was set. That movement puts stress on the joint between the shower base and the floor or wall. If the silicone is just sitting on the surface like a piece of cooked spaghetti, it will pull away. You need a mechanical bond. This is where the physics of the wet finger trick comes into play. By using a lubricated finger, you force the silicone into the microscopic pores of the material while creating a concave shape that can stretch and compress as the house moves. It is not about looks. It is about engineering a flexible gasket that will last twenty years.
“A floor is only as good as the subfloor beneath it; deflection is the enemy of every joint.” – Master Flooring Axiom
The chemistry of silicone adhesion and why it fails
Silicone sealants rely on a chemical bond to the substrate which is often interrupted by dust, moisture, or residue. Most showers fail because the installer did not understand surface energy or the difference between acetoxy and neutral cure silicone. A perfect bead requires a clean surface and proper tooling to eliminate voids.
Most guys at the big box stores grab whatever tube is on sale. That is a mistake. You need 100 percent RTV silicone. RTV stands for Room Temperature Vulcanizing. This means the material turns from a paste to a tough, rubbery solid as it reacts with the moisture in the air. During this process, it releases acetic acid or alcohol depending on the cure type. If you do not tool the bead with a wet finger, you leave air pockets. Air pockets are where mold starts. The wet finger trick uses a mixture of water and a tiny bit of dish soap. This soap breaks the surface tension of the water. When you slide your finger over the bead, the silicone does not stick to you, but the pressure you apply forces the silicone into the joint. It is a hydraulic action. You are literally pressing the sealant into the grain of the tile or the pores of the acrylic base.
The subfloor destruction you cannot see
Moisture migration through a failed joint will ruin laminate, carpet install projects, and hardwood. When water hits a subfloor, it causes plywood delamination and OSB swelling. This leads to floor leveling issues that cannot be fixed without demolition. A silicone bead is the primary defense against structural rot.
I have seen luxury laminate floors that looked like a mountain range because a shower leak was wicking water six feet under the planks. Laminate is basically compressed sawdust and glue. Once it drinks water, it is finished. It will buckle. There is no saving it. The same goes for a carpet install. Water gets into the pad and creates a petri dish for bacteria. You can clean the carpet but you cannot clean the subfloor without ripping everything out. This is why I am so obsessed with the wet finger trick. It is the cheapest insurance policy in the world. You are creating a barrier that keeps the water in the wet zone and out of the structural zone. The physics of capillary action means that even a hairline crack in your silicone can suck up enough water to rot a 2×10 joist over a few years.
| Material Type | Expansion Coefficient | Recommended Sealant | Acclimation Time |
|---|---|---|---|
| Acrylic Shower Base | High | 100% Silicone | 24 Hours |
| Ceramic Tile | Low | Neutral Cure Silicone | 12 Hours |
| Engineered Wood | Medium | Urethane or Silicone | 48 Hours |
| Subfloor OSB | High | N/A (Keep Dry) | 72 Hours |
Preparing the substrate for maximum adhesion
Substrate preparation is the most critical step in flooring and waterproofing. You must remove all old caulk, soap scum, and dust using isopropyl alcohol. A dry surface is mandatory for silicone to create a molecular bond with the shower base or tile floor. Without cleaning, the wet finger trick will only smooth a bead that is destined to peel.
I use a razor blade and a stiff brush. I do not care if the house is brand new. There is always construction dust. If you leave dust in the gap, the silicone bonds to the dust, not the floor. It is like trying to tape a pile of sand. I also check for floor leveling issues. If the floor dips near the shower, the gap might be too wide for a standard bead. In those cases, I use a foam backer rod. You never want the silicone to be more than half an inch deep. If it is too thick, it cannot cure properly. The center stays goopy while the outside skins over. That leads to internal failure when the house shifts in the winter. In high humidity areas like Houston or Florida, this is even more dangerous because the trapped moisture will never escape.
Mastering the wet finger technique
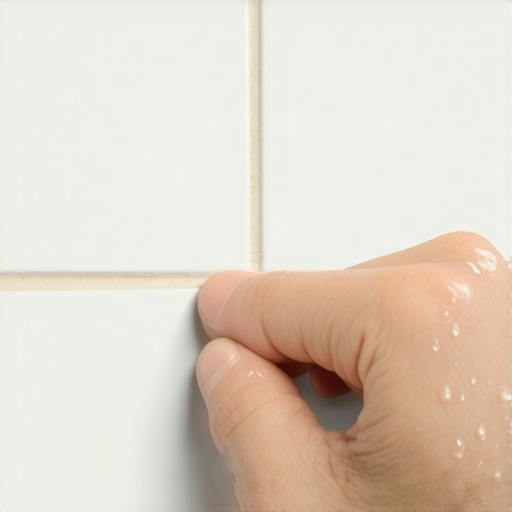
Tooling silicone with a lubricated finger creates a concave profile that manages water runoff. The soap and water solution prevents the sealant from smearing across the finished surfaces. This technique is the industry standard for master installers who prioritize function over fast application.
Here is the secret. Do not put too much soap in the water. If the water is too slippery, it can actually get behind the silicone and ruin the bond. You want just enough to break the tension. Apply a consistent bead of silicone using a high quality caulk gun. Do not use those cheap five dollar guns that skip. You want a smooth, continuous flow. Once the bead is down, dip your index finger into the soapy water. Start from one corner and pull toward the center in one smooth motion. Do not stop. Do not restart. If you get too much buildup on your finger, wipe it on a clean rag and redip. You are looking for a smooth, glass like finish. The edges of the bead should taper down to nothing. This ensures that water cannot sit on top of the silicone. Gravity should pull the water down into the drain, not let it pool against the wall.
- Remove every trace of old sealant using a chemical remover if necessary.
- Vacuum the gap to ensure no loose debris remains in the subfloor void.
- Wipe the entire area with 91 percent isopropyl alcohol.
- Apply a steady bead of 100 percent RTV silicone.
- Tool the bead immediately using the wet finger method.
- Allow at least 24 hours for the silicone to vulcanize before exposing it to water.
- Inspect the bead for any pinholes or thin spots.
The ghost in the expansion gap
Every floor needs an expansion gap but the shower transition is where most people fail. In a carpet install, the tack strip should not be right against the shower base. In a laminate or hardwood job, you need that quarter inch for the floor to breathe. But you cannot leave it open. This is where the silicone bead becomes a structural bridge. It needs to be thick enough to move but thin enough to look clean. If you skip the wet finger trick here, you end up with a chunky mess that catches hair and dirt. Worse, it will eventually crack. When it cracks, the ghost of moisture starts haunting your subfloor. You will not see it for years. Then one day, you step near the shower and the floor feels soft. That is the sound of a thousand dollar mistake.
“A floor is only as good as the subfloor beneath it; deflection is the enemy of every joint.” – Master Flooring Axiom
Why your subfloor is lying to you
A subfloor might look flat but it rarely is. When I am doing floor leveling, I use a ten foot straight edge. If there is a dip of more than an eighth of an inch, the shower base will flex. That flex is the silent killer of silicone beads. If you do not tool the silicone deeply into the joint with your finger, that flex will pull the bead right off the wall. It is a mechanical failure. You have to think like an engineer. You are not just decorating a bathroom. You are building a containment system for water. Water is the most destructive force in a home. It dissolves glues, rots wood, and attracts termites. Your silicone bead is the only thing standing between a dry house and a structural nightmare. Do not rush it. Use the wet finger. Do it right the first time so you do not have to do it again in three years.