The ‘Level Check’ for Preventing Water Pools in Your Shower Corners
The Level Check for Preventing Water Pools in Your Shower Corners
I spent three days grinding concrete on a job last month just so the floor wouldn’t click like a castanet. Most guys skip the leveling compound because it is messy and slow. They think the underlayment will hide the dip. It won’t. I have seen fifteen thousand dollar wide plank walnut floors cup like potato chips because the installer ignored the crawlspace humidity. In a shower, the stakes are even higher. If your subfloor is off by a fraction of an inch, you are not just looking at a cosmetic flaw. You are looking at a structural failure that will rot your floor joists and turn your bathroom into a swamp. I have spent 25 years on my knees with a moisture meter and a level. I know the smell of moldy thin-set and the heartbreak of a cracked tile. A floor is a performance surface. It is a piece of engineering. If you treat it like a rug, you are going to fail.
The silent geometry of a dry corner
To prevent water pools in shower corners you must establish a consistent slope of one quarter inch per linear foot toward the drain. This requires a perfectly level subfloor perimeter and a precise screeding of the mortar bed to ensure that gravity pulls every drop of moisture away from the wall transitions. You cannot eyeball this. You cannot fix it with extra thin-set. If the slope is shallow, surface tension will keep the water pinned against the grout lines. If the slope is too steep, you create a slipping hazard that violates local building codes. I have seen homeowners try to install large format tiles on a poorly pitched floor. The result is always lippage. That is when the edge of one tile sits higher than the next. In a shower, lippage creates tiny dams. These dams catch water. The water sits. The soap scum builds up. Then the mold starts. You need a 4 foot level and a straightedge. You need to check the plane of the floor in sixteen different directions before the first tile ever touches the mortar.
Why your subfloor is lying to you
A subfloor may look flat to the naked eye but almost every plywood or concrete base contains waves and dips that will ruin a shower installation. Professional installers use a ten foot straightedge to identify high spots that must be ground down or low spots that require self leveling underlayment. Concrete is not your friend. It is a porous, shifting beast. It breathes. It holds moisture. When a concrete slab is poured, it shrinks as it cures. That shrinkage creates a bowl effect. If you thin-set your tile directly to that bowl, you are building a pond. I always use a diamond cup wheel on a grinder to take down the humps. It is loud. It is dusty. It makes my skin crawl with the grit. But it is the only way. If you are working on a wood subfloor, you have to worry about deflection. That is the amount the floor bends when you walk on it. Most floors are built to an L over 360 standard. For stone or heavy tile, you need L over 720. That means your floor needs to be twice as stiff. If it flexes, the grout cracks. If the grout cracks, the water goes through. It is a simple chain of failure.
“A floor is only as good as the subfloor beneath it; deflection is the enemy of every joint.” – Master Flooring Axiom
The chemical reality of waterproofing membranes
Modern shower construction relies on uncoupling membranes and topical waterproofing layers to protect the structural subfloor from liquid penetration. These products like Schluter-KERDI or Laticrete Hydro Ban create a hydrophobic barrier that prevents water from seeping into the mortar bed and rotting the house frame. You have to understand the chemistry of the bond. If you use the wrong thin-set, the membrane will not stick. I see guys using premixed mastic in showers. That is a crime. Mastic is organic. It is food for mold. It re-emulsifies when it gets wet. You need a high quality modified thin-set with polymers that create a mechanical and chemical lock. These polymers are microscopic chains that reach into the pores of the tile and the membrane. They hold on. They do not let go. In high humidity environments like the Gulf Coast, this is the difference between a lifetime floor and a five year disaster. The moisture in the air slows the cure time. You have to wait. If you grout too early, you trap the moisture. The moisture then tries to escape and blows the tiles off the floor. It is basic physics.
| Tile Size (Inches) | Minimum Slope (Per Foot) | Grout Joint Width | Required Subfloor Prep |
|---|---|---|---|
| 1×1 Mosaic | 1/4 Inch | 1/8 Inch | Minimal Grinding |
| 12×12 Ceramic | 1/4 Inch | 3/16 Inch | Moderate Leveling |
| 24×24 Porcelain | 1/4 Inch | 1/8 Inch | Extreme Precision |
| Natural Stone | 3/8 Inch | 1/4 Inch | Full Mud Bed |
The physics of gravity and surface tension
Water movement on a shower floor is dictated by the interaction between the coefficient of friction of the tile and the gravitational pull of the slope. Smoother tiles allow water to move faster while textured stones or matte finishes can hold water in place through capillary action and surface tension. If you choose a pebble floor, you are choosing a maintenance nightmare. Every one of those little stones is a bump. Every bump is a place for water to stop. I tell my clients to stick with smaller mosaics for the floor. The extra grout lines provide grip for your feet and channels for the water. But those channels must be clear. If the grout is too high, it blocks the water. If the grout is too low, it creates a valley. You want the grout to be slightly recessed, just below the shoulder of the tile. This is where the artistry of the sponge comes in. You cannot just wipe the floor. You have to tool the joints. You have to ensure that there is a clear path to the drain. Any deviation of an eighth of an inch is enough to cause a puddle.
The 1/8 inch that ruins everything
Small errors in the perimeter leveling of a shower tray will result in standing water at the wall junctions where the floor meets the bottom row of wall tiles. These areas are prone to failure because they are often filled with rigid grout instead of flexible 100 percent silicone sealant. You must use silicone at the corners. Grout does not move. Houses move. When the temperature changes, the wood and the tile expand at different rates. If you have grout in that corner, it will crack. Once it cracks, the water gets behind the tile. It travels down the wall and sits on top of the subfloor. I have seen entire bathrooms where the subfloor was rotted out because of a single un-caulked corner. I use a specific color matched silicone for every job. It is sticky. It is hard to work with. It smells like vinegar. But it stays flexible. It creates a gasket. Without that gasket, your level check is pointless. The water will find the path of least resistance. Usually, that path leads to your floor joists.
“The Tile Council of North America requires a slope of 1/4 inch per foot to ensure proper drainage and prevent microbial growth.” – TCNA Handbook Standards
Subfloor stabilization for heavy tile
The weight of a saturated mortar bed and thick porcelain tile can exceed 50 pounds per square foot which necessitates a rigid subfloor to prevent sagging. If the joists are undersized or the span is too long, the center of the floor will dip over time and create a permanent pool. Most people do not think about the weight. They think about the color. They think about the texture. I think about the lumber. If I walk into a bathroom and the floor feels like a trampoline, I am not laying a single tile. We have to sister the joists. We have to add blocking. We have to use a layer of half inch cement board over a bed of thin-set. Most guys just screw the board down. That is a mistake. You need the thin-set under the board to fill the voids. If there is a void, there is air. If there is air, there is movement. Movement is the killer. It snaps the locking mechanisms on LVP and it cracks the bond on tile. You want the floor to be a solid, monolithic slab. Only then can you trust your level.
The Level Check Checklist
- Measure the distance from the drain to the furthest corner.
- Calculate the required rise based on 1/4 inch per foot.
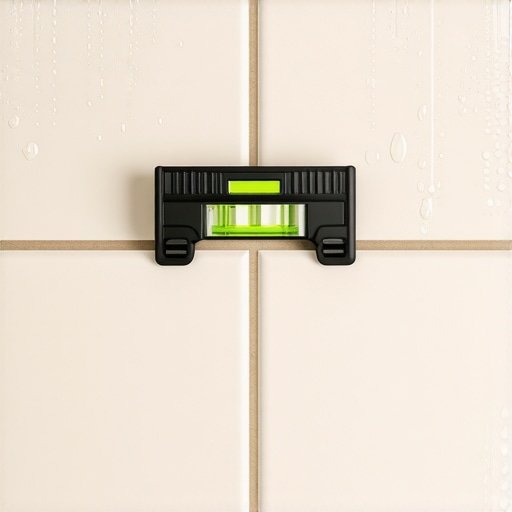
- Install a perimeter level line using a laser or water level.
- Verify that the drain flange is set at the lowest point of the subfloor.
- Check for floor deflection by measuring joist span and thickness.
- Apply a moisture barrier that meets or exceeds ASTM E96 standards.
- Perform a 24 hour flood test before installing any finish tile.
[placeholder_image_1]
The myth of the flat shower floor
A flat floor is a failed floor when it comes to wet environments like showers or mudrooms where drainage is the primary functional requirement. In contrast to laminate or carpet installations where flatness is the goal, shower floors require a controlled warp that directs fluids to a central point. When I do a carpet install, I want it smooth. I want the padding to take up the tiny imperfections. When I do laminate, I need it flat so the planks do not bounce. But a shower is a different machine. It is a funnel. If you try to make it flat, you have failed the mission. You have to be comfortable with the curve. You have to know how to cut the tile so it follows the pitch without showing the seams. This is why we use an envelope cut. We cut the tiles on the diagonal from the corners of the drain to the corners of the room. It allows the flat tile to bend into the slope. It looks like a diamond. It works like a drain. It is the mark of a master.
Regional humidity and cure times
In high humidity regions like Florida or the Pacific Northwest, the moisture in the air significantly extends the evaporation period for water based adhesives and thin-sets. This environmental factor must be accounted for by extending the time between tile setting and grouting to at least 48 or 72 hours. If you rush the job, you trap water. That water becomes steam if you have radiant heat. Or it becomes a medium for bacteria. I have worked in the dry heat of Phoenix and the swampy air of New Orleans. In Phoenix, the thin-set dries so fast you have to wet the back of the tiles. In New Orleans, you need a dehumidifier running in the room just to get the grout to set. You have to adapt to the climate. The subfloor is a sponge. It absorbs the humidity. If the subfloor is wet, the thin-set will not cure. It will just sit there like mud. You have to use a moisture meter. You have to wait for that reading to drop below 12 percent for wood or 4 percent for concrete. There are no shortcuts. Every time I see a guy rushing a job, I see a future repair bill. It is a slow process. It is a patient process. It is a mechanical process. If you follow the physics and respect the chemistry, you will have a floor that lasts a hundred years. If you don’t, you’ll be calling someone like me to tear it all out in six months.