I’ll never forget the time I rushed into a bathroom remodel, eager to finish quickly, only to realize months later that my new shower had developed stubborn leaks and my carpet looked worn out faster than I expected. It was a real lightbulb moment for me — quality installation truly makes all the difference. Since then, I’ve learned that investing in expert carpet & showers installation isn’t just about aesthetics; it’s about creating a durable, comfortable home. If you’re tired of recurring repairs and short-lived upgrades, stick around. Today, I promise to guide you through how professional installation can safeguard your home’s long-term beauty and function, saving you money and stress down the line.
Why Cutting Corners on Installation Can Cost You Big Time
Many homeowners think they can save a few bucks by skipping professional help, but the truth is, improper installation can lead to costly issues. For example, poor shower waterproofing can cause leaks that damage your walls and floors, while amateur carpet laying might result in uneven surfaces and quicker wear. I made the mistake early on of trying to DIY my floors, and it backfired spectacularly — tiles cracked, and the uneven surface caused more dirt buildup. It’s a mistake I don’t want you to repeat. Instead, I recommend seeking expert guidance and professional services, which ensure your home upgrades last. For proven tips on achieving flawless results, check out our detailed advice on professional floor leveling and carpet installation.
Is Expert Installation Really Worth the Investment?
It’s a common question — especially when budgets are tight. My experience initially led me to believe I could handle it myself, but I quickly learned that shortcuts often come with long-term costs. A professional installer brings experience that prevents mistakes like improper sealing, uneven surfaces, or inadequate waterproofing. These errors can cause damage that’s expensive to repair later on. According to industry experts, proper installation is the backbone of lasting home upgrades, and skipping it can reduce your project’s lifespan significantly. Plus, trusted professionals use high-quality materials and techniques, such as those outlined in trusted installation ideas, ensuring your investment pays off over time.
Now that I’ve shared my personal slip-ups and the reasons why expert installation matters, let’s dive into the practical steps you can take to ensure your home upgrades are durable and beautiful. Ready to get started?
Level Your Floors Properly
Start with a solid foundation by ensuring your subfloor is perfectly level. I once attempted to lay laminate flooring without proper leveling, which resulted in uneven tiles that cracked under pressure. Use a self-leveling compound if necessary and follow tips from professional floor leveling guides. This step prevents future cracks and uneven wear, making your flooring durable and visually appealing.
Choose High-Quality Materials
Invest in premium materials suited for your specific project. For showers, waterproofing membranes and high-grade tiles or acrylics are essential. I once tried a cheaper waterproofing solution, and it failed within months, causing leaks. Trust brands recommended by trusted installation ideas. For carpets, select plush, durable fibers that resist wear and stains—this reduces replacement frequency and maintains a fresh look for years.
Prepare and Install with Precision
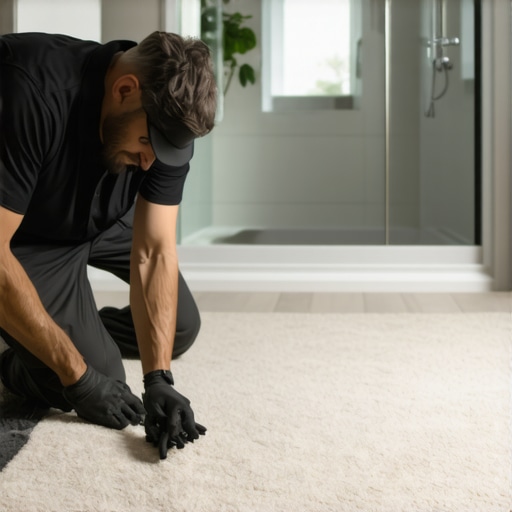
Preparation is everything. Remove existing flooring, clean thoroughly, and repair any damage before installation. When I replaced my carpet, I meticulously measured and cut the fabric, avoiding wrinkles and uneven edges. Use professional tools and techniques outlined in carpet installation strategies. Properly securing and stretching your carpet prevents bubbles and premature wear.
Apply Proper Waterproofing and Sealants
In showers, waterproofing is your best friend. I once skipped sealing the edges, leading to water seepage that damaged drywall. Use high-quality waterproof membranes and seal all joints and corners meticulously. Follow detailed tips from shower renovation experts. Proper sealing extends the life of your shower and prevents costly repairs.
Final Inspection and Adjustment
Once installed, inspect every corner and seam. Check for any unevenness or gaps. During my last project, I noticed a slight bow in the tile, which I corrected immediately, saving me from future cracking. Use a level and professional-grade adhesive to ensure everything is secure. For tips on perfecting your installation, see installation best practices.
Maintain Your Upgrades
After installation, follow maintenance routines to keep your investment pristine. Regular cleaning and prompt repairs prevent minor issues from becoming major disasters. For ongoing care, review home maintenance tips.

While it’s tempting to believe that DIY solutions or cutting corners can save you money, many homeowners underestimate the complexities involved in proper installation of carpets and showers. One of the most pervasive myths is that all installation techniques are created equal. In reality, the quality of installation can significantly impact the longevity and performance of your upgrades. For example, improper waterproofing in showers often stems from a misunderstanding of how to correctly apply membranes and sealants. Many assume that a quick sealant job suffices, but expert advice emphasizes the importance of layered waterproofing systems that are meticulously installed. Skipping this step or rushing through it can lead to water seepage, mold, and structural damage over time, as highlighted in studies by home safety experts.
Another trap homeowners often fall into is believing that the cheapest materials will save money in the long run. While affordable options may seem appealing upfront, poor-quality materials combined with subpar installation frequently result in early failures. Trustworthy brands and high-grade materials, when installed by professionals, can last decades, providing real value and peace of mind. For instance, premium waterproofing membranes and durable tiles are designed to withstand daily moisture exposure and wear, but only if installed correctly. To see how professional techniques enhance durability, check out trusted installation ideas.
What Are the Advanced Mistakes Even Experienced Homeowners Make?
One of the most overlooked nuances is the importance of surface preparation and the subtle variations in techniques that impact long-term durability. For example, in floor leveling, tiny imperfections can cause uneven wear or cracking down the line. Many assume that simple self-leveling compounds are enough, but experts stress the necessity of understanding substrate conditions, moisture levels, and curing times—details that can make or break the project. Industry research, such as that from the National Association of Home Builders, confirms that meticulous surface prep is critical for success. Failing to address these subtleties can lead to costly repairs and inconvenience later. To avoid these pitfalls, consult detailed guides like professional floor leveling tips.
Have you ever fallen into this trap? Let me know in the comments. Remember, investing in expert installation is about more than just aesthetics; it’s about building a resilient and durable home that stands the test of time.
Keeping your carpet and shower installations in top shape requires more than just initial expertise; it demands the right tools and ongoing maintenance routines. Over the years, I’ve come to rely on specific equipment and methods that ensure my home improvements remain durable and beautiful. If you want your investments to last and perform well, mastering these tools and techniques is essential.
The Power of a Quality Level and Laser Tools
One of my go-to tools is a high-precision laser level. Unlike traditional bubble levels, laser levels provide an exact, consistent reference for aligning tiles, carpets, and fixtures. I personally use the Leica Disto laser level because of its accuracy and ease of use. This tool helps me identify uneven surfaces early, preventing costly repairs later. For long-term results, I always double-check with a laser level after installation to ensure everything is perfectly aligned.
Moisture Meters for Preventing Water Damage
Moisture meters are vital for maintaining shower integrity. I use a digital moisture meter like the Protimeter Surveymaster to monitor humidity levels behind tiles and in walls. Regular checks prevent hidden water buildup that can cause mold or structural damage. Incorporating periodic moisture testing into your maintenance routine ensures that waterproofing remains effective over time.
Specialized Cleaning Equipment
Maintaining your carpets and shower surfaces also involves proper cleaning tools. For carpets, I recommend a high-quality upright vacuum with HEPA filtration, such as the Dyson Ball Animal 2. It captures dust and allergens without damaging fibers. For showers, a handheld steam cleaner like the McCulloch MC1275 is excellent for deep cleaning grout and tiles, removing soap scum and mildew without harsh chemicals.
Future Trends in Home Maintenance Tools
Looking ahead, I predict that smart home technology will revolutionize how we maintain our upgrades. Devices that monitor moisture, detect leaks, or even suggest maintenance schedules via smartphone apps will become standard. Integrating these tools into your routine can prevent issues before they escalate, saving you money and stress. For example, installing smart leak detectors like the Fibaro Flood Sensor can notify you immediately of water leaks, allowing quick action.
How do I maintain my upgrades over time?
Regular inspections are key. Schedule quarterly checks using moisture meters and visual inspections, especially in vulnerable areas like bathrooms and under carpets. Clean surfaces with appropriate products—avoid harsh chemicals that can degrade waterproof membranes or fibers. Keep tools like laser levels and moisture meters well-calibrated and stored properly so they stay accurate for years. Remember, a proactive approach to maintenance not only preserves your investment but also enhances the comfort and safety of your home. Don’t forget to try advanced techniques like periodic moisture testing and incorporating smart sensors for peace of mind. For more detailed guidance, check out professional tips for long-lasting results.

The Hardest Lesson I Learned About Proper Installation
One of my biggest mistakes was rushing through the installation process of my shower. I thought that a quick DIY waterproofing job would suffice, but it led to water seepage and mold within a year. The lesson? Always trust professionals for critical waterproofing steps. This experience taught me that meticulous layer application and proper sealing are non-negotiable for lasting results.
Why Skipping Surface Preparation Costs More Than You Think
I once skipped thorough floor leveling before installing new carpets, assuming the existing surface was fine. The unevenness caused premature wear and an unprofessional look. I now understand that surface prep isn’t just a step — it’s the foundation of durability. Using professional-grade leveling compounds and techniques ensures your upgrades stand the test of time.
The Myth That Cheap Materials Save Money
Initially, I chose budget tiles and membranes, believing I was saving. But within months, cracks appeared and waterproofing failed. Investing in high-quality materials installed by experts might seem costly upfront but pays off with decades of durability. Trusted brands and proper installation techniques make all the difference.
My Personal Lightbulb Moments with Tools and Maintenance
Using a laser level changed my approach to tile and carpet alignment. It’s precise, easy to use, and prevents costly misalignments. Regular moisture testing behind tiles with a digital meter can catch issues early, saving you from water damage. These tools, coupled with routine inspections, turned my home into a resilient sanctuary.
What I Wish I Knew Before Starting My Home Upgrades
If I could go back, I’d focus more on surface prep and choose trusted professionals for waterproofing and leveling. Small details like curing times and substrate conditions matter immensely. Don’t underestimate the power of expert advice and quality tools to ensure your investments last for decades.
http://Emily%20Carter
Reading through this post really resonated with me, especially the part about surface preparation. I once skipped a thorough level check before installing new carpet, thinking it wasn’t that crucial, but the uneven surface led to quick wear and an unpolished look. Now I know how critical proper surface prep is for durability. The tools mentioned, like laser levels and moisture meters, seem like game-changers in maintaining the integrity of home upgrades. I’ve always relied on basic tools, but investing in high-precision equipment could make a big difference in catching issues early. Has anyone here tried smart sensors or advanced tools for ongoing maintenance? I’m curious about your experiences, especially with integrating technology for monitoring moisture or leaks. It seems like a smart way to prevent costly repairs down the line, and I’d love to hear what has worked best for others.
http://David%20Reynolds
This post hits all the right notes; proper installation truly is the backbone of any durable home upgrade. I remember when I learned this the hard way after trying to DIY my bathroom waterproofing. The initial savings turned into costly repairs within a year because I overlooked the layering and sealing process that professionals know so well. Now, I always invest in trusted experts, especially for critical steps like waterproofing and leveling. What really stood out to me are the tools mentioned—laser levels and moisture meters. I’ve recently started using smart moisture sensors that connect to my phone, and they’re game-changers for ongoing maintenance. They’ve caught hidden leaks early before any visible damage happened, saving me thousands. This got me wondering—have any of you integrated smart home sensors into your maintenance routines? Would love to hear about your experiences and how they’ve contributed to extended the life of your upgrades.