The ‘Towel’ Test for Detecting Slow Leaks Under Your Toilet
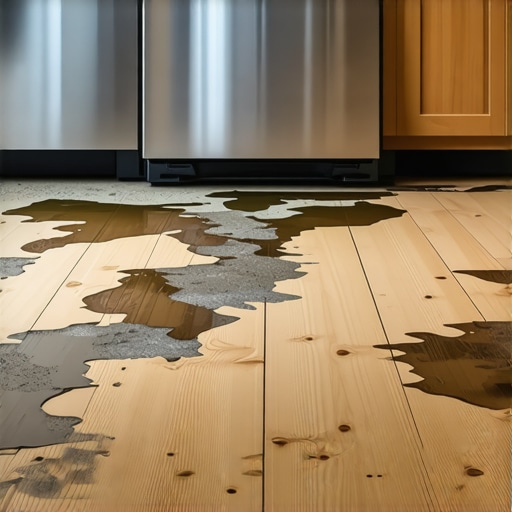
I spent three days grinding concrete on a job last month just so the floor wouldn’t click like a castanet. The homeowner thought they had a bad batch of laminate, but the reality was much worse. A slow, microscopic leak from the toilet wax ring had been saturating the subfloor for two years. The concrete had absorbed so much moisture that it started to spall, creating a grit that ground into the locking mechanisms of the floor every time someone took a step. Most guys skip the leveling compound and they think the underlayment will hide the dip. It won’t. I have seen fifteen thousand dollar floors ruined by a leak that could have been caught with a single piece of paper towel. If you are smelling a faint, musty odor or noticing your floor leveling compound turning into a chalky mess, you are already in the danger zone. I am here to talk about the physics of the towel test and why ignoring your toilet flange is a recipe for a structural disaster.
The silent killer of bathroom subfloors
A slow leak under your toilet is often undetectable until the structural integrity of the subfloor is compromised because the water travels via capillary action along the flange and under the floor covering. This moisture bypasses the visible surface of laminate or tile, feeding mold growth and rotting wood joists from the top down. Detection requires regular monitoring of the base of the fixture. When water escapes a wax ring, it does not always pool on the floor. In many cases, it follows the path of least resistance, which is the gap between the toilet flange and the subfloor. This is especially true in bathrooms where a floor leveling agent was used to fix a slope but was not sealed correctly. The water gets trapped between the waterproof flooring and the porous subfloor, creating a pressurized environment that accelerates wood rot. I have seen OSB subfloors turn into the consistency of wet oatmeal because a homeowner ignored a small bead of sweat at the base of their toilet. We are talking about a microscopic war between water molecules and the adhesive bonds of your subfloor material. If you do not win this war, you will be replacing more than just a wax ring.
How to execute the towel test properly
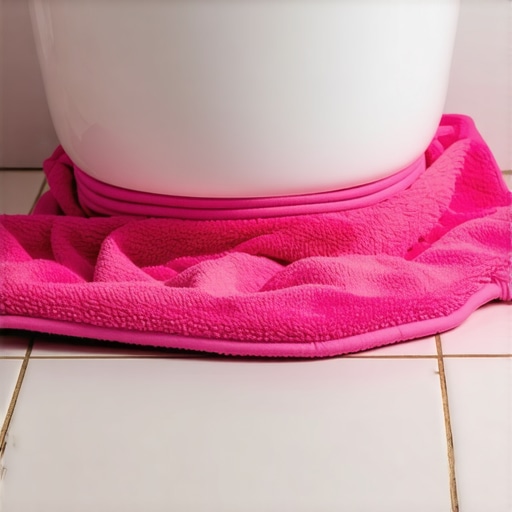
The towel test involves placing a dry paper towel or specialized moisture-wicking fabric around the base of the toilet to identify slow seepage that evaporates before becoming visible. By leaving the towel overnight, you capture minute amounts of water that indicate a failing wax ring or a hairline crack in the porcelain. To start, you must ensure the exterior of the toilet and the surrounding floor are bone dry. Use a hair dryer if you have to. Take a single sheet of white paper towel and fold it into a thin strip. Wrap this strip tightly around the base where the porcelain meets the floor. If you have laminate or carpet install nearby, make sure the towel is tucked against the edge. Leave it there for twenty-four hours. If the towel shows any discoloration, dampness, or a yellow tint, your wax ring has failed. It is not a matter of if it will leak more, but when the floor beneath it will collapse. This test is the only way to catch a leak that is so slow it evaporates into the air before forming a puddle. In high-humidity regions like Florida or the Gulf Coast, this evaporation happens even faster, masking the leak until the subfloor is already mush. A floor is only as good as the subfloor beneath it; deflection is the enemy of every joint.
“A floor is only as good as the subfloor beneath it; deflection is the enemy of every joint.” – Master Flooring Axiom
Why your laminate floor hates your toilet
Laminate flooring is particularly vulnerable to toilet leaks because its core is typically made of high-density fiberboard which expands rapidly when exposed to moisture from the unsealed edges. Once water penetrates the locking joints near a toilet, the planks will cup and peak, making a full replacement inevitable. Even if you bought the expensive waterproof laminate, that rating usually only applies to the top surface. The edges and the tongue-and-groove joints are the Achilles heel. When water seeps from under a toilet, it hits these raw edges immediately. The fiberboard absorbs the water like a sponge. This causes the edges to swell upwards, creating those sharp ridges you feel under your socks. This expansion also puts immense pressure on the toilet flange itself, sometimes even lifting the toilet slightly and breaking the seal even further. It is a vicious cycle. If you are planning a laminate install in a bathroom, you must use a 100 percent silicone sealant in the expansion gap around the toilet. Most installers are too lazy to do this. They just throw the baseboard or a T-molding over it and call it a day. That is how you end up with a floor that looks like a topographical map of the Andes after six months.
Floor leveling requirements before a reinstall
Proper floor leveling before a toilet reinstallation requires a moisture-stable substrate and a high-strength Portland cement-based compound that can withstand the concentrated weight of the fixture. If the subfloor is damp from a previous leak, the leveling compound will fail to bond and eventually crack under the toilet. Before you even think about pouring self-leveler, you have to use a pin-style moisture meter to check the wood or concrete. If the wood has a moisture content above 12 percent, you cannot pour. You have to dry it out with industrial fans for days. If you skip this, the moisture will be trapped under the new leveler. It will eventually turn into a gaseous state and blow the leveler right off the floor. I have seen entire bathrooms where the tile is crunching like potato chips because the installer poured leveler over a damp subfloor. You also need to ensure the leveler is rated for the specific type of subfloor you have. Plywood requires a different primer than concrete. If you get the chemistry wrong, the bond will be mechanical only, not chemical, and the weight of a person sitting on the toilet will cause the leveler to pulverize into dust. Moisture content in the subfloor must be within 2 to 4 percent of the flooring material’s equilibrium moisture content.
“The moisture content of the subfloor must be within 4 percent of the moisture content of the wood flooring for strip flooring.” – NWFA Technical Guidelines
The relationship between showers and toilet leaks
Water from showers often migrates toward the toilet base through subfloor channels, making it difficult to distinguish between a leaking wax ring and poor shower door seals. The towel test isolates the toilet as the source of the moisture by absorbing water before it can be influenced by secondary bathroom humidity. High-end showers with zero-entry thresholds are beautiful, but they are a nightmare for subfloors if the waterproofing membrane does not extend far enough. I have seen water travel fifteen feet along a floor joist from a leaky shower pan only to pool under the toilet. This happens because the toilet hole is often the only break in the subfloor, acting like a drain for any water trapped under the flooring. If you see water at your toilet base after every shower, do not assume it is the toilet. Use the towel test during a period when no one is using the shower. If the towel stays dry after forty-eight hours of toilet use but gets wet after a shower, you have a shower pan or door seal issue. The physics of water movement in a bathroom is complex. Gravity and capillary action work together to destroy your home. You have to be a detective to figure out the true culprit.
| Leak Severity | Subfloor Impact | Repair Action |
|---|---|---|
| Damp Towel | Surface staining only | Replace wax ring immediately |
| Discolored Towel | OSB swelling / Plywood delamination | Dry subfloor for 72 hours |
| Saturated Towel | Structural rot / Joist damage | Replace subfloor section |
| Odor Present | Active mold colonies | Professional remediation required |
When to abandon carpet install in bathroom zones
Installing carpet in a bathroom is a structural liability because the padding acts as a permanent reservoir for moisture from toilet leaks and shower overspray, leading to rapid subfloor decay. Carpet hides the evidence of a slow leak until the floor is soft enough to fall through, making it the most dangerous flooring choice for wet areas. I do not care if you like the feeling of warm toes in the morning. Carpet near a toilet is a health hazard. The fibers trap bacteria and the foam padding underneath holds onto water like a swamp. If a toilet develops a slow leak in a carpeted bathroom, you will never know until the floor starts to sag. By that time, the mold growth is usually extensive. I have ripped out carpet in bathrooms where the floor joists were literally black with rot. If you must have something soft, use a washable bath mat. Never, under any circumstances, glue or tack carpet down around a toilet. It is the quickest way to devalue your home and ruin your air quality. Even the most careful homeowner will eventually have a spill or a slow leak. With carpet, you are just inviting a disaster to stay for dinner. The 1/8 inch that ruins everything is often the gap between the carpet tack strip and the toilet base where water collects and sits forever.
The physics of capillary action in plywood
Plywood subfloors are composed of layered veneers that pull moisture horizontally through a process called capillary action, which means a toilet leak can damage wood several feet away from the actual fixture. This lateral movement of water is why a leak in the master bathroom can cause a ceiling stain in the living room below that is not directly under the toilet. Water molecules are polar. They want to stick to the wood fibers. As the first layer of veneer gets saturated, it pulls water into the next layer and then the next. If the plywood is CDX grade, the glue between the layers might hold up for a while, but eventually, the wood fibers themselves will swell and pull apart. This is called delamination. Once a subfloor delaminates, it has no structural strength. It becomes a series of thin, floppy sheets of wood instead of a solid panel. This is why you cannot just dry out a severely water-damaged subfloor and expect it to be fine. Once those bonds are broken, the floor will always be bouncy. You have to cut it out and start over. I have spent many days with a circular saw cutting out sections of subfloor because someone thought a three dollar wax ring could wait another month.
Checklist for toilet leak prevention
- Check the floor bolts for tightness every six months to ensure the toilet does not rock.
- Perform the towel test annually or if any musty smells develop in the bathroom.
- Ensure the floor leveling compound is fully cured and sealed before installing flooring.
- Use a high-quality reinforced wax ring or a silicone flange seal for better longevity.
- Maintain a 1/4 inch expansion gap around the toilet with laminate or LVP and fill with silicone.
- Inspect the supply line nut for hairline cracks that can mimic a base leak.
The reality of flooring is that water is the ultimate enemy. Whether you are dealing with a carpet install or a complex tile pattern, the subfloor is the foundation of your success. Ignoring a slow leak is like ignoring a termite infestation. It is a slow-motion catastrophe that will eventually demand a high price. Take the time to run the towel test. It costs you nothing and could save you thousands. I have seen the heartbreak of a ruined hardwood floor and the frustration of a buckling laminate planks. Most of it could have been avoided with a little attention to detail and a respect for the physics of moisture. Do not let your subfloor become a cautionary tale. Keep it dry, keep it level, and keep that toilet sealed tight.