The ‘Blue Light’ Method for Finding Hidden Pet Stains in Bedrooms
I once walked into a house where a 15,000 dollar wide-plank walnut floor was cupping so bad it looked like a potato chip because the installer didn’t check the crawlspace humidity. But that was not the worst part. The worst part was the smell that hit me the moment the sun warmed up the master bedroom. The homeowner swore the house was clean, but my moisture meter and my 365nm ultraviolet light told a different story. Flooring is not just about what you see in the showroom. It is a structural engineering challenge where biology and chemistry meet wood and stone. When you have pets, your floor becomes a giant petri dish if you do not understand the physics of absorption. Most guys skip the leveling compound. They think the underlayment will hide the dip. It won’t. I spent three days grinding concrete on a job last month just so the floor wouldn’t click like a castanet, and during that grind, I uncovered decades of pet accidents that had crystallized into the slab. This is why the blue light method is the only way to truly audit the health of your bedroom floor before a new carpet install or a laminate project.
The glowing truth under the ultraviolet bulb
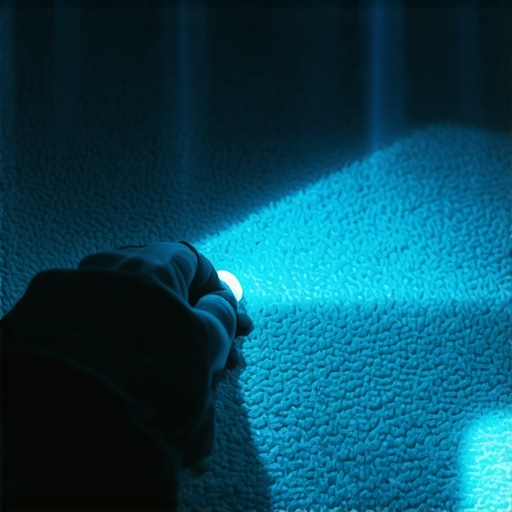
The blue light method uses 365nm ultraviolet radiation to cause organic compounds like urea to fluoresce, making hidden stains visible to the naked eye. This process reveals the exact boundaries of a spill, which is often three times larger on the subfloor than it appears on the surface of your carpet or laminate boards. You need a light that operates in the correct nanometer range. Cheap 395nm lights often show too much purple glare, which masks the pale yellow or neon green glow of dried proteins. When you turn off the overhead lights, you are looking for the phosphorescence of phosphorus and proteins found in animal waste. These elements do not evaporate. They stay behind as salt crystals that attract moisture from the air. This is why a room smells worse on a humid day. The crystals are literally drinking the water from the air and off-gassing the ammonia smell all over again. If you are planning a carpet install, you must do this audit first. Installing new padding over old urea crystals is like putting a clean shirt over a dirty body. The heat from your feet will reactivate those crystals every time you walk across the room.
“A floor is only as good as the subfloor beneath it; deflection is the enemy of every joint.” – Master Flooring Axiom
The chemical war between uric acid and laminate cores
Laminate flooring fails when pet stains penetrate the click-lock joints and reach the high-density fiberboard core. While the wear layer of laminate is technically waterproof, the edges where the planks meet are the Achilles heel of the entire system. Once urine or water from nearby showers hits these seams, it travels downward via capillary action. This is where the structural zooming becomes important. The HDF core is essentially compressed sawdust and resin. When it absorbs liquid, it undergoes an irreversible thickness swell. The fibers expand, but they do not shrink back to their original size once they dry. This creates a peaked seam that you can feel with your socks. If a pet has an accident in the bedroom, the blue light will show a glowing line along these seams. At this point, the floor is no longer just dirty, it is structurally compromised. You cannot sand out a laminate floor. You have to replace the boards. This is why I always tell people to seal their seams with a specialized wax or click-sealant during the initial install if they have aging pets or frequent spills.
Why your subfloor hides the sins of the past
Subfloors act as a biological record because porous materials like plywood and OSB absorb liquid through capillary action. Many installers believe that a thick underlayment will block odors, but the reality is that the subfloor needs to be decontaminated or sealed. I have seen plywood that looked perfect from the top, but when I pulled it up, the bottom was covered in black mold fueled by pet stains that had seeped through the carpet years ago. If your subfloor has a dip, the urine will pool in that low spot. This is why floor leveling is a step you cannot skip. A level floor ensures that liquids stay on the surface longer, giving you time to clean them before they find a path to the wood below. If you have a concrete slab, the urine can actually etch the surface of the concrete, creating a permanent home for bacteria. You have to use an enzymatic cleaner that eats the proteins, not just a soap that masks the scent. After cleaning, using a high-quality primer like shellac-based BIN is the only way to lock those odors in forever so they do not haunt your new flooring.
| Material Type | Porosity Level | Stain Resistance | Structural Risk |
|---|---|---|---|
| Solid White Oak | High | Low | Cupping and Gapping |
| Engineered Maple | Medium | Moderate | Delamination |
| Rigid Core LVP | Zero | High | Joint Failure |
| Traditional Laminate | Medium | Low | Edge Swelling |
| Plywood Subfloor | Extreme | Zero | Rot and Odor |
The leveling compound secret that keeps odors away
Using a self-leveling underlayment creates a non-porous barrier that prevents liquid from reaching the structural subfloor. Most people think leveling is just about making the floor flat for the next guy. It is actually about creating a predictable surface. When you pour a high-quality cementitious leveler, you are filling the pores of the old concrete or wood. This makes the surface much easier to decontaminate if an accident happens in the future. I always look for a leveler with a high compressive strength, usually over 4000 psi. This ensures that the floor does not crack under the weight of heavy bedroom furniture like a California King bed. If the floor is not level, the locking mechanisms on your laminate or LVP will constantly be under stress. This stress creates tiny gaps in the joints, and those gaps are exactly where pet stains will go. I have spent years fixing floors where the locking tabs snapped because the installer was too lazy to use a 10-foot straight edge and some bags of leveler. Do not be that guy. Do the work on the substrate, or the finish floor will fail in six months.
Carpet install disasters that start with a puppy
Carpet installations in bedrooms are particularly vulnerable to pet stains because the pad acts as a secondary reservoir for liquid. When a dog pees on a carpet, the liquid passes through the primary and secondary backings and hits the rebond foam pad. This pad is like a sponge. Even if you steam clean the carpet, the pad remains soaked. The blue light will show a small circle on the carpet, but if you were to pull that carpet back, you would see a stain on the pad that is five times larger. This is why I recommend moisture-barrier padding for every bedroom. These pads have a thin film on the top that prevents liquid from entering the foam. It keeps the mess in the carpet fibers where your extractor can actually reach it. Without this barrier, you are just moving the stain around. I have also seen tack strips that were completely rotted out by pet accidents. The high salt content in urine can even corrode the nails in the tack strip, making the carpet go loose and wavy over time. If you see those black stains around the perimeter of the room, your tack strips are toast and need to be replaced before the new carpet goes down.
“Deflection in a subfloor leads to grout failure in tile and joint fatigue in wood.” – TCNA Installation Handbook Reference
The 1/8 inch that ruins everything when cleaning floors
Maintaining a flatness tolerance of 1/8 inch over 10 feet is the industry standard that prevents mechanical failure and cleaning issues. When a floor has a dip, your mop or floor scrubber cannot reach the bottom of that depression. Over time, dirt, cleaning chemicals, and pet residue build up in these low spots. This creates a sticky film that attracts more grime. If you are using the blue light method, these low spots will often glow the brightest because they have the highest concentration of dried material. When we talk about floor leveling, we are talking about ensuring that every square inch of the floor is accessible to your cleaning tools. In the world of flooring, 1/8 of an inch is a mile. It is the difference between a floor that stays clean and a floor that always feels greasy. I have seen homeowners spend thousands on premium cleaners when the real problem was a subfloor that looked like the rolling hills of Kentucky. You have to get the floor flat before you worry about the aesthetic.
- Inspect the subfloor with a 365nm UV flashlight in total darkness.
- Mark all areas of fluorescence with painters tape for targeted treatment.
- Check the moisture content of the wood using a pin-style meter.
- Use enzymatic cleaners and allow them to sit for the full recommended dwell time.
- Apply a shellac-based sealer to any permanent stains on the subfloor.
- Level the floor to within 1/8 inch over a 10-foot radius using cementitious compound.
- Select a flooring material with high joint integrity like rigid core LVP.
- Install a moisture-barrier underlayment if using carpet or laminate.
- Seal the perimeter expansion gaps with a flexible 100 percent silicone.
- Re-scan the room every six months to catch new accidents early.
Moisture meters and the physics of bedroom floors
A moisture meter is a flooring professional’s most valuable tool for detecting the invisible liquid trapped within the cells of a wood floor. When you are dealing with pet stains, the moisture meter can tell you if the stain is fresh or if the wood has reached a state of equilibrium with the room. Solid wood floors should typically stay between 6 and 9 percent moisture content. If my meter jumps to 15 percent in a spot that looks clean but glows under the blue light, I know there is a deep-seated issue. This is especially important in rooms adjacent to showers. Steam from the bathroom can travel through the walls and settle in the bedroom subfloor, creating a damp environment where bacteria thrive. The combination of heat from a shower and urea from a pet stain is a recipe for a structural disaster. The wood will start to rot from the inside out, a process called brown rot, which destroys the cellulose and leaves the wood brittle. If you catch it early with the light and the meter, you can save the floor. If you wait until the boards start to move under your feet, it is too late.