How to fix a scratched laminate plank with a wax crayon
The reality of the surface wound
Fixing a scratched laminate plank with a wax crayon requires a clean surface and a precise color match to restore the protective wear layer. Most homeowners fail because they do not clean the scratch with denatured alcohol first, which prevents the wax from bonding to the high-density fiberboard core.
Most guys skip the leveling compound. They think the underlayment will hide the dip. It won’t. I spent three days grinding concrete on a job last month just so the floor wouldn’t click like a castanet. That clicking eventually leads to micro-cracks in the wear layer, which is exactly where those scratches start to fester. When you see a scratch, you are looking at a failure of the aluminum oxide coating. This coating is rated on the Mohs scale for hardness, usually sitting around a 9, just below a diamond. When silica or a dragged chair leg exceeds that threshold, it shears the resin and exposes the paper decor layer. This is not just an aesthetic problem. It is a structural entry point for moisture that will cause the HDF core to swell like a sponge. Once that swelling starts, the plank is garbage and no amount of wax will save it. You have to treat every scratch as a leak in a hull. You plug it or you sink. If you are coming from a carpet install background, you might not be used to this level of intolerance. Carpet hides everything. Laminate hides nothing. A 1/8 inch dip in the subfloor will cause the locking mechanisms to flex, which in turn stretches the wear layer and makes it more susceptible to these abrasions.
The physics of the laminate surface layer
Laminate flooring is a composite of melamine resin and aluminum oxide particles pressed over a high-density fiberboard core. The scratch you see is often just a refractive error where the clear coat has been crushed, scattering light and appearing white against the darker wood grain pattern below.
Understanding the molecular makeup of your floor is essential for a permanent repair. The wear layer is not paint. It is a thermoset plastic. When a grain of sand gets caught under a boot, it acts like a diamond-tipped glass cutter. It creates a valley in the resin. If the scratch is shallow, you are only dealing with the wear layer. If you can see brown or beige, you have hit the core. This is where the floor leveling conversation becomes non-negotiable. A floor that is not level moves. That movement creates friction. Friction creates heat. Over time, that heat can actually degrade the bond between the decor paper and the core. When you apply a wax crayon, you are essentially performing a localized lamination. You are filling that valley with a paraffin or carnauba based polymer that has a similar refractive index to the original melamine. This makes the scratch vanish because the light no longer scatters. It passes through the wax and hits the pattern, reflecting back just like the rest of the floor. You cannot just use any crayon from a toy box. You need a hard wax specifically designed for floors that can withstand the pressure of foot traffic without squishing out of the groove.
“A floor is only as good as the subfloor beneath it; deflection is the enemy of every joint.” – Master Flooring Axiom
Why your subfloor is lying to you
A subfloor that looks flat to the naked eye can still have significant variations that lead to surface scratching and joint failure. Using a ten-foot straightedge is the only way to verify that the surface meets the industry standard of 3/16 inch deviation over a ten-foot radius.
I have seen guys install beautiful laminate over old plywood that was rotting from the bottom up. They think the foam underlayment is a magic carpet that solves all sins. It is not. If your subfloor has a dip, the laminate plank will bridge that gap. Every time you walk on it, the plank bends. That bending puts the wear layer under tension. A wear layer under tension is far easier to scratch than one that is properly supported by a solid, level subfloor. This is why floor leveling is the most skipped step in the industry and the reason why so many laminate floors look like a mess after two years. If you are doing this repair near showers or kitchens, the stakes are even higher. High humidity levels will enter the scratch and cause the core to expand, which will push your wax repair right out of the hole. You need to ensure the room is acclimated and the subfloor is dry before you even think about opening your repair kit. The chemistry of the bond depends on a stable environment. If the house is at 60 percent humidity during the repair and drops to 20 percent in the winter, the core will shrink and the wax will lose its grip.
The inventory of a professional repair kit
A professional laminate repair kit must include a variety of hard wax sticks, a battery-operated heating iron, a plastic leveling spatula, and lint-free buffing cloths. Soft waxes are insufficient for flooring because they attract dirt and eventually wear away under standard cleaning protocols.
| Repair Method | Durability Rating | Heat Resistance | Application Time |
|---|---|---|---|
| Wax Crayon | Medium | Low | 5 Minutes |
| Hard Wax Melt | High | Medium | 15 Minutes |
| Acrylic Resin | Very High | High | 30 Minutes |
| Plank Replacement | Maximum | Maximum | 2 Hours |
Selecting the right color is an art form. You never use just one color. Real wood has variance. To make a scratch disappear, you need a base color that matches the lightest part of the grain and a darker tone to mimic the ticking or the knots. When you melt these together into the scratch, you create a 3D effect that fools the eye. Cheap kits from big box retailers usually give you three sticks that look like mud. Professional kits give you twenty shades. You also need to consider the sheen. If your floor is a high-gloss piano finish, a matte wax will look like a thumbprint on a window. You will need a gloss lacquer pen to seal the wax after it sets. This is the difference between a hack job and a master repair. The tools define the outcome. If you are using a butter knife to level the wax, you are going to scratch the surrounding area. Use the plastic spatula. It is designed to be harder than the wax but softer than the aluminum oxide wear layer.
Execution of the surgical wax fill
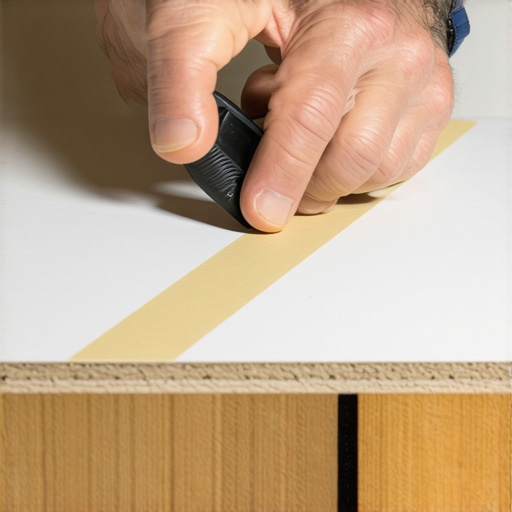
The execution of a wax fill involves cleaning the debris from the scratch, melting the wax into the void at a controlled temperature, and scraping the excess away at a 45-degree angle. This ensures the fill is flush with the surface without damaging the adjacent factory finish.
- Clean the scratch using a cotton swab and denatured alcohol to remove oils.
- Select two wax sticks that match the grain and the base tone of the plank.
- Heat the tip of the wax stick with a butane or electric heat tool until it reaches a thick consistency.
- Drip the wax into the scratch, overfilling it slightly to account for cooling shrinkage.
- Wait sixty seconds for the wax to harden but not become brittle.
- Use the serrated edge of the plastic scraper to remove the excess wax in short, firm strokes.
- Buff the area with a gray abrasive pad to match the texture of the surrounding laminate.
- Apply a clear coat pen if the floor has a high-sheen finish.
The speed of the scrape is where most people mess up. If you go too fast, you create friction heat that softens the wax again, pulling it out of the scratch. You want slow, deliberate pressure. If the scratch is deep, do it in layers. Fill half the depth, let it cool, then do the top layer. This prevents the wax from trapping air bubbles. Air bubbles are the enemy because they will collapse under the weight of a chair leg later. You are building a structural bridge across a canyon. Treat it with that level of respect.
The ghost in the expansion gap
Laminate floors are floating systems that require a minimum 3/8 inch expansion gap at all vertical obstructions to prevent the planks from peaking or buckling. If a floor is locked against a wall, the resulting pressure can cause surface fractures that look like scratches but are actually structural breaks.
I have seen people try to fix a scratch that was actually a stress fracture. No wax in the world will fix a stress fracture. If your floor is tight against the baseboards, the whole system is under load. It is like a spring that is coiled too tight. Any impact on the surface will result in a much larger crack than it would on a properly installed floor. This often happens after a carpet install where the installer didn’t leave enough room for the transition strips. They hammer the T-molding down tight and lock the floor in place. You need to check your perimeter before you blame the scratch on a dropped plate. If the floor cannot move, the wear layer will eventually fail at its weakest point. This is the molecular reality of high-density fiberboard. It wants to expand when the humidity hits. If it can’t go out, it goes up. When it goes up, the surface is exposed to more abrasion. Fix the expansion gap first, then fix the scratch. Otherwise, you are just painting a sinking ship. The final verdict on laminate repair is that it is 90 percent preparation and 10 percent application. If your subfloor is level, your expansion gaps are correct, and your surface is clean, that wax crayon will last for a decade. If you ignore the physics, you will be doing the same repair next month.