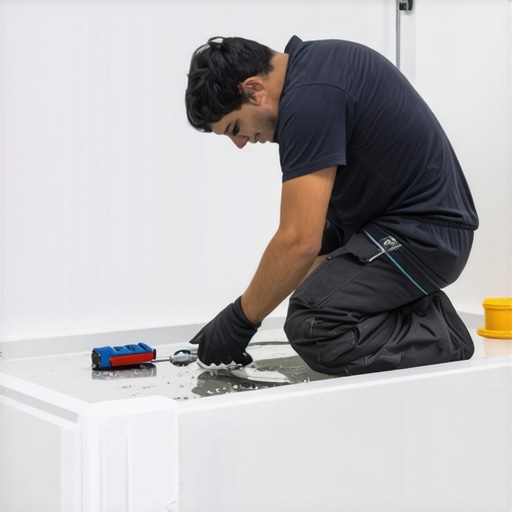
The ‘Drip Test’ for checking shower pan integrity
How the drip test saves your shower from structural rot
I spent three days grinding concrete on a job last month just so the floor wouldn’t click like a castanet. The homeowner thought I was crazy for charging three days of labor just to move dust around, but they changed their tune when the straightedge showed a half inch dip that would have snapped every locking mechanism on their new laminate. Most guys skip the leveling compound because they think the underlayment will hide the dip. It won’t. That same lazy philosophy is what kills showers. I have walked into too many bathrooms where the grout is pristine but the subfloor is a marsh because someone skipped the drip test. You can’t trust a visual inspection when you are dealing with hydrostatic pressure and capillary action. I smell like floor wax and sawdust most days because I do things the hard way, which is the only way that lasts twenty years. Flooring is not a decoration. It is a structural engineering challenge that starts with the chemistry of your slab and ends with the physics of your drain.
The hidden disaster behind the tile
A drip test or flood test involves plugging the shower drain and filling the basin with water to check for leaks. This process ensures the waterproofing membrane and shower pan are watertight before tile installation, preventing structural rot and mold in the subfloor and framing. If you skip this, you are betting your house on a ten cent piece of plastic. The ‘drip’ specifically refers to monitoring the area directly beneath the drain assembly to ensure the solvent weld or the clamping ring hasn’t failed under the weight of the water. When you fill a standard shower base with two inches of water, you are looking at several hundred pounds of weight pressing down on that membrane. That weight forces water into every microscopic pinhole. If there is a failure, it usually happens at the transition between the vertical pipe and the horizontal flange. I have seen guys use the wrong glue on a PVC liner, and within ten minutes, that drip becomes a steady stream that eats through the plywood subfloor below.
“A floor is only as good as the subfloor beneath it; deflection is the enemy of every joint.” – Master Flooring Axiom
Why your subfloor is lying to you
Floor leveling is the mandatory first step for any installation whether you are putting down tile, laminate, or carpet install. A subfloor that is not within 1/8 inch of level over a 10 foot radius will cause tile tenting, grout cracking, or the annoying clicking sound in floating floors. Most installers think a little bit of thin-set can fix a slope. It cannot. Thin-set is an adhesive, not a filler. When it is applied too thick to compensate for a dip, it shrinks as it cures, creating a void that leaves the tile unsupported. This is why I spend so much time with the grinder and the self-leveling underlayment. In a shower, the subfloor needs to be even more precise. You need a perfect 1/4 inch per foot slope toward the drain. If the subfloor has a hump, the water will pool in the corners, eventually saturating the mortar bed and bypassing the topical waterproofing. It is a slow death for your floor joists.
| Membrane Type | Material Composition | Mil Thickness | Cure Time Required |
|---|---|---|---|
| PVC Liner | Polyvinyl Chloride | 40 mil | Immediate |
| CPE Liner | Chlorinated Polyethylene | 40 mil | Immediate |
| Liquid Applied | Polymer Resin | 20-30 mil | 24 Hours |
| Sheet Membrane | Polyethylene | 8-12 mil | Immediate |
The physics of the drain assembly
The shower drain is the most vulnerable point in the entire bathroom because it connects two different materials that expand and contract at different rates. When you perform a drip test, you are testing the integrity of the clamping ring and the weep holes. Most homeowners do not realize that water actually goes through the grout and the mortar bed. The weep holes in the drain assembly are there to catch that moisture and guide it down the pipe. If the installer got mortar in those holes, the water stays trapped. It sits there, stagnating, until it finds a way out through the wood framing. I always use a bit of crushed stone or a specialized plastic spacer around the drain base to keep those holes clear. It is about managing the molecular movement of water through porous media. The chemistry of the bond between the liner and the drain flange is delicate. Use the wrong sealant and you might as well not have a drain at all.
The anatomy of a failed curb
The shower curb is often the first place where a leak shows its face because installers love to drive nails through the top of it. You never, ever penetrate the waterproofing membrane on the top or inside of the curb. I see it all the time. Guys want to secure their backer board, so they drive a screw right through the liner. Now you have a hole at the exact point where water pressure is highest when the shower is in use. When I do a drip test, I fill the water right up to the top of that curb. If the level drops even a sixteenth of an inch over twenty four hours, I know there is a puncture. You have to think about the capillary action. Water can climb up a vertical surface if there is a tiny gap. It will wicking into the 2x4s of the curb, rot them from the inside out, and then move into the carpet install in the bedroom next door. By the time you see the stain on the ceiling below, the damage is already five figures deep.
- Clean the entire shower pan of any debris or sharp pebbles that could puncture the liner.
- Insert a pneumatic or mechanical test plug into the drain pipe below the level of the flange.
- Fill the shower base with water to a depth of at least two inches or up to the curb.
- Mark the water line with a grease pencil or tape on the tile or liner.
- Wait exactly twenty four hours to ensure no evaporation or leakage has occurred.
- Inspect the ceiling below or the subfloor for any signs of moisture or dripping.
How gravity destroys your framing
Subfloor integrity is compromised the second water touches it because plywood and OSB are essentially sponges made of glue and wood chips. Once those wood fibers saturate, they expand, and the structural bond of the glue fails. This is called delamination. If you have a leaking shower pan that fails the drip test, the water will travel along the joists, often showing up ten feet away from the actual leak. This makes troubleshooting a nightmare. This is why I am so aggressive about the drip test. I would rather spend two days finding a leak in a dry room than two months replacing a rotten floor system. In regions like the Pacific Northwest, where the ambient humidity is already high, a subfloor that gets wet from a shower leak will never dry out on its own. It will grow black mold within forty eight hours. You have to be a stickler for the TCNA standards. There is no middle ground when it is your reputation and the homeowner’s safety on the line.
“Standard B415 of the TCNA Handbook requires a 24-hour water test for all tiled showers to ensure the assembly is watertight before finishing.” – Master Flooring Axiom
The transition to laminate and carpet
The transition area where the bathroom tile meets the hallway laminate or carpet install is the most common failure point for aesthetic reasons. People hate T-moldings. They want that clean, flush look. But if your bathroom floor isn’t level with the hallway floor, you are going to have a trip hazard or a gap that collects dirt and moisture. I spend a lot of time calculating the finished height of the tile, the thin-set, the backer board, and the waterproofing membrane to ensure it matches the 12mm laminate next door. If I have to, I will use a double layer of plywood in the hallway to bring it up to the tile height. You have to plan this before the first nail is driven. Most guys just wing it and then use a bulky, ugly reducer at the end. That is the mark of an amateur. A real pro understands the architecture of the entire floor, from the shower drain to the front door. You have to respect the expansion gaps too. Laminate needs space to breathe, and if you butt it tight against the bathroom tile, it will buckle the first time the humidity hits eighty percent.
The physics of the twenty four hour wait
The wait time during a flood test is not a suggestion. It is a physical requirement based on the rate of penetration. Water is a polar molecule. It wants to find a way to bond with other things. In a shower pan, the water is looking for a path of least resistance. Sometimes a leak is so small it takes twelve hours just for the water to saturate the mortar bed enough to start dripping out the bottom. If you only wait two hours, you will miss it. I have seen leaks that only appear after the water has sat long enough to cool down or warm up, causing the PVC liner to slightly shift. You also have to account for evaporation. In a dry climate like Arizona, you might lose a little bit of water to the air, so you have to be smart enough to distinguish between a leak and the atmosphere. I usually leave a bucket of water next to the shower as a control. If the water in the bucket drops the same amount as the water in the shower, I know I’m safe. If the shower dropped more, I have a problem.
How to fix a failed drip test
If you fail the drip test, you do not just throw more goop on it. You have to find the source. Usually, it is a bad weld at the corner or a loose bolt on the drain flange. I have had to tear out entire pans because the installer used a staple gun and hit the liner. You can’t patch a liner and expect it to hold for twenty years. The chemical bond is broken. If it is a liquid membrane, you might be able to apply another coat, but you have to make sure the first coat was clean and dry. Most of the time, a failure means you start over. It is painful, but it is cheaper than a mold remediation bill later. This is why I am the guy with the level and the moisture meter. I don’t want to do the job twice. I want to do it once and forget about it. That is the difference between a floor that looks good in a photo and a floor that performs for a generation. Respect the physics. Do the test. Grind the concrete. Level the subfloor. It is the only way to sleep at night in this business.