The Proper Way to Seal a Shower Bench with Liquid Membrane
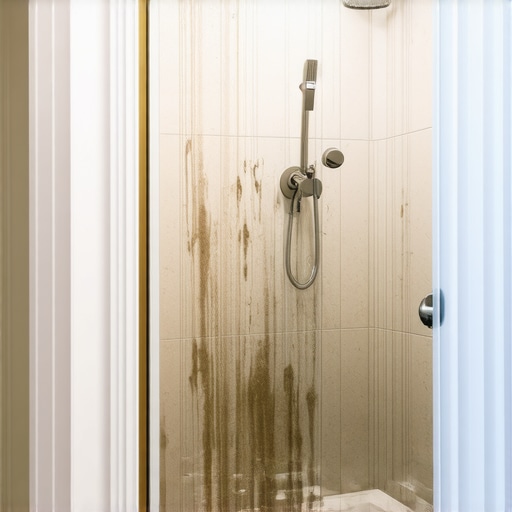
I once spent three days grinding concrete on a job just so the floor wouldn’t click like a castanet. Most guys skip the leveling compound. They think the underlayment will hide the dip. It won’t. That same level of neglect happens in the shower. I have walked into bathrooms where the homeowner spent ten grand on marble, but the bench was framed with raw 2x4s and covered in standard drywall. Within six months, the grout started crying brown streaks. The bench was rot-hollowed. A shower bench is a structural engineering challenge, not a furniture piece. It is a horizontal surface that must shed water while resisting the hydrostatic pressure of a seated adult. If you treat it like a carpet install or a laminate floor transition, you will fail. This is about the molecular bond of the membrane to the substrate.
The structural reality of a shower bench
A shower bench is essentially a dam that sits in the middle of a wet zone. Every time the shower runs, gravity pulls water into the horizontal surface. If that surface is not sloped at exactly one quarter inch per foot toward the drain, water sits. Liquid membrane is your only defense against that standing water migrating into the framing. Unlike a floor leveling project where you want a flat surface, the bench requires a specific pitch. You must ensure the substrate is cementitious. Do not apply liquid membrane to wood. Use a cement backer board or a pre-sloped high-density foam form. The chemistry of the membrane depends on an inorganic surface to create a mechanical bond. When the polymer chains in the liquid dry, they shrink slightly, pulling themselves into the pores of the cement. On wood, they just sit on top until the wood expands and snaps the bond.
“A floor is only as good as the subfloor beneath it; deflection is the enemy of every joint.” – Master Flooring Axiom
The physics of liquid membrane adhesion
The liquid membrane is an elastomeric compound. It is designed to stretch without breaking. Think of it as a rubber glove for your bench. For this to work, the substrate must be clean. I mean hospital clean. Any dust from floor leveling in the other room that drifted into the shower will act as a bond breaker. You need to vacuum the bench with a HEPA filter and then wipe it with a damp sponge. If you see a bead of water on the surface, there is oil or wax present. That must be ground off. The membrane needs to penetrate. Most installers thin the first coat, but I don’t recommend that unless the manufacturer explicitly states it. You want full strength. You are looking for a wet film thickness of thirty mils. That is roughly the thickness of a credit card.
Managing the corners and transitions
The 1/8 inch that ruins everything is the gap at the corner. This is where the bench meets the wall. This is a change of plane. In the world of showers, a change of plane is where movement happens. If you just paint the liquid into the corner, it will crack as the house settles. You must use a reinforcing fabric or a transition tape. You embed the tape into a thin layer of liquid, then paint over it. This creates a bridge. The membrane can then stretch across the gap without tearing. It is the same logic as taping a joint in a laminate underlayment, but with higher stakes. Without that fabric, the membrane is just paint. With it, it is a structural gasket.
| Feature | Liquid Membrane | Sheet Membrane |
|---|---|---|
| Application Method | Brush or Roller | Thin-set Mortar |
| Corner Handling | Reinforcing Fabric Required | Pre-formed Corner Pieces |
| Curing Time | 12 to 24 Hours | Immediate Tiling |
| Visual Inspection | Color Change Indicates Dry | Thickness is Constant |
The science of the second coat
One coat is a prayer, not a plan. You need two coats. The first coat fills the pores. The second coat builds the millage. You must apply the second coat in a direction perpendicular to the first. This cross-hatching technique ensures that any pinholes left behind by the first pass are sealed. If you went horizontal first, go vertical second. This is technical floor leveling for your walls. You are building a uniform skin. Do not rush the drying time. If the humidity is high, the membrane will stay tacky. If you tile over wet membrane, you trap the moisture. This leads to a process called re-emulsification. The membrane turns back into a liquid under the tile. Your bench will leak, and your tile will pop off in sheets.
- Ensure the bench has a 2 percent slope toward the drain.
- Apply mesh tape to all internal and external corners.
- Use a 3/16 inch v-notch trowel to gauge thickness if rolling is uneven.
- Allow 24 hours before performing a flood test.
- Never mix different brands of liquid membrane.
The flood test and final verification
Before a single piece of tile goes down, you must prove the system works. This is where the men are separated from the boys. Plug the drain and fill the shower base until the water level reaches the top of the bench. Mark the water line. Wait twenty four hours. If that water level drops and it didn’t evaporate, you have a leak. It is usually in the corners. It is better to find that out now than after you have installed expensive stone. Most guys skip this because it takes time. But I have seen five figure showers torn out because of a pinhole in a bench corner. The liquid membrane should look like a solid sheet of plastic. There should be no bubbles. Bubbles mean outgassing from the substrate. If you see bubbles, pop them, sand the area, and re-apply.
“Waterproofing is not a suggestion; it is a legal and structural mandate for the longevity of the home.” – TCNA Handbook Principle
The reality of moisture migration
Water does not just go down. It goes sideways through capillary action. If your bench is properly sealed but your carpet install in the bedroom is right against the bathroom door without a transition, moisture can wick through the subfloor. Everything is connected. When we seal a bench, we are not just protecting the seat. We are protecting the joists under the bathroom, the ceiling in the kitchen below, and the air quality of the house. Mold grows in the dark, wet spaces behind tile. A pinhole in your membrane is an invitation for a colony to start. Use a high-quality, modified thin-set to bond your tile to the membrane. Not all thin-sets are compatible with all membranes. Check the bag. If it doesn’t say it bonds to non-porous surfaces, it won’t stick to the rubber skin you just built.
The ghost in the expansion gap
When the tile goes on the bench, people forget about expansion. Tile expands when it gets warm. The bench is in a shower. It gets warm. If you jam the tile tight against the wall, it will tent. It will exert pressure on the corners and potentially tear the membrane you worked so hard to apply. Leave a 1/8 inch gap at every corner. Fill that gap with 100 percent silicone sealant, not grout. Grout is rigid and porous. Silicone is flexible and waterproof. This allows the bench to move independently of the walls. It is a floating system, much like a laminate floor needs an expansion gap at the perimeter. This is the difference between a job that lasts five years and a job that lasts fifty years. Do it right or don’t do it at all.