How to level a floor that has a large hump in the center
The 1/8 inch that ruins everything
Floor leveling requires a 10-foot straightedge and a diamond grinding wheel to remove high spots. Most humps are caused by foundation settlement, joist crowning, or subfloor moisture expansion. You must achieve a flatness tolerance of 3/16 inch over 10 feet for a successful laminate or hardwood installation.
Most guys skip the leveling compound. They think the underlayment will hide the dip. It won’t. I spent three days grinding concrete on a job last month just so the floor wouldn’t click like a castanet. That job was a nightmare because the previous contractor thought he could just float a floor over a three-quarter inch hump. When I walked in, the locking mechanisms on the high-end laminate had already snapped. The floor felt like a trampoline. You could hear the friction of the wood fibers rubbing together every time someone walked near the kitchen island. This is the reality of ignoring the physics of your substrate. A floor is not a decorative rug. It is a structural layer that must withstand thousands of pounds of pressure over its lifetime. If the ground beneath it is shaped like a mountain, the material on top will eventually succumb to the stress of gravity and foot traffic. I do not care if you bought the most expensive plank in the world. If your subfloor is garbage, your floor is garbage.
The physics of the subfloor hump
Subfloor humps occur when wooden joists crown or concrete slabs heave due to hydrostatic pressure. Wood is a hygroscopic material that expands and contracts with relative humidity. When a joist is installed with the crown facing up, it creates a structural peak that translates directly through the plywood subfloor to your finished surface.
When you are dealing with a wood subfloor, the hump is usually a structural signal. You are looking at the crown of a joist. Wood has a memory. Over decades, a joist can bow upward or downward. If it bows up, you have a ridge that will act as a pivot point for any rigid flooring like laminate or engineered wood. Imagine a see-saw. That is what your floor becomes. Every time you step on one side of the hump, the other side lifts. This movement is what kills carpet install projects too, as it causes the tack strips to pull or the backing to delaminate over the peak. In wet areas like showers, a hump is even more dangerous. It can reverse the necessary slope toward the drain, leading to standing water and mold growth under the tile.
“A floor is only as good as the subfloor beneath it; deflection is the enemy of every joint.” – Master Flooring Axiom
Identifying the peak of the crown
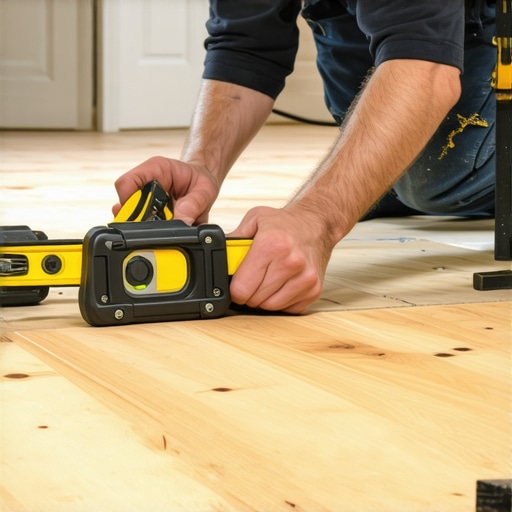
Identifying a floor hump involves using a laser level or a magnesium straightedge to map the high spots. You must mark the perimeter of the hump with a carpenter pencil to visualize the slope transition. A moisture meter should also be used to ensure the hump is not caused by active water infiltration.
I use a 10-foot magnesium straightedge because it does not bend. I lay it across the room and look for light passing under the ends. If the center is touching and the ends are hovering, you have a hump. I mark the highest point with an X. Then I move the level in a 360 degree radius. This gives me a topographical map of the failure. If you are working on a concrete slab, that hump could be a sign of a settling foundation or even a plumbing leak beneath the vapor barrier. You have to be a detective before you can be an installer. If the concrete is pushing up, no amount of grinding will fix it until the hydrostatic pressure is addressed.
| Subfloor Type | Primary Leveling Method | Material Required | Cure Time |
|---|---|---|---|
| Concrete Slab | Diamond Grinding | HEPA Vacuum and Grinder | Immediate |
| Plywood Joists | Plane and Sister | Electric Plane and 2×10 Lumber | 24 Hours |
| OSB Subfloor | Sanding and Shimming | Belt Sander and Asphalt Shingle | Immediate |
| Wet Areas | Screed Bedding | Mud Set or Thinset | 48 Hours |
The chemistry of the mechanical bond
Self-leveling underlayment requires a high-solids acrylic primer to ensure a mechanical bond to the substrate. Without primer, the porous subfloor will suck the moisture out of the leveling compound too fast. This leads to pinholing and delamination, which causes the floor to crack under load.
If you are trying to level a hump by adding material around it to create a flat plane, you need to understand the molecular weight of your primer. I see guys pour self-leveling compound straight onto dusty concrete. It will pop off in sheets. You need to prep the surface to a concrete surface profile of 2 or 3. This means it should feel like 60-grit sandpaper. If you are working on wood, you need a primer that can handle the expansion and contraction of the fibers. Wood moves. Concrete stays still. If you use a rigid leveler on a flexible wood subfloor without the right latex additives, it will crumble like a dry cookie. It will buckle. There is no middle ground here.
“Substrate preparation is 90 percent of the labor; the finished floor is merely the victory lap.” – Master Flooring Axiom
Grinding the concrete mountain
Concrete grinding involves using a 7-inch angle grinder with a turbo cup wheel and a dust shroud. You must wear a P100 respirator to prevent silicosis from the silica dust. Grinding is the only way to permanently remove a hump from a structural slab without raising the overall floor height.
Grinding is a dirty, miserable job. It smells like burnt stone and electricity. But if you have a 1/2 inch hump in a slab, you cannot just pour leveler everywhere else to match it. You would end up raising your entire floor, which ruins your door clearances and baseboard heights. You take the grinder and you start at the X. You work in circular motions. You check your progress every two minutes with the straightedge. It is a game of millimeters. If you go too deep, you create a birdbath. Then you are back to square one, mixing patching compound to fill the hole you just made.
The checklist for subfloor perfection
- Verify moisture levels in the subfloor using a pin-type meter.
- Secure all loose plywood sheets with 2.5-inch deck screws.
- Identify the highest point of the hump using a 10-foot level.
- Grind or plane the high spot until it meets the 3/16-inch tolerance.
- Vacuum all dust using a HEPA-filtered shop vac to ensure adhesion.
- Apply the appropriate primer for your specific leveling compound.
- Allow for full acclimation of the flooring material for 72 hours.
Why your subfloor is lying to you
Subfloors often appear flat to the naked eye but hide significant deflection under load. You must test for joist bounce by jumping in the center of the room. If the subfloor moves, your hump is likely a structural failure rather than a simple wood crown.
I have seen floors that look perfect until you put a refrigerator on them. Then suddenly, the hump appears because the joists are sagging everywhere except where they sit on a load-bearing wall. That is a deflection issue. If you try to level that with cementitious patch, the weight of the patch will just make the sag worse. You have to go into the crawlspace. You have to look at the piers and the girders. Sometimes you have to sister the joists. This means bolting a new, straight board to the old, curved one. It is a brutal, cramped job, but it is the only way to stop the floor leveling project from becoming a recurring nightmare. The 1/8 inch you ignore today will be the 1/2 inch gap in your laminate joints tomorrow. Do not trust your eyes. Trust the tools. Test everything twice. If the floor clicks, you failed. If it moves, you failed. Build it like it is going to last a century, even if the homeowner only cares about the next five years.