The ‘Tapping’ trick for finding loose subfloor nails
The tapping trick that reveals your hidden subfloor failures
Most guys skip the leveling compound. They think the underlayment will hide the dip. It won’t. I spent three days grinding concrete on a job last month just so the floor wouldn’t click like a castanet. That is the reality of the trade. If you do not respect the substrate, the substrate will humiliate you. You can buy the most expensive wide-plank white oak in the world, but if it sits on a subfloor that moves, it will squeak, crack, and eventually fail. I have seen fifteen thousand dollar projects go to the landfill because an installer was too lazy to check for loose fasteners. You have to be a detective before you can be a craftsman.
The physics of the subfloor squeak
A subfloor squeak occurs when a loose nail rubs against the wood fibers of a joist or the subfloor panel itself. This movement is caused by deflection, which is the vertical displacement of the floor under a load. Proper fastener engagement and structural integrity are required to eliminate these acoustic failures. When a house settles or the humidity fluctuates, wood shrinks and expands. A smooth-shank nail that was tight three years ago can lose its grip. When you walk over that spot, the plywood moves down, but the nail stays put, or vice versa. That friction creates the high-pitched chirp that drives homeowners crazy. It is not just an annoying sound. It is a sign of mechanical failure. Every time that board moves, it is stressing the tongue and groove joint of your finished floor. In a laminate installation, this vertical movement is the primary cause of locking mechanism failure. The plastic or HDF joints are not designed to be a shock absorber for a trampoline subfloor.
“A floor is only as good as the subfloor beneath it; deflection is the enemy of every joint.” – Master Flooring Axiom
The tapping trick for finding loose subfloor nails
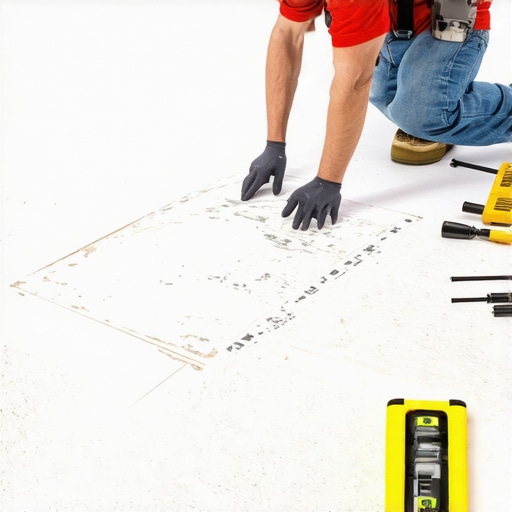
The tapping trick involves using the handle of a heavy screwdriver or a hammer to strike the subfloor surface across its entire area. A solid connection produces a sharp, high-frequency thud, while a loose fastener or a void between the plywood and the joist produces a hollow, low-frequency vibration. This is sensory diagnostics at its finest. You do not need an expensive infrared camera to find a problem. You need a pair of good knees and a focused ear. I start at one corner of the room and move in a grid pattern. You are listening for the change in pitch. When you hit a spot where the plywood has pulled away from the joist, the sound changes instantly. It sounds empty. That is where you mark the floor with a wax crayon. Those marks are your map for the repair phase. This is especially critical before a carpet install, as any lump or loose board will be felt through even the thickest pad.
The geometry of subfloor deflection
Subfloor deflection is measured as the ratio of the span length to the depth of the dip, often expressed as L/360 for ceramic tile or L/480 for natural stone. Excessive deflection causes grout to crack and tiles to delaminate from the substrate. We are talking about the microscopic bending of wood. If your joists are spaced too far apart, or if the plywood is too thin, the floor will flex. This flex is the silent killer of showers and bathroom floors. When you build a walk-in shower, the subfloor must be rock solid. If there is even a millimeter of movement, the waterproof membrane can be stressed beyond its elastic limit. I have torn out showers where the leak was not caused by bad plumbing, but by a subfloor that moved so much it tore the corner tape of the liquid-applied membrane. You must verify the joist spacing and the thickness of the subfloor before you ever think about thin-set.
| Fastener Type | Pull-out Resistance | Shear Strength | Best Use Case |
|---|---|---|---|
| Smooth Shank Nail | Low | Moderate | Temporary Bracing |
| Ring Shank Nail | High | High | Subfloor to Joist |
| Wood Screw | Very High | Low | Cabinetry Only |
| Structural Flooring Screw | High | High | Subfloor Repair |
Floor leveling and the chemistry of adhesion
Floor leveling requires the use of polymer-modified self-leveling underlayment to create a flat surface within 1/8 inch over a 10-foot radius. Proper surface preparation, including the application of a high-solids primer, is mandatory to prevent the leveling compound from delaminating or cracking due to rapid dehydration. People think you just pour the bag and walk away. That is a recipe for disaster. If the subfloor is dusty or porous, it will suck the water out of the leveling compound before the polymers can cross-link. This results in a chalky, weak surface that will crumble under the weight of the furniture. I always use a spiked roller to release the surface tension and trapped air bubbles. This ensures the floor leveling compound reaches its maximum density. If you are prepping for laminate, this step is what separates a floor that feels like a solid slab from one that feels like a cheap temporary stage. You want that flat surface so the planks can float without any hollow spots underneath.
The structural cost of ignoring the subfloor
Ignoring subfloor issues leads to catastrophic failure of the finished flooring material, including broken click-lock joints, cracked tile grout, and premature wear of the wear layer. Remediation after the finished floor is installed costs significantly more than the initial preparation. I have seen guys try to fix a squeak by shooting a finish nail through the top of a prefinished hardwood board. It never works. You are just putting a band-aid on a broken leg. The only way to fix it is from the bottom up. If you have access to the joists from a basement or crawlspace, you can use subfloor adhesive and shims to stop the movement. If not, you are pulling up the old floor. I tell my clients that eighty percent of the labor cost is in the prep. If they do not like that, they can find a cheaper guy who will be out of business by the time the floor starts falling apart in six months. Professionals understand that the surface is just the skin. The subfloor is the skeleton. If the skeleton is weak, the body fails.
“Moisture is the primary catalyst for structural degradation in wood-based subfloors; always maintain a consistent relative humidity between 35 and 55 percent.” – NWFA Technical Guidelines
- Check moisture content with a pin-type meter.
- Verify joist spacing is 16 inches on center or less.
- Sand down all high seams in the plywood.
- Fill all voids with a non-shrinking patch compound.
- Use 2-inch floor screws to reinforce every joist connection.
The final walkthrough of the substrate
Before the first plank of laminate or the first roll of carpet install begins, you must walk the floor one last time. This is not a casual stroll. You are looking for any sign of movement. You are looking for the 1/8 inch gap that could ruin the entire aesthetic. In a bathroom, you are checking that the showers area is perfectly sloped and the substrate is rigid enough for tile. My reputation is built on the things people never see. They see the beautiful oak, but I know it is the ring-shank nails and the three bags of floor leveling compound that are doing the real work. Don’t be the guy who rushes the prep. Be the guy whose floors are still silent and level twenty years from now. That is the mark of a master architect of floors. It starts with a hammer, a screwdriver, and the patience to listen to what the wood is telling you. If you hear a hollow sound, you have work to do. Do it right the first time, or don’t do it at all.