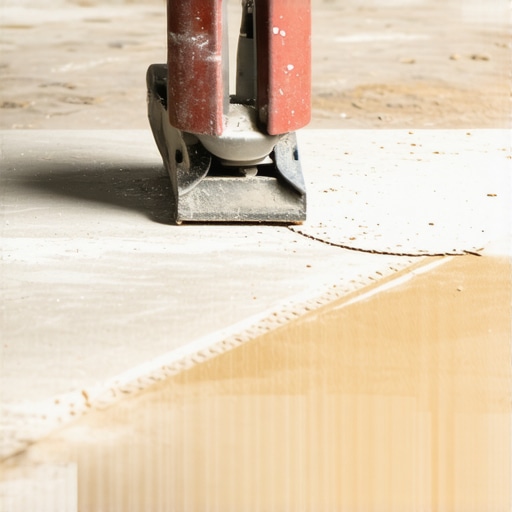
Why your floor leveler has a shiny film on top
The sight of a mirror-like finish on a freshly poured subfloor might look impressive to the untrained eye, but to a veteran installer, it is a flashing red light. I spent three days grinding concrete on a job last month just so the floor wouldn’t click like a castanet. Most guys skip the leveling compound. They think the underlayment will hide the dip. It won’t. When you see that glass-like sheen, you are often looking at a structural failure in the making. It smells like wet lime and failure. That film is usually laitance or a concentrated layer of polymers that have migrated to the surface because the chemistry of the mix was compromised. If you ignore it and move straight to your laminate or carpet install, you are gambling with the bond strength of your entire floor system.
The mirror finish that signals a bond failure
A shiny film on top of floor leveler, technically known as laitance, consists of weak cement particles and lime that rise to the surface due to excess water. This brittle layer lacks structural integrity and will prevent adhesives from sticking. It forms when the water to powder ratio is exceeded during the mixing process. When you pour a self leveling underlayment, you are initiating a complex chemical hydration process. If there is too much water, the heavy aggregates sink to the bottom while the lighter particles and excess moisture float to the top. This creates a surface that looks smooth and shiny but is actually soft and dusty once it fully cures. You cannot install a high performance floor over a dusty surface. It will peel. It will crack. It will fail.
The physics of polymer migration
Polymer migration occurs when high concentrations of redispersible polymer powders float to the top of the leveling pour because of improper mixing or environmental factors. Modern self levelers are high tech soups of calcium aluminate cement, silica sand, and chemical additives. These polymers are designed to give the floor flexibility and stickiness. However, if the mix is whipped at too high a speed, air is entrained into the slurry. The air bubbles rise and bring the polymers with them, creating a plastic like skin. This skin prevents the leveler from breathing and can lead to pinholes or a surface that is too slick for thin-set or glue to bite into. In the world of high end showers and wet rooms, this film is a disaster because it prevents waterproofing membranes from achieving a mechanical bond.
“A floor is only as good as the subfloor beneath it; deflection is the enemy of every joint.” – Master Flooring Axiom
The preparation protocol for professional pours
Preparation for floor leveling requires a clean, porous concrete surface and a high quality primer to prevent the subfloor from sucking the life out of the leveler. If the concrete is too dry, it will pull the water out of the leveler too fast, causing it to crack. If the concrete is sealed, the leveler won’t stick. We use the Concrete Surface Profile or CSP scale to determine readiness. For most residential jobs involving laminate or carpet install, a CSP of 2 to 3 is required. This means the concrete should feel like 60 grit sandpaper. If your slab is smooth as glass before you start, your leveler will eventually pop off like a scab. I always tell my apprentices that the pour is the easy part. The grinding, vacuuming, and priming is where the money is made. If you skip the prep, you might as well throw your money into the dumpster.
| Subfloor Material | Required CSP Rating | Recommended Primer Type | Acclimation Time |
|---|---|---|---|
| Standard Concrete | CSP 3 | Acrylic Polymer | 24 Hours |
| Old Tile Surface | CSP 4 | Epoxy with Sand Broadcast | 48 Hours |
| Plywood Subfloor | CSP 1 | Wood Rated Primer | 12 Hours |
| Radiant Heat Slabs | CSP 3 | High Temperature Primer | 24 Hours |
The 1/8 inch that ruins everything
Precision leveling requires a tolerance of no more than 1/8 inch deviation over a 10 foot radius to ensure that click lock flooring joints do not snap. Most people think a little dip doesn’t matter. They are wrong. When you walk across a floor with a hollow spot, the tongue and groove mechanism on your laminate or LVP flexes. Over time, that plastic or wood joint will fatigue and break. This is why the shiny film is so dangerous. It hides the fact that the surface might be level but is not sound. You need a floor that is both flat and firm. If you have a shiny film, you must sand it off with a 40 or 60 grit floor paper. You need to see the aggregate in the leveler. Only then do you know you have reached the structural heart of the material. A shiny floor is a lying floor.
Why your subfloor is lying to you
Subfloors often hide moisture issues that push salts and minerals to the surface, creating an efflorescent shine that mimics a leveler film. In humid regions like the Gulf Coast, moisture vapor transmission is a constant battle. If you don’t use a moisture barrier before your leveler, the ground water will push up through the slab and break the bond of your leveler. This is why we use calcium chloride tests or electronic moisture meters. If your slab is reading above 75 percent relative humidity, you cannot just pour leveler and hope for the best. You need a dedicated moisture mitigation system. The shiny film you see might actually be moisture trapped under a layer of cured polymer. If you trap that water, it will eventually turn into mold or cause your adhesive to emulsify into a sticky mess.
The ghost in the expansion gap
Expansion gaps are non negotiable structural requirements that allow the floor to expand and contract with changes in temperature and humidity. I have seen $20,000 hardwood floors buckle into a tent because the installer didn’t leave a gap at the drywall. They thought the floor leveler would hold it in place. It won’t. Wood is a living material. Even laminate, which is mostly resin and sawdust, moves. If your floor leveler has run all the way to the wall and plugged your expansion space, you have created a ticking time bomb. You must scrape that leveler out of the perimeter. The floor needs to float. If it is locked in by a hard ridge of cement, the only place for the floor to go when it expands is up. This causes peaks at the seams and ruins the aesthetic of the room.
“Subfloor flatness is the single most important factor in the longevity of a floating floor system.” – NWFA Technical Guidelines
Corrective measures for shiny leveler surfaces
Removing the shiny film requires mechanical abrasion such as sanding or diamond grinding to reveal a bondable surface. You cannot simply mop it away. The film is a chemical byproduct that has hardened. If you are doing a carpet install, you might get away with a light sand. If you are doing tile or a shower pan, you must be aggressive. Use a floor maintainer with a sanding disc. Go slow. Vacuum the dust with a HEPA filter. The goal is to reach the matte finish underneath. Once the shine is gone, perform a water drop test. Drop a few beads of water on the surface. If they soak in within 60 seconds, you are ready for adhesive. If the water beads up, you still have a film or a sealer present. You are not ready to install. Discipline in this phase is the difference between a floor that lasts 30 years and a floor that lasts 30 days.
- Check the water ratio on the bag twice before mixing.
- Use a low speed drill to avoid whipping air into the slurry.
- Verify the ambient temperature is between 50 and 85 degrees Fahrenheit.
- Apply the primer evenly with no puddles.
- Measure the floor with a 10 foot straight edge before and after the pour.
- Wait the full cure time before walking on the surface.
Environmental impact on hydration chemistry
Temperature and humidity play a massive role in how the leveler cures and whether a film will form on the surface. In the dry heat of Phoenix, the water evaporates too quickly, leaving a crusty, shiny skin. In the swampy humidity of Houston, the leveler stays wet too long, allowing more time for the polymers to float to the top. You have to adjust your strategy based on where you are. In dry climates, I often mist the air to keep the humidity up. In wet climates, I use fans to move the air, but never point them directly at the wet leveler. Direct airflow causes uneven drying and surface skinning. It is a delicate balance of chemistry and physics that only comes with years of being on your knees in the dust. Respect the material, or it will humiliate you. Floor leveling is a science disguised as manual labor. Treat it with the technical respect it deserves and your floors will stay flat for a lifetime.