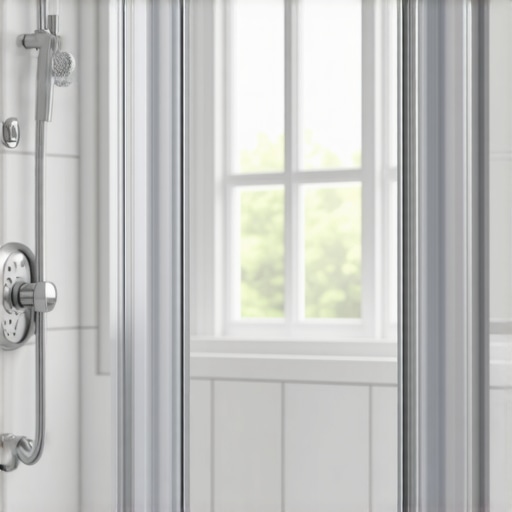
How to Waterproof a Shower Window Frame Without it Rotting
I spent three days grinding concrete on a job last month just so the floor wouldn’t click like a castanet. That level of obsession is the only way to survive the flooring trade. Most guys skip the leveling compound. They think the underlayment will hide the dip. It won’t. When it comes to a shower window frame, that same laziness leads to black mold and structural failure. I once tore out a three year old bathroom where the window studs had turned to the consistency of wet cake. The installer thought a bit of caulk and some plastic trim would save him. It did not. Gravity and capillary action do not care about your schedule. If you do not build a shower window to the standards of the Tile Council of North America, you are just building a very expensive sponge.
The physics of water migration in wet areas
Shower window waterproofing requires a mechanical bond that accounts for hydrostatic pressure and vapor transmission. To stop rot, you must understand that water moves through grout via capillary action. It does not just sit on the surface. A window in a shower creates a thermal bridge where warm, moist air meets a cold surface, leading to condensation inside the wall cavity. This moisture needs a clear path back to the drain, not a trap behind the tile. When we talk about floor leveling or a carpet install, we worry about flat surfaces. In a shower, we worry about the 1/8 inch slope that dictates whether a window lives or dies.
“A floor is only as good as the subfloor beneath it; deflection is the enemy of every joint.” – Master Flooring Axiom
The gravity trap inside your wall
Gravity is the most predictable force in construction. If your window sill is flat, water will sit. If water sits, the surface tension will eventually pull it under the tile and into the thin-set. Standard thin-set is not waterproof. It is a cementitious bond that remains porous. You need a 15-degree pitch on that sill. Anything less is a gamble. I have seen guys try to use laminate underlayment scraps to shim a sill. That is professional malpractice. You use a solid mortar bed or a pre-sloped foam wedge. The goal is to ensure that every drop of water that hits that glass or frame is pushed immediately back into the shower pan. When I handle a floor leveling job, I use a laser to find the high spot. In a shower window, I use a level to ensure the water has no choice but to leave.
The silicon bead lie
Many installers believe that a thick bead of silicone is a permanent barrier. It is not. Silicone is a maintenance item. It will eventually peel, shrink, or succumb to soap scum and mold. If your waterproofing strategy relies on a tube of caulk, you have already failed. The real waterproofing happens at the substrate level. You must wrap the entire window opening in a liquid-applied membrane or a high-grade polyethylene sheet. This creates a continuous envelope. Think of it like a roof. You would not trust a roof that was just shingles and caulk. You trust the flashing. The window frame needs integrated flashing that overlaps the wall membrane by at least three inches.
Liquid membranes versus sheet membranes
The choice between a roll-on liquid like RedGard and a sheet like Kerdi is often a matter of the specific geometry of the window. Liquids are easier for complex corners, but you must measure the mil thickness with a wet-film gauge. If it is too thin, it is just paint. If it is too thick, it can skin over and trap moisture inside the product. Sheet membranes offer a guaranteed thickness but require precise cutting and folding at the corners to avoid bulky build-up that makes tiling impossible. I prefer a hybrid approach. I use sheet membranes for the flat runs and a compatible liquid for the intricate corner transitions where the window meet the wall.
| Material Type | Permeance Rating | Best Use Case |
|---|---|---|
| Liquid Membrane | 0.35 to 0.50 | Complex corners and small niches |
| Polyethylene Sheet | 0.75 to 0.90 | Large flat walls and steam rooms |
| Bituminous Tape | Low | Rough opening protection only |
The 1/16th of an inch that saves the studs
Precision is everything. When you are doing a carpet install, you can hide a lot of sins with the padding. In a shower window, a gap the size of a fingernail is a highway for rot. Every screw hole in the window frame must be sealed with a marine-grade sealant before the screw is driven home. The transition from the window jamb to the tile must include a movement joint. Buildings move. If you tile tight to the window, the expansion and contraction will crack the grout. Once that grout cracks, the moisture starts its journey into your 2x4s. You leave a 1/16 inch gap and fill it with a color-matched 100 percent silicone sealant. This allows the window to breathe and move without breaking the waterproof seal.
The invisible moisture in your studs
Wet wood expands. Dry wood shrinks. This cycle is what destroys shower windows. If you use wood trim inside a shower, you are asking for trouble. Even if it is painted with the best epoxy, the back of the wood will absorb moisture from the air. Over time, the wood will cup and pull away from the wall. I always recommend using solid surface materials like quartz, marble, or porcelain tile for the returns. These materials do not have a cellular structure that can hold water. They are inert. When I talk about the chemistry of adhesives, I am talking about the way a polymer-modified mortar grabs onto a non-porous surface. You need that bond to be absolute.
- Ensure the rough opening is sloped at the base before the window is set.
- Apply a minimum of two coats of liquid membrane, allowing full cure between applications.
- Use alkali-resistant mesh tape on all corners and transitions.
- Check the moisture content of the studs with a pin-meter before sealing them up.
- Verify that the window is rated for wet-room exposure; many vinyl windows are not.
Why the window jamb is your shower’s weakest link
The jamb is where the vertical wall meets the horizontal sill. This is the intersection of three different planes of movement. It is the most common point of failure. I treat this area like I treat a subfloor transition in a high-traffic hallway. It needs reinforcement. I use a pre-formed outside corner piece to wrap the jamb. This eliminates the need for four different cuts of membrane that could leak. If you have ever seen a floor buckle because someone forgot the expansion gap, you know how much power a little bit of movement has. In a shower, that movement ruins the seal. You have to over-engineer the corners. It is the only way to sleep at night.
The ghost in the expansion gap
While most people want the thickest underlayment for comfort, too much cushion actually causes the locking mechanisms on LVP to snap under pressure. This same logic applies to shower waterproofing. Too much sealant or too much membrane build-up creates a soft spot. You want a firm, rigid assembly. The tile should feel like part of the wall. If there is any flex when you press on the window sill, the grout will fail. I use a high-density foam board as my substrate because it does not rot and it provides a perfectly flat surface for the tile. It is a far cry from the old days of cement board and tar paper, but the principles remain the same. You have to manage the water.
“Deflection is the silent killer of the master bath.” – TCNA Handbook Wisdom
The chemistry of the bond
We need to talk about the molecular level. Modified thin-set contains polymers that create a bridge between the substrate and the tile. These polymers are hydrophobic once cured. However, they need a clean surface. If there is dust from a floor leveling job or sawdust from a window install, the bond will fail. I vacuum every surface twice. I wipe it down with a damp sponge. I want that membrane to bite into the surface. When you are waterproofing a window, you are creating a chemical gasket. Any contamination ruins the gasket. It is as simple as that.
Managing the vapor pressure
In a hot shower, the air pressure increases. This pressure pushes water vapor through the smallest openings. This is why a vapor barrier is different from a water barrier. You need both. A window frame is a giant hole in your vapor barrier. To fix this, you must seal the gap between the window frame and the rough opening with non-expanding closed-cell spray foam. Do not use the stuff that expands wildly or it will bow the window frame and make it impossible to open. Use the window and door specific formula. This creates a thermal break and a secondary vapor seal. It is the final step in the structural engineering of a waterproof window.