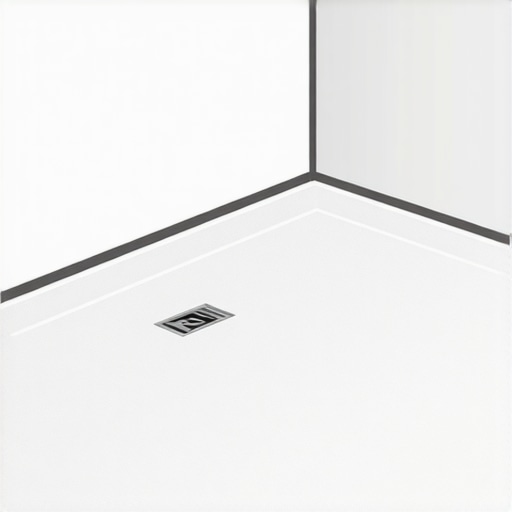
How to Stop Your Shower Pan from Flexing Under Your Weight
A flexing shower pan is a ticking time bomb for your bathroom. When you step into a fiberglass or acrylic shower and feel that sickening sink or hear a squeak, you are feeling the structural failure of the installation. This movement stresses the drain seal, cracks the grout lines in adjacent tile, and eventually leads to catastrophic water damage in your subfloor. Most guys skip the leveling compound. They think the underlayment will hide the dip. It won’t. I spent three days grinding concrete on a job last month just so the floor wouldn’t click like a castanet, and showers are even less forgiving than laminate or hardwood. If your base moves, your plumbing will eventually leak. It is that simple.
The structural cost of a bending base
Stopping shower pan flex requires creating a zero-tolerance contact point between the bottom of the acrylic or fiberglass base and the subfloor using a structural mortar bed. This eliminates the air gap that causes deflection. Proper floor leveling and checking the subfloor for bounce are the primary preventative measures.
When an installer tosses a shower pan onto a subfloor that is not perfectly level, they are relying on the thin plastic or fiberglass ribs of the pan to carry 200 pounds of human weight plus the weight of the water. Those ribs are designed for secondary support, not as the primary load bearing structure. In the world of high end renovations, we look at the deflection rating. For tile, you want L over 360, but for a shower pan, you want absolute rigidity. If the subfloor has even a quarter inch dip, that pan will bow. Over time, the repeated stress fractures the resin. I have seen hundreds of pans that look fine on the surface but are spiderwebbed with micro cracks underneath. You smell the mildew before you see the water. By then, your floor joists are already rotting.
“A floor is only as good as the subfloor beneath it; deflection is the enemy of every joint.” – Master Flooring Axiom
Why thin-set is not a filler
Using thin-set mortar as a primary gap filler is a recipe for failure because thin-set is designed for adhesion in thin layers rather than structural build. You must use a dedicated floor leveling compound or a stiff dry pack mortar bed to provide the necessary compressive strength under a shower.
The chemistry of adhesives matters more than most homeowners realize. Standard thin-set has high shrinkage rates when applied in thick mounds. If you try to use it to fill a half inch void under a shower pan, it will pull away from the surface as it cures. This leaves the pan suspended in mid air again. You need a mortar with high compressive strength and low shrinkage. I prefer a sand mix or a dedicated deck mud. This material stays where you put it. It creates a solid rock foundation that mirrors the underside of the pan. When you walk on it, it feels like concrete because, for all intents and purposes, it is. The molecular bond of a modified thin-set is great for sticking tile to a wall, but it won’t stop a 250 pound man from snapping a fiberglass flange.
The concrete truth about floor leveling
Floor leveling is a mandatory step that involves checking the substrate with a six foot straight edge and applying a high flow self leveling underlayment to remove any peaks or valleys. This ensures the shower pan sits flush against the subfloor and prevents localized pressure points that cause cracking.
I remember a job in a coastal home where the humidity had warped the plywood subfloor into something resembling a washboard. The homeowner wanted to just slap the shower pan down and caulk the edges. I refused. We spent the better part of a day preping that floor. We used a primer to seal the wood pores so the self leveler wouldn’t lose its hydration too fast. If the wood sucks the water out of the leveler, the leveler becomes brittle and dusty. It won’t hold the weight. We poured a high strength gypsum based leveler and let it set for 24 hours. That extra day of work saved them from a five thousand dollar repair bill three years down the line. Most people think they can save money by skipping the prep. They are wrong. Prep is the only part of the job that actually matters for longevity.
| Material Type | Compressive Strength PSI | Flexibility Rating | Best Use Case |
|---|---|---|---|
| Dry Pack Mortar | 4000+ | Low | Heavy shower bases |
| Structural Foam | 100-300 | Medium | Lightweight acrylics |
| Self Leveling Underlayment | 5000+ | Very Low | Subfloor correction |
| Wood Shims | Variable | High | Emergency spot fixes only |
Mortar beds and the foam alternative
A mortar bed provides a custom molded support system that fills every void under the shower pan while structural spray foam offers a faster but less durable solution for minor flexing. Mortar is the industry standard for permanent residential and commercial installations because it does not compress over time.
Some guys will tell you to use expanding spray foam. They crawl under the house, drill a hole in the subfloor, and spray a can of Great Stuff under the shower. That is a hack move. Most consumer grade spray foam is open cell. It is soft. It is meant for insulation, not for structural support. Under the weight of a person, that foam will compress and stay compressed. Now you have a gap again, but this time it is filled with squishy plastic. If you must use foam, it has to be a high density closed cell structural foam rated for load bearing. But even then, I do not trust it. Give me a bucket of mortar any day. You want the consistency of damp sand. You pile it in mounds, lay a piece of plastic over it so it does not stick to the pan in case you ever need to remove it, and then set the pan into the mud. You wiggle it until it hits your level lines. Once that mud cures, that pan is part of the house.
“Deflection limits for ceramic tile and stone are established to prevent structural failure under anticipated loads.” – TCNA Handbook Standards
The ghost in the expansion gap
An expansion gap at the perimeter of the shower pan allows the house to breathe without putting stress on the shower base or the wall tiles. Failing to leave this gap causes the pan to pinch against the studs which leads to upward bowing and eventual floor failure.
Wood moves. Concrete moves. The humidity in your bathroom changes every time you turn on the hot water. If you wedge a shower pan tight against the wall studs with no room to breathe, the house will eventually squeeze it. This is why you see pans that seem to lift up in the center. It is not that the floor sank, it is that the walls moved in. You need a small gap, usually an eighth of an inch, around the perimeter. You fill that gap with a high quality one hundred percent silicone sealant. Do not use acrylic caulk. Acrylic caulk gets hard and cracks. Silicone stays flexible. It acts like a shock absorber for your house. This is a technical detail that separates the pros from the guys who just watched a ten minute video online.
The 1/8 inch that ruins everything
Measurement errors as small as one eighth of an inch can lead to improper drain alignment which forces the shower pan to sit at an angle. This misalignment creates a permanent void under one side of the base that will eventually lead to a structural snap.
When you are setting your drain, you have to be precise. If the drain pipe is a hair too high, it will hold the shower pan up off the floor. If it is too low, it will pull the pan down. I always dry fit the pan three or four times before the mud goes in. I check for any rock or wobble. If I feel a wobble, I find the high spot and I grind it down. You cannot fix a plumbing height issue with more caulk. You have to get the geometry right from the start. This is especially true if you are transitioning from a carpet install in the bedroom to a tile floor in the bathroom. The height of your subfloor needs to be consistent. If the plumber hacked up the subfloor to move a pipe, you have to reinforce those joists. You cannot expect a piece of plastic to bridge a hole in the structural floor.
- Verify subfloor flatness within 1/8 inch over 10 feet.
- Ensure the drain pipe is cut to the exact height specified by the manufacturer.
- Mix mortar to a stiff, peanut butter consistency for maximum support.
- Apply a moisture barrier over wood subfloors to prevent rot from condensation.
- Allow the mortar bed to cure for at least 24 hours before using the shower.
- Check for joist deflection if the bathroom is on a second story.
Avoiding the plumbing disaster
Securing the drain assembly with a locking nut and high quality plumbers putty or silicone is the final step in ensuring a rigid shower installation. A moving pan will eventually loosen this connection and lead to a leak that destroys the ceiling below.
I have replaced entire kitchens because a shower pan on the second floor was flexing. Every time the owner took a shower, the drain moved just a tiny bit. Over two years, that movement unscrewed the lock nut. It started as a drip. Then it became a mold colony. By the time the ceiling started sagging, the floor joists were so soft you could poke a screwdriver through them. People worry about the color of the tile or the style of the faucet. I worry about the drain. I use a heavy duty brass drain assembly whenever possible. Plastic drains are fine for a budget flip, but if you want a floor that lasts thirty years, you go with brass. You tighten it down, you bed the pan in mortar, and you sleep easy knowing that floor is not going anywhere. This is the difference between building a house and just decorating one. A real floor is an engineering feat. It is a silent partner in your home that should never make a sound.”