The Mixing Paddle Speed Mistake That Ruins Floor Leveler
The subfloor secret that contractors wont tell you
Most guys skip the leveling compound. They think the underlayment will hide the dip. It wont. I spent three days grinding concrete on a job last month just so the floor wouldnt click like a castanet. That job was a nightmare because the previous contractor tried to level it but used a high speed drill. The whole surface looked like Swiss cheese. When you are standing in a room with five thousand dollars of uninstalled laminate planks and a subfloor that looks like a topographical map of the Ozarks, you realize that floor leveling is not a suggestion. It is a requirement for structural integrity. Most failures in carpet install projects or luxury vinyl tile jobs trace back to a single moment of impatience with a mixing paddle. People want to go fast. They want to see the powder disappear into the water. But speed is the enemy of a flat floor. If you whip the leveler like you are making a meringue, you are essentially injecting structural weakness into your substrate. I have seen showers fail because the leveler underneath the pan was so aerated it crumbled under the weight of a standard adult. This is not about aesthetics. This is about the physics of compression and the chemistry of hydration. Let us look at why your drill speed is likely ruining your floor before you even pour the first bucket.
The hidden physics of air entrainment
Air entrainment occurs when high speed mixing paddles create a vortex that pulls atmospheric oxygen into the calcium aluminate slurry. This process creates thousands of microscopic bubbles that remain trapped as the self-leveling underlayment begins its initial set. When these bubbles eventually migrate to the surface, they leave behind pinholes and craters. These are not just cosmetic flaws. Every pinhole represents a void in the compressive strength of the floor. If you are prepping for a carpet install, those voids will eventually collapse under the localized pressure of furniture legs. For laminate, these voids mean the subfloor is no longer providing uniform support to the locking mechanisms. When you walk across the floor, the planks flex into these tiny craters. Over time, that flex causes the plastic or wood fiber joints to fatigue and snap. You will hear a clicking sound every time you step. That is the sound of a mistake made at 1,200 RPM. A floor leveling compound is engineered to be dense. When you introduce air, you change the specific gravity of the mix. You are no longer working with the product the engineers designed in the lab. You are working with a structural foam that has no business being under a high traffic floor.
“A floor is only as good as the subfloor beneath it; deflection is the enemy of every joint.” – Master Flooring Axiom
Why your subfloor is lying to you
Subfloor flatness is often confused with levelness, but the two are distinct engineering metrics that determine the success of laminate or carpet install. A floor can be slanted like a mountain side but still be perfectly flat. Most manufacturers require a flatness tolerance of 1/8 inch over a 10 foot radius. If your floor leveling attempt results in a surface full of bubbles and ridges because of high speed mixing, you have failed the flatness test. I have walked onto jobs where the homeowner thought they did a great job leveling a shower subfloor, only to find the surface felt like 40 grit sandpaper. That texture is the result of polymer shear. When you mix too fast, you break the long chain polymers that give the leveler its flexibility and bond strength. Without those polymers, the leveler becomes brittle. It will bond poorly to the concrete or plywood underneath. Eventually, the whole layer will delaminate. You will know it happened when you hear a hollow thud under your feet. At that point, the only fix is to rip everything up and start over. It is a expensive lesson that could have been avoided by simply turning down the dial on the drill.
The molecular disaster of high speed mixing
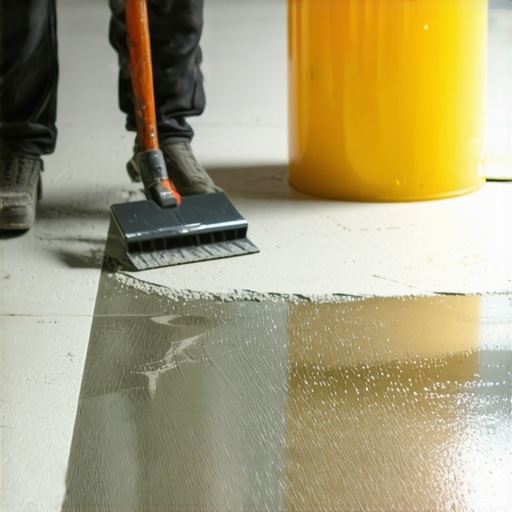
Polymer modified levelers rely on a delicate chemical balance to achieve their flow characteristics and final strength. High speed mixing generates friction, and friction generates heat. This heat can trigger a flash set, where the leveler begins to harden before it has had time to properly flow and find its own level. This is particularly problematic in showers where you need a precise pitch or a perfectly flat base for a pre-sloped tray. If the leveler starts to stiffen in the bucket because you over-mixed it, you will end up troweling it out. Troweling a self-leveling product is a recipe for disaster. It creates ridges. It creates high spots. It creates more work for you later. The goal is a glassy, mirror like finish that requires zero sanding. To get that, you need the chemistry to work for you, not against you. Low speed mixing, typically under 650 RPM, allows the water to fully hydrate the cement particles without shearing the additives. This ensures that the wear layer of the leveler is as hard as the base. When you go too fast, the lighter components of the mix, including the air and the excess polymers, rise to the top. This creates a soft, chalky surface that will never hold an adhesive or a carpet install tack strip properly.
| Factor | High Speed Mixing | Low Speed Mixing |
|---|---|---|
| Air Entrainment | Excessive Pinholes | Minimal Bubbles |
| Polymer Shear | Potential Breakdown | Homogeneous Blend |
| Compressive Strength | Reduced | Full Rating |
| Surface Finish | Cratered | Glassy |
Preparation before the pour
Substrate preparation is the most overlooked phase of floor leveling, especially for those transitioning from carpet install to hard surfaces. You cannot just pour leveler over a dirty floor and expect it to stick. It is a mechanical and chemical bond. You must start by removing every trace of old adhesive, paint, and drywall mud. If you leave a patch of old carpet glue, the leveler will sit on top of it like oil on water. I use a diamond cup wheel on an angle grinder to get down to virgin concrete. Once the floor is clean, you must use a primer. Think of primer as the bridge between the old floor and the new leveler. It seals the pores of the concrete. This is vital because if the concrete is porous, it will suck the water out of the leveler too fast. This causes the leveler to crack. It also prevents air from escaping the concrete and entering the leveler. This is a secondary cause of pinholes, but when combined with high speed mixing, it creates a surface that looks like the moon. I always tell my crew that the pour is the easy part. The four hours of cleaning and priming is where the real work happens.
- Measure the moisture content of the slab with a calcium chloride test.
- Vacuum every square inch of the substrate using a HEPA filter.
- Apply the recommended primer with a nap roller to ensure total coverage.
- Verify the water ratio with a precision measuring bucket to the exact ounce.
- Set the mixing drill to exactly 650 RPM or less using a dedicated mixing station.
Laminate and the click lock failure
Laminate flooring is particularly sensitive to subfloor imperfections because of the locking mechanism design. These floors are floating systems, meaning they are not attached to the subfloor. They rely on their own weight and the integrity of the tongue and groove joints to stay together. If you have a dip in the floor because your floor leveling compound did not flow properly, the laminate will bridge that gap. Every time someone walks over that spot, the joint is stressed. Eventually, the HDF core will crack. I have seen 1,000 square foot installations ruined in six months because the installer thought a thick underlayment would compensate for a poor leveler job. It does not. In fact, a thick, squishy underlayment makes the problem worse by allowing even more movement. You want a rock solid, perfectly flat base. If you mix your leveler at low speed, it remains fluid longer. It finds the low spots. It fills them completely. It creates a monolithic slab that supports the laminate across its entire surface area. This eliminates the vertical movement that kills floors. If you are doing this in a high humidity area like New Orleans, this becomes even more important. The moisture in the air can affect how the laminate expands and contracts. If it is already struggling with a bad subfloor, the expansion will cause it to buckle and peak at the seams.
“Subfloor flatness is a non-negotiable requirement for all modern floating floor systems to prevent joint fatigue.” – NWFA Installation Guidelines
Shower pans and the pitch problem
Shower installations require a level of precision that exceeds standard room flooring. Whether you are using a liquid applied waterproofing membrane or a sheet membrane, the substrate must be flawless. If you use a high speed mixer for the leveler in a shower base, the resulting pinholes can become paths for moisture. Even though the membrane is waterproof, any air pockets underneath can trap interstitial moisture. Over time, this leads to mold and the degradation of the leveler itself. Furthermore, if you are installing a curbless shower, the transition between the bathroom floor and the shower tray must be perfect. A 1/16 inch ridge caused by poorly mixed, fast setting leveler will telegraph through your tile. You will feel it under your feet every time you step into the shower. It is the difference between a high end custom build and a DIY disaster. I always recommend using a spiral mixing paddle designed specifically for levelers. These paddles are shaped to lift the material from the bottom without drawing air from the top. When combined with a low RPM drill, you get a pour that is as smooth as glass. It makes the subsequent tile work a breeze because you are not fighting the floor to get your layout right.
Carpet installation and the crunch
Carpet install jobs might seem more forgiving of subfloor issues, but that is a dangerous misconception. While carpet can hide a dip, it cannot hide the structural failure of a poorly mixed leveler. If the leveler is full of air from high speed mixing, it will be brittle. As the tack strips are nailed into the perimeter, the leveler can shatter. Tack strips require a solid substrate to hold the tension of a stretched carpet. If the leveler crumbles, the carpet will lose its tension and start to ripple. I have been called to fix ripples in carpets only to find that the floor leveling compound underneath had turned to dust. The homeowner thought it was a bad carpet, but it was a bad subfloor. Additionally, the crunching sound of breaking leveler under a carpet is a common complaint. This happens when the aerated leveler breaks down into small pebbles under the padding. Every step sounds like you are walking on gravel. To avoid this, you need a high compressive strength leveler mixed at the correct speed to ensure the polymers are fully integrated and the density is uniform from the bottom of the pour to the top surface.