Why Your Kitchen Floor Tiles Are Cracking Near the Dishwasher
Why Your Kitchen Floor Tiles Are Cracking Near the Dishwasher
I spent three days grinding concrete on a job last month just so the floor wouldn’t click like a castanet. Most guys skip the leveling compound. They think the underlayment will hide the dip. It won’t. I have seen it a thousand times in kitchens where the tile looks perfect until the first time the dishwasher runs a heavy cycle. You look down and see a hairline fracture snaking through the grout or across a beautiful porcelain slab. It is not bad luck. It is physics. Your floor is a performance surface. If the engineering fails under the surface, the cosmetic layer on top is doomed. This is about more than just a broken tile. It is about a failure to respect the subfloor. Most homeowners assume the tile is the strength of the floor. It is not. The tile is a brittle shell. The strength comes from the joists and the subfloor. When you add a dishwasher into the mix, you are introducing heat, moisture, and vibration. These three elements act as a precision tool designed to break weak tile bonds.
The hidden violence of the dishwasher cycle
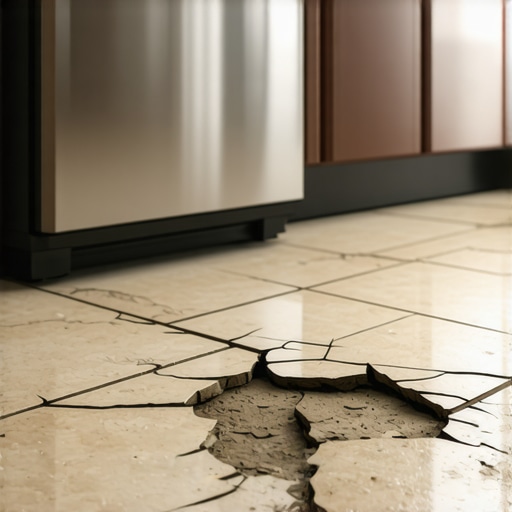
The cracking of kitchen tiles near a dishwasher is primarily caused by localized thermal expansion and moisture fluctuations that stress the rigid bond of the tile to the subfloor. This area experiences rapid temperature swings. Steam escapes during the drying cycle. Heat radiates downward from the heating element. This creates a micro-climate where the subfloor expands and contracts at a different rate than the ceramic material. If there is no movement joint, the tile must crack. I have seen high-end porcelain shattered because the installer didn’t leave a perimeter gap. Wood subfloors are especially prone to this. They breathe. They swell when the dishwasher vents steam. They shrink when the kitchen cools down at night. This constant tug-of-war eventually snaps the thin-set bond. The bond is a chemical bridge. When that bridge is stressed by a moving anchor point, it collapses. It is not a matter of if, but when. You can’t fight thermodynamics with cheap mortar.
“A floor is only as good as the subfloor beneath it; deflection is the enemy of every joint.” – Master Flooring Axiom
Deflection is the silent killer of grout lines
Floor deflection refers to the vertical movement of a floor system under a load, and it is the leading cause of tile failure in kitchens. If your joists are spaced too far apart or your plywood is too thin, the floor will bounce. You might not feel the bounce, but the tile does. Tile is a ceramic. It does not bend. If the subfloor moves 1/16 of an inch, the tile must either move with it or break. Since tile is bonded with rigid mortar, it breaks. I always check the L/360 rating. This is the standard set by the Tile Council of North America. It means the floor should not deflect more than the length of the span divided by 360. If you are installing heavy natural stone, that requirement jumps to L/720. Most builders do the bare minimum. They use thin plywood that meets code but fails the tile test. When you put a heavy dishwasher full of water and plates on a weak subfloor, you are asking for trouble. The weight causes a dip. The heat causes expansion. The tile is caught in the middle. It is a structural sandwich of failure. I tell people that floor leveling is not a luxury. It is a requirement. If your floor isn’t flat within 1/8 inch over 10 feet, your tile is on borrowed time.
The science of the chemical bond
The failure of the bond between the tile and the thin-set mortar is often a result of improper hydration or the use of unmodified mortar on a flexible substrate. Thin-set is not just mud. It is a complex chemical compound. Modern modified thin-sets contain polymers. These polymers are like microscopic rubber bands. They allow for a tiny amount of movement. If an installer uses cheap, unmodified mortar, there is no flexibility. The bond is brittle. Under a dishwasher, where vibration is constant, a brittle bond will shake itself apart. Think about the motor in that appliance. It spins at high speeds. It creates a frequency that travels through the floor. Over months and years, that vibration fatigues the mortar. I have pulled up tiles near dishwashers where the thin-set has turned back into powder. It literally disintegrated. You need a high-polymer mortar for these zones. You also need a moisture barrier. If the steam from the dishwasher seeps into the subfloor, it can cause the plywood to delaminate. Once the plywood layers separate, the structural integrity is gone. It doesn’t matter how expensive your tile was. It is going to crack.
| Material Type | Thermal Expansion Rate | Moisture Sensitivity | Subfloor Requirement |
|---|---|---|---|
| Porcelain Tile | Very Low | Very Low | L/360 Rigid |
| Natural Stone | Low | Moderate | L/720 Rigid |
| Laminate Flooring | High | High | Flat and Dry |
| Luxury Vinyl | Moderate | Low | Extremely Flat |
Why floor leveling is not optional
Floor leveling is the process of creating a perfectly flat plane to ensure that tile is fully supported across its entire surface area. If there is a void under a tile, that tile will crack when stepped on or when a heavy appliance moves over it. I spend more time on my knees with a straightedge than I do with a trowel. Many installers try to use extra thin-set to level the floor as they go. This is a hack move. Thin-set shrinks as it cures. If you have a big glob of it in one spot to fill a hole, it will shrink more than the thin layer next to it. This creates internal tension. That tension pulls on the tile. By the time the dishwasher adds heat to the equation, the tile is already stressed to its limit. Use self-leveling underlayment. It flows like water and creates a glass-flat surface. It is the only way to ensure the tile is supported. I have seen people skip this step to save a few hundred dollars. They end up spending thousands to rip the floor out two years later. You can’t build a skyscraper on a swamp, and you can’t lay tile on a wavy floor. It is that simple.
“Substrate preparation is eighty percent of the labor but one hundred percent of the success in any tile installation.” – TCNA Installation Handbook
The 1/8 inch that ruins everything
A deviation of just 1/8 inch in the subfloor can create a pivot point that causes a tile to snap under the weight of a person or a heavy appliance. This is especially critical near the dishwasher because of the transition to the cabinets. Often, the subfloor is not level where the cabinets meet the main floor. The installer bridges that gap with tile. Now you have a tile that is half-supported by the floor and half-hanging over a void. When the dishwasher vibrates, it acts like a hammer on that unsupported edge. It is a slow-motion demolition. I always check the perimeter. I make sure the transition from the kitchen to other areas, like where a carpet install might begin, is handled with proper thresholds. But under the dishwasher, you don’t see the problem until it is too late. The vibration also affects the grout. Grout is the weakest part of the floor. If the tiles move even a fraction of a millimeter, the grout will crumble. Then water from the dishwasher gets into the cracks. Now you have a mold problem under your floor. It is a cascading failure.
- Always use a 6-foot level to check for dips before starting.
- Apply a waterproof uncoupling membrane like Schluter-Ditra to isolate the tile from subfloor movement.
- Ensure the dishwasher is leveled properly to reduce mechanical vibration.
- Leave a 1/4 inch expansion gap at the walls and cabinets, filled with matching silicone caulk instead of hard grout.
- Verify that the subfloor is at least 1 1/4 inches thick if using 16-inch on-center joists.
Comparing kitchen flooring durability factors
When choosing flooring for a kitchen, you must weigh the rigid beauty of tile against the flexibility of materials like laminate or vinyl. Tile is the king of durability, but it is unforgiving. If your house settles, the tile tells the story. Laminate is more forgiving of minor floor leveling issues because it floats. It isn’t bonded to the subfloor. However, laminate hates the moisture near a dishwasher. If a dishwasher leaks, laminate will swell and ruin the kitchen. Tile won’t rot, but it will crack. This is why I advocate for porcelain over ceramic. Porcelain is denser and stronger. It handles the thermal stress better. But even the best porcelain needs a solid foundation. Some people think a thick underlayment will help. That is a myth. While most people want the thickest underlayment, too much cushion actually causes the locking mechanisms on laminate or LVP to snap under pressure. For tile, you want zero cushion. You want a rock-solid, unyielding base. If you want a floor that lasts thirty years, you build it from the joists up.
The ultimate kitchen tile installation checklist
Success in a kitchen tile project requires a disciplined approach to moisture management, structural rigidity, and chemical selection. You cannot rush the prep work. If you are doing a renovation, rip the old floor down to the joists. Check for rot around the dishwasher and sink. Replace any soft wood. Add blocking between joists if the span is too long. This reduces the bounce. Use a high-quality modified thin-set that meets ANSI A118.15 standards. This mortar is designed to handle the toughest environments. Don’t use premixed mastic in a kitchen. Mastic is basically glue. It will re-emulsify if it gets wet. A dishwasher leak will turn your mastic back into goo and your tiles will just float away. Stick to real thin-set. Use a 1/2 inch notched trowel to get good coverage. You want at least 95 percent coverage in a wet area like a kitchen. Back-butter every tile. This means applying a thin layer of mortar to the back of the tile before setting it. It ensures there are no air pockets. Air pockets are where cracks start.
A final word on structural integrity
A floor is a system. It is not a collection of parts. When you look at the cracks near your dishwasher, don’t just blame the tile. Look at the subfloor. Look at the heat. Look at the way the house moves. If you want to fix it, you have to do more than replace a tile. You have to address the reason it broke. Sometimes that means stiffening the joists from the basement. Sometimes it means adding a layer of cement board. But it always means taking the time to do it right. I have never regretted spending an extra day on prep. I have always regretted rushing to the finish. A good floor is quiet. It is solid. It doesn’t complain when you walk on it or when the dishwasher runs. If your floor is talking to you, it is time to listen. The cracks are the floor’s way of telling you that the engineering failed. Fix the engineering, and the beauty will take care of itself.