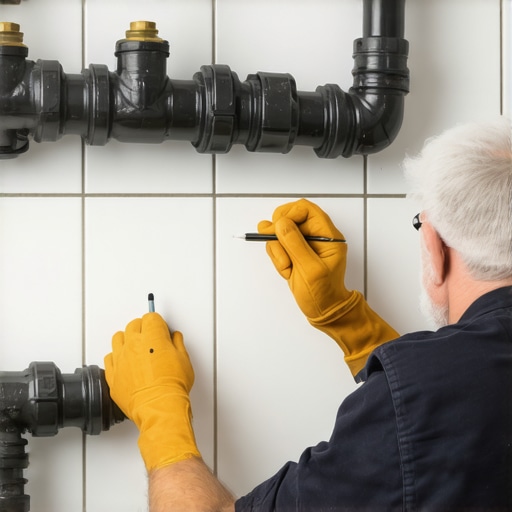
The ‘Pencil Trick’ for Marking Tile Around Pipes
The shadow of the subfloor
Most guys skip the leveling compound. They think the underlayment will hide the dip. It won’t. I spent three days grinding concrete on a job last month just so the floor wouldn’t click like a castanet. That job was supposed to be a simple install, but the slab looked like the rolling hills of Kentucky. If you do not fix the substrate, the most expensive tile or laminate in the world will fail. I have seen fifteen thousand dollar walnut floors turn into potato chips because of crawlspace humidity. I have seen high end porcelain snap like crackers because the installer did not understand deflection. You have to respect the physics of the surface. A floor is not a decoration. It is a structural engineering layer that must withstand thousands of pounds of pressure and constant environmental shifts.
The geometry of a perfect pipe cut
The pencil trick for marking tile around pipes involves using a standard carpenter pencil as a physical spacer to transfer the exact radius of a copper or PVC pipe onto your material. By placing the tile against the pipe and rotating the pencil around the circumference, you create a perfect scribe line. This method ensures a snug fit that allows for the necessary expansion gap without leaving an unsightly hole that grout cannot fill. You need a sharp lead point and a steady hand. If you are working with large format tile in showers, this precision is the difference between a professional finish and a hack job. Most amateurs try to measure with a tape and a square, but they forget that pipes are rarely perfectly centered. The pencil trick accounts for the real world position of the plumbing, not the theoretical one on the blueprints.
“A floor is only as good as the subfloor beneath it, deflection is the enemy of every joint.” – Master Flooring Axiom
The chemical reality of thin set bonding
Modified thin set mortars use liquid latex or powdered polymers to increase the bond strength and flexibility of the cementitious matrix. This allows the tile to move slightly with the building without shearing off the substrate. When you are setting tile around a shower drain or a radiator pipe, the thermal expansion of the pipe itself creates stress. If you use a cheap, unmodified mortar, the bond will break. I prefer an ANSI A118.11 rated mortar for most plywood subfloors because it has the grab required to fight wood movement. The molecular bond happens at the microscopic level where the cement crystals grow into the pores of the tile and the wood. If there is dust on that surface, those crystals grow into the dust instead of the floor. That is why I am always vacuuming. You cannot get a chemical bond on a dirty surface.
Why your subfloor is lying to you
Floor leveling requires a deep understanding of high spots and low spots measured over a ten foot radius using a straight edge or a laser level. A subfloor that looks flat to the naked eye often contains dips that will cause laminate locking systems to fail or carpet install seams to peak. I use a self leveling underlayment that flows like water but sets up at 5,000 PSI. You have to prime the wood first. If you do not prime, the dry wood sucks the moisture out of the leveler too fast and it cracks. It is about the hydration chain. The water in the mix needs to stay there long enough for the polymers to cross link. I have walked onto too many jobs where the previous guy just threw down some patch and hoped for the best. Hope is not a strategy when you are dealing with structural integrity.
| Material Type | Janka Hardness | Acclimation Time | Max Deflection |
|---|---|---|---|
| Solid White Oak | 1360 lbf | 10 to 14 Days | L/360 |
| Engineered Maple | 1450 lbf | 3 to 5 Days | L/480 |
| Luxury Vinyl Plank | N/A | 48 Hours | 1/8 inch over 10ft |
| Porcelain Tile | N/A | None | L/720 |
The 1/8 inch that ruins everything
Expansion gaps are non negotiable perimeters required for every hard surface flooring installation to accommodate the natural swell and shrink cycles of the material. A floor locked against a wall or a heavy kitchen island will eventually buckle, peak, or separate as humidity levels change throughout the seasons. Most people think waterproof LVP means they do not need a gap. They are wrong. The vinyl might not absorb water, but the house it is sitting in still moves. When the temperature rises, the planks expand. If they have nowhere to go, they go up. I have seen entire floors lift off the ground like a tent because someone tucked them too tight under the baseboards. Use spacers. Always. It is a tiny detail that prevents a total teardown two years later. You also have to watch your transitions. A zero threshold look is great until the transition strip snaps because there was no room for the material to breathe.
The mechanical logic of carpet install
Carpet installation depends on the tension created by power stretching the primary backing over a series of tack strips anchored to the perimeter of the room. Without proper tension, the carpet will develop ripples or waves that lead to premature wear and trip hazards. It is not just about kicking it in with a knee kicker. A knee kicker is for positioning. A power stretcher is for the actual install. I have seen guys try to skip the stretcher on a big commercial loop pile, and six months later it looks like the ocean. You also have to consider the pad. A high density 8 pound pad is the gold standard for residential. Cheap pad collapses and leaves the carpet backing to grind against the subfloor. That friction creates heat and dust that ruins the fibers. It is a system. The pad, the backing, and the subfloor all work together.
“Substrate preparation is seventy percent of the labor but one hundred percent of the success.” – Master Flooring Axiom
A checklist for structural integrity
- Verify moisture content in wood subfloors is within 2 percent of the flooring material.
- Check concrete slabs for vapor emission using a calcium chloride test or an RH probe.
- Sand down high spots in plywood seams to prevent telegraphing through thin materials.
- Ensure all fasteners are countersunk and do not squeak when walked upon.
- Vacuum the entire surface with a HEPA filter to ensure a clean bond for adhesives.
- Verify the joist spacing meets the requirements for the intended stone or tile weight.
The ghost in the expansion gap
Expansion gaps around pipes and vertical obstructions are often overlooked but are the primary cause of clicking sounds and board separation in floating floors. Cutting the material too close to a radiator pipe prevents the floor from shifting as a single unit, leading to localized stress. When I use the pencil trick, I always add a tiny bit of extra room for the collar. You want the pipe to be centered in a hole that is slightly larger than the pipe itself. Then you cover it with a split escutcheon. While most people want the thickest underlayment, too much cushion actually causes the locking mechanisms on LVP to snap under pressure. You want a firm, high density underlayment that provides sound dampening without turning the floor into a trampoline. The physics of compression are unforgiving. If the tongue and groove flex too much, the plastic will fatigue and eventually snap. That is why a flat floor is more important than a thick pad. You are building a foundation, not a bed.