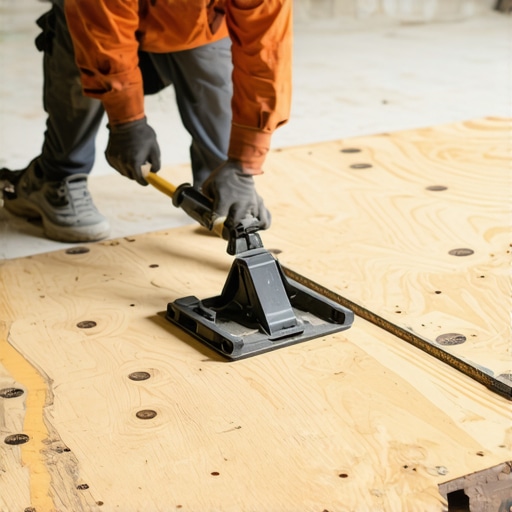
The ‘Flashlight Trick’ for Checking Your Subfloor Prep
I spent three days grinding concrete on a job last month just so the floor wouldn’t click like a castanet. Most guys skip the leveling compound because they think the underlayment will hide the dip. It won’t. I have seen fifteen thousand dollar wide-plank walnut floors cupping like potato chips because the installer ignored the crawlspace humidity. Most homeowners think a floor is just what they walk on, but to a master installer, it is a structural assembly where the subfloor does all the heavy lifting. If your subfloor is not dead flat, your expensive laminate or hardwood is nothing more than a ticking time bomb of noise and structural failure. My hands are constantly covered in oak dust and my knees have the permanent calluses of a man who respects the National Wood Flooring Association standards more than his own sleep schedule. We are going to talk about the physics of the subfloor and why your eyes are lying to you when you look at a bare room.
The subfloor secret that contractors hide
Subfloor preparation involves floor leveling and moisture mitigation to ensure structural integrity. A flat surface is the primary requirement for laminate, hardwood, and carpet install projects. Professionals use self-leveling compounds, moisture meters, and straightedges to detect subfloor deflection and high spots before laying the final material. Failure to prep leads to joint separation and clicking sounds.
You see a room. I see a topographic map of potential disasters. The industry standard for flatness is usually an eighth of an inch over a ten foot radius. That sounds generous until you realize that a sixteenth of an inch dip under a floating floor acts like a trampoline. Every time you step on that spot, the locking mechanism of your laminate flexes. Do that ten thousand times and the tongue snaps off. Now you have a gap that collects dirt and moisture. I have walked into hundreds of homes where the owner is complaining about their waterproof flooring failing. The floor did not fail. The installer failed because he was too lazy to pull out a level and some patch. Real floor leveling is a gritty, dusty process that involves chemical primers and mechanical bonds. It is not something you can skip by buying a thicker pad. In fact, a thicker pad often makes the problem worse by allowing even more vertical movement.
“A floor is only as good as the subfloor beneath it; deflection is the enemy of every joint.” – Master Flooring Axiom
The ghost in the expansion gap
Expansion gaps are required around the perimeter of every hard surface floor to allow for thermal expansion. These gaps prevent buckling and tenting in laminate and vinyl plank. A quarter inch gap hidden by baseboards or shoe molding provides the necessary room for molecular expansion caused by ambient humidity changes and temperature fluctuations within the home environment.
Floating floors are alive. They move. They breathe. If you pin a floor down with a heavy kitchen island or jam it tight against the drywall, it has nowhere to go when the humidity hits sixty percent. The internal pressure builds until the weakest point gives way. That is when you get a hump in the middle of the room. I once saw an entire kitchen floor lift three inches off the subfloor because the installer forgot to leave a gap at the door casings. It looked like a bubble under a rug. This is why I tell people to stop thinking about floors as static objects. They are dynamic systems. Wood cells are like little sponges. Even when they are finished with aluminum oxide, the core material is still reacting to the atmosphere. The expansion gap is the relief valve for that pressure. If you don’t respect it, the floor will eventually destroy itself.
The physics of the flashlight trick
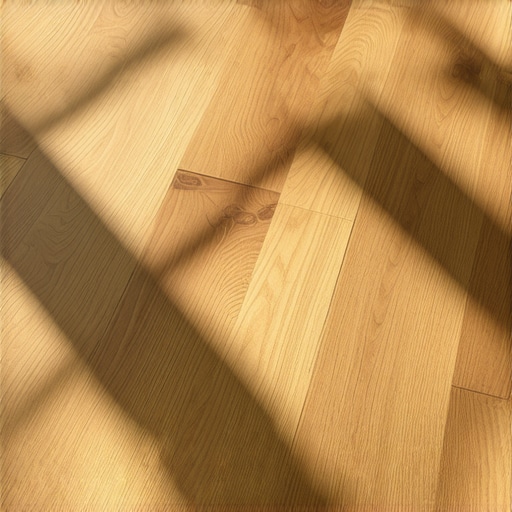
The flashlight trick identifies subfloor irregularities by casting long shadows across dips and humps. By placing a high lumen LED flashlight flat on the subfloor in a dark room, an installer can visualize low spots and high points. This method is more accurate than the human eye for detecting deviations that exceed NWFA specifications or TCNA standards for floor leveling.
Most people try to check their floor by standing up and looking down. That is a waste of time. Light hits the floor at a ninety degree angle and washes out the detail. When you drop that flashlight down to the floor level, you are using the physics of light to your advantage. A dip of just a thirty-second of an inch will cast a shadow that looks like a canyon. I use a high-powered tactical light. I turn off the overheads and slide that light across the concrete or plywood. It shows me exactly where I need to grind and where I need to fill. This is the difference between a floor that feels solid like a rock and one that feels like a cheap hotel. If you are doing a shower floor, this is even more vital. A shower floor requires a precise slope to the drain. If you have a hump in your mud bed, the water will pool and grow mold. The flashlight does not lie. It reveals the microscopic reality of your surface.
| Subfloor Type | Levelness Tolerance (10ft) | Moisture Limit (MC%) | Recommended Fix |
|---|---|---|---|
| Concrete Slab | 1/8 inch | 3 lbs / 1000 sqft | Self-leveling underlayment |
| CDX Plywood | 3/16 inch | 12% | Plywood shims or sanding |
| OSB Board | 3/16 inch | 10% | Sanding high joints |
| Shower Mud Bed | 1/16 inch | N/A | Mortar screeding |
Why your subfloor is lying to you
Subfloors often appear flat while harboring structural issues like crowning or joist deflection. A subfloor might be level relative to the horizon but fail to be flat across its surface. Engineered wood and laminate require surface flatness rather than perfect levelness to prevent mechanical failure of the locking system over time.
A subfloor is a deceptive surface. You might put a four foot level on it and think you are golden. But what happens when you put a ten foot straightedge down? You see the long waves. Those waves are caused by the joists underneath. If a joist is crowned upward, your floor will have a high spot that acts as a pivot point. Every time you walk over it, the boards on either side will teeter. This mechanical stress is what causes those annoying squeaks. It is not the wood rubbing together. It is the fastener pulling in and out of the joist because the subfloor is moving. You have to address the structural source. Sometimes that means sistering a joist in the basement. Other times it means using a floor leveling compound that has a high compressive strength. I prefer compounds that hit 4000 PSI because they can handle the point loads of heavy furniture without cracking.
“Substrate preparation is seventy percent of the job; the remaining thirty percent is just the victory lap.” – TCNA Handbook Insight
The chemistry of floor leveling compounds
Floor leveling compounds use polymer-modified cements to create a high strength bond with the substrate. These products feature controlled shrinkage and high flowability to fill low spots automatically. Primers are essential to prevent the subfloor from absorbing hydration from the leveling mix, which would otherwise result in brittle adhesion and delamination.
Let’s zoom into the molecular level. When you pour a self-leveler, you are initiating a complex chemical reaction. The polymers in the mix are designed to create a bridge between the old surface and the new one. But if your concrete slab is dusty or porous, it will suck the water out of the leveler before the cement crystals can fully form. This is why I always use a high-quality acrylic primer. It seals the pores and creates a tacky surface for the leveler to grab onto. I have seen guys pour leveler over a dusty subfloor without a primer. Two weeks later, you can hear the leveler crunching under the carpet because it never actually bonded. It just turned into a layer of expensive crackers. You also have to watch your water ratios. If you add too much water to make it flow easier, you weaken the crystalline structure. The top of the pour will be soft and chalky. It won’t hold a staple or an adhesive. You have to follow the bag instructions to the milliliter.
Why your laminate clicks at night
Clicking sounds in laminate floors are caused by vertical movement over subfloor voids. When a floating floor is installed over a dip, the locking joint is forced to bend under weight. This mechanical friction produces a clicking or snapping noise as the HDF core rubs against the underlayment or the neighboring plank.
There is a ghost in the floor. That is what homeowners tell me. They say they hear clicks and pops when they walk through the hallway. It is not a ghost. It is physics. Laminate is made of high-density fiberboard. It is rigid. If there is a hollow spot under that plank, the plank has to deflect to meet the subfloor when you step on it. The click is the sound of the tongue and groove being stressed to their limit. If you used the flashlight trick, you would have seen that shadow. You would have filled that hole. Now, you are stuck with it unless you pull the whole floor up. This is why I am so obsessive about floor leveling. You get one shot to get the foundation right. Once the floor is clicked together, the subfloor is a secret that only the noises will reveal.
Showers and the structural moisture trap
Shower floor preparation requires a waterproof membrane and a precise slope to ensure effective drainage. The pre-slope beneath the liner must be flat and consistent to prevent water pooling in the mortar bed. A capillary break at the transition prevents moisture migration from the wet area into the dry subfloor of the bathroom.
The shower is the most technical part of any tile job. You are literally building a vessel to hold water. If your subfloor under the shower pan is bouncy, your grout lines will crack. Once they crack, water gets into the thin-set. Most people don’t realize that thin-set is not waterproof. It is a sponge. It will hold water against your subfloor until the wood rots out. I have seen joists that look like wet cardboard because a shower pan wasn’t leveled and waterproofed correctly. You need a solid, deflection-free base. For tile, that means L/360. That is the length of the span in inches divided by 360. If your joists move more than that, your tile will fail. I always double up the plywood or add blocking if I feel even a hint of a bounce. You can’t fix a shaky shower with more grout. You fix it with better lumber.
- Check subfloor moisture levels with a pin-type meter before any carpet install.
- Grind down high spots in concrete using a diamond cup wheel.
- Vacuum the substrate three times to ensure no dust interferes with the bond.
- Apply the correct primer for the specific leveling compound being used.
- Allow self-leveling materials to cure for at least 24 hours before walking on them.
- Verify flatness with a ten foot straightedge in multiple directions.
- Ensure the expansion gap is consistent around every vertical obstruction.
The 1/8 inch that ruins everything
A deviation of one eighth of an inch can cause catastrophic failure in modern thin-click flooring systems. While traditional carpet install projects can hide minor subfloor flaws, rigid core vinyl and laminate have zero tolerance for unevenness. The structural load of furniture and foot traffic concentrates stress on high points, leading to fractured joints.
People laugh when I pull out my feeler gauges. They think I am being too precise. But that eighth of an inch is the difference between a floor that lasts thirty years and one that lasts three. When you have a high spot, the floor sits on it like a seesaw. The planks are constantly trying to bend over that hump. Since they are designed to be flat, the internal tension eventually wins. The wear layer will start to white at the edges. That is the plastic stretching and failing. You might think you can just sand it down, but if it is concrete, you are looking at a messy afternoon with a shroud and a vacuum. Do the work before the flooring arrives. Acclimate your materials to the room. If you don’t let the wood sit in the house for at least three days, it will shrink or grow the moment you pin it down. This is the part of the job that isn’t pretty. It doesn’t look good on a portfolio. But it is the part that keeps me from getting those angry phone calls at two in the morning because a floor is buckling.
The reality of flooring is that the finished surface is just a mask. The true character of the room is the subfloor. If you take the time to use the flashlight trick, to grind the high spots, and to fill the valleys with high-quality polymer-modified compounds, you will have a floor that stays quiet and stable. Don’t listen to the big-box retailers who tell you that their underlayment fixes everything. They are trying to sell you a roll of foam. I am telling you how to build a floor that will outlast the house. It takes sweat, it takes a lot of dust, and it takes an obsessive attention to the tiny fractions of an inch. But when you walk across a perfectly flat floor, you can feel the quality. It doesn’t move. It doesn’t sound hollow. It feels like the solid ground it was meant to be.