The Penny Trick for Checking if Your Subfloor Screws are Countersunk
Most guys skip the leveling compound. They think the underlayment will hide the dip. It won’t. I spent three days grinding concrete on a job last month just so the floor wouldn’t click like a castanet. I have seen the same disaster play out with plywood. People think they can just slap some glue and a few screws into a sheet of OSB and call it a day. Then they lay a expensive laminate or a thin carpet and wonder why they feel a sharp bump under their heel every time they walk toward the kitchen. It is almost always a screw head that was not driven deep enough. I have spent twenty five years on my knees fixing these mistakes. A floor is a performance surface. It is a piece of structural engineering that happens to look nice. If the foundation is trash, the finish will be trash too. That is why I rely on a simple piece of pocket change to save my reputation.
The day I spent three days grinding concrete
Subfloor preparation requires a flat surface where every fastener sits at least one sixteenth of an inch below the wood plane. Using a penny allows you to detect proud screws that will eventually cause laminate failure or carpet wear. This manual check ensures structural integrity across the entire room before the final floor installation. I once walked onto a job where the previous contractor had missed over fifty screws in a single master bedroom. He thought his impact driver was set correctly. It was not. He had already started laying the underlayment. I made him rip it all up. You cannot hide a steel screw head with a piece of foam. The foam will compress over time and the hard steel will remain. That creates a pivot point. Every time you step on that spot, the floorboards flex around the screw. Eventually, the tongue and groove joint on your laminate or engineered hardwood will snap. It is a slow motion train wreck that starts with a single fastener sitting a hair too high.
Why a simple copper coin saves a thousand dollar floor
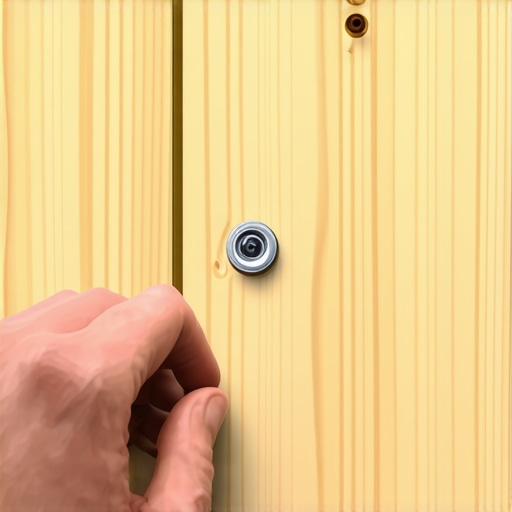
Checking subfloor screws with a copper penny is the most reliable way to identify protruding fasteners before laying LVP or hardwood. You slide the coin across the plywood seams and the field of the subfloor sheet. If the penny clicks or stops, you have found a proud screw that needs re-driving. It sounds primitive because it is. We have lasers that can tell us if a floor is level within a thousandth of an inch, but a laser will not tell you if a screw head is sticking up just enough to ruin a carpet install. When you are installing carpet, a high screw head acts like a tiny cheese grater. It rubs against the backing of the carpet every time someone walks over it. Within two years, you have a bald spot or a hole. The penny trick is the physical confirmation that the surface is clear. I tell my apprentices that if they cannot slide a penny from one wall to the other without hearing a click, they are not done with the screw gun. It is about discipline. It is about respecting the physics of the assembly.
“A floor is only as good as the subfloor beneath it; deflection is the enemy of every joint.” – Master Flooring Axiom
The physics of fastener protrusion in subfloor assemblies
Fastener depth affects the compression strength of the subfloor and prevents mechanical interference with the finished floor. When a screw head sits above the wood fibers, it creates a stress riser. In engineered flooring, this leads to creaking and joint separation as the planks struggle to sit flat. When you drive a screw into a piece of CDX plywood, the wood fibers are compressed. The bugle head of the screw is designed to pull the wood down tight against the joist. If the screw stops early, the wood is not fully compressed. This leaves a tiny gap between the plywood and the joist. That gap is the source of the dreaded floor squeak. People buy cans of lubricant or try to spray foam into their crawlspaces to stop squeaks. The real fix is just driving the screw correctly in the first place. You need the head to be countersunk so it is not the highest point on the board. The wood around the screw should be slightly indented. This is what we call the crater effect. It ensures that even if the wood swells slightly due to humidity, the steel head stays out of the way.
When leveling compound meets a proud screw head
Floor leveling requires a perfectly clean subfloor where metal fasteners do not break the surface tension of the self-leveling underlayment. A screw head sticking up will create a weak point in the cured compound, leading to cracking and delamination. If you are pouring leveler, those screw heads are your worst enemy. The compound is designed to flow like water. It creates a smooth, glass like surface. But if a screw is sticking up, it creates a ripple. Even worse, the metal and the cementitious compound have different expansion rates. As the house heats and cools, that screw head will push against the bottom of the leveler. Eventually, you will see a little starburst crack in your beautiful flat floor. It is a preventable tragedy. I have seen guys try to grind down screw heads after the leveler has dried. It is a dusty, miserable job that usually ends up ruining the levelness they worked so hard to achieve. Use the penny before you open the bag of leveler.
The mechanical reality of subfloor fasteners
| Fastener Type | Ideal Depth | Material Logic | Risk Level |
|---|---|---|---|
| Subfloor Screw | 1/16 inch below surface | Prevents joint friction | High |
| Ring Shank Nail | Flush or deeper | Resists pull out | Medium |
| Finish Nail | 1/8 inch with wood fill | Purely aesthetic | Low |
| Construction Staple | Flush with crown | Shear strength focus | Medium |
How a single fastener kills a laminate locking system
Laminate flooring relies on click-lock joints that require a flat substrate to maintain lateral tension. A proud screw creates a fulcrum point that forces the tongue and groove to flex upward, which will snap the locking mechanism under foot traffic. Modern laminate is great, but it is thin. Most of it is only eight to twelve millimeters thick. The locking joints are even thinner. They are made of high density fiberboard which is basically pressed sawdust and glue. It is strong under compression but weak under tension. When a plank sits on top of a screw head, it is like a see saw. One side goes up, the other goes down. The joint is not designed to handle that kind of vertical movement. After a few hundred steps, the thin piece of fiberboard that holds the planks together just gives up. Now you have a gap. Dirt gets in the gap. Moisture gets in the gap. The floor starts to swell. All of this because you did not want to spend ten minutes with a penny and a screwdriver.
Preparing subfloors for the moisture of custom showers
Shower subfloors must be perfectly flat to allow waterproof membranes like Schluter-Kerdi to bond without voids or punctures. A protruding screw head can pierce the membrane during tile installation, leading to structural rot and mold growth. This is where the stakes are the highest. In a bedroom, a bad screw just makes a noise. In a bathroom, a bad screw can cause ten thousand dollars in water damage. When you are laying down a moisture barrier, you need it to be perfectly flat against the substrate. If there is a screw head sticking up, it creates a point of high pressure. When you walk on the tile above it, that pressure is transferred directly to the screw. It is like a dull needle pressing against a balloon. It might not pop today, but it will eventually wear through. Once that hole exists, gravity does the rest. Water finds the screw, follows the threads down into the joist, and the rot begins. I have torn out showers where the entire subfloor was turned to mush because of one missed fastener. It makes me sick to see such a basic error lead to such a massive failure.
“In tile work, the substrate is the foundation of the finish; any irregularity in the subfloor will be mirrored in the grout lines.” – TCNA Technical Manual Reference
The technical checklist for a professional subfloor
- Inspect every square foot of the plywood using the penny slide method.
- Ensure all screws are driven into the center of the joists to prevent wood splitting.
- Check the moisture content of the subfloor with a pin meter to ensure it is within 4 percent of the finish flooring.
- Sweep the floor twice to remove any sawdust or metal shavings before applying underlayment.
- Countersink every fastener at least one sixteenth of an inch below the surface.
- Verify that no screws have missed the joist, which creates a floating fastener that will click.
The ghost in the expansion gap
Expansion gaps at the perimeter of the subfloor must be clear of obstructions to allow the wood to expand and contract with seasonal humidity. A screw placed too close to the edge can split the plywood, reducing the holding power of the fastener. Wood moves. It is a biological product. Even after it is cut and dried and turned into a house, it still thinks it is a tree. When the humidity goes up in the summer, those sheets of plywood swell. If you have not left a gap at the walls, the floor will buckle. If you have driven screws too close to the edge without pre-drilling, you have already started a crack. That crack will grow. The screw will lose its grip. The floor will start to move. You will hear it every time you walk by. It sounds like a ghost in the floorboards, but it is just bad carpentry. You have to respect the material. You have to give it room to breathe while still holding it tight to the skeleton of the house.
Why your subfloor is lying to you
Visual inspections of subfloors are often misleading because shadows and wood grain can hide proud fasteners from the naked eye. Using tactile feedback like the penny trick or a steel straightedge is the only objective method to verify surface flatness. I have seen guys look at a floor and say it is fine. They are lying to themselves because they are tired and want to go home. You cannot trust your eyes. The overhead lights in a job site are usually terrible. They create shadows that mask the tiny raised heads of the screws. You have to feel the floor. You have to get down on your knees. If you are not willing to do that, you should not be in the flooring business. It is a craft of inches and millimeters. It is a craft of sweat and attention to detail. Every single screw matters. There are usually hundreds of them in a standard room. Each one is a potential failure point. Each one is a chance to do the job right or do it twice. I prefer to do it once. I prefer to use the penny and know that when I lay that expensive white oak or that modern vinyl, it is going to stay flat for the next forty years.