How to Stop Laminate Boards from Peaking at the Seams
I spent three days grinding concrete on a job last month just so the floor wouldn’t click like a castanet. Most guys skip the leveling compound. They think the underlayment will hide the dip. It won’t. I walked into a kitchen recently where the laminate was peaking so badly it looked like a mountain range at every joint. The homeowner thought they bought a bad batch of material. The truth was simpler and more expensive. The installer didn’t leave a gap at the walls and the subfloor had a hump that pushed the boards together until they had nowhere to go but up. I can still smell the burnt concrete dust from that grinder. My hands were vibrating for hours after that job. But the floor stayed flat. That is the difference between a floor that lasts and one that fails in six months. Flooring is not a decoration. It is a structural engineering challenge that starts under your feet before the first box is even opened.
The silent pressure within the laminate planks
Laminate board peaking occurs when two planks are forced together with such high pressure that the edges lift into a tent shape. This is typically caused by a lack of expansion gaps at the perimeter or excessive moisture causing the high-density fiberboard core to expand beyond its limits. Laminate is a floating floor. It is never nailed or glued to the subfloor. It needs to move as temperature and humidity change. When you lock it against a wall or a heavy kitchen island, you kill its ability to breathe. The pressure builds across the entire span of the room. Eventually the weakest point gives way. That point is always the locking mechanism at the seam. The boards act like a pair of tectonic plates. When they collide, they create a mountain. You cannot simply hammer them back down. If you try, you will shatter the melamine wear layer and ruin the core integrity.
“A floor is only as good as the subfloor beneath it; deflection is the enemy of every joint.” – Master Flooring Axiom
The physics of the expansion gap
An expansion gap is a mandatory space left between the edge of the flooring and any fixed object like a wall, door frame, or cabinet. This gap must be at least 1/4 inch to 3/8 inch wide to allow for the natural movement of the planks. I see people shove the boards tight against the baseboards all the time. They think it looks cleaner. Those people are wrong. Wood fibers are hygroscopic. They absorb moisture from the air. When the humidity in your house hits sixty percent in the summer, every single plank grows by a fraction of a millimeter. Across a twenty foot room, that adds up to a massive amount of physical force. If that floor hits a wall, it will buckle. You need to use spacers during the install. Do not trust your eyes. Use the plastic blocks designed for the job. Once the floor is in, the baseboard or a piece of quarter-round molding covers the gap. The floor moves underneath the trim while staying hidden. It is a simple system that people fail to respect every single day.
Why your subfloor is lying to you
A subfloor that is not perfectly flat will cause the laminate locking systems to engage at an angle which eventually leads to peaking or snapping. The industry standard requires a subfloor to be flat within 3/16 of an inch over a 10 foot radius. Most people think the underlayment will act like a sponge and fill in the holes. It does not work that way. If you have a hump in the plywood or a high spot in the slab, the laminate will pivot on that point. Every time you walk over it, the joint flexes. This mechanical stress weakens the tongue and groove. Eventually, the friction between the boards causes them to bind. Once they bind, the next time the humidity rises, they will peak. I have spent more time with self-leveling compound and a straightedge than I have actually clicking boards together. Preparation is ninety percent of the work. The actual installation is just the victory lap. If you ignore the subfloor, you are just building a failure on a bad foundation.
| Room Span (Feet) | Expansion Gap Required (Inches) | Flatness Tolerance (Inches per 10ft) |
|---|---|---|
| Under 20 Feet | 1/4 Inch | 3/16 Inch |
| 20 to 30 Feet | 3/8 Inch | 3/16 Inch |
| Over 30 Feet | 1/2 Inch with T-Molding | 1/8 Inch |
The danger of excessive underlayment cushion
While most people want the thickest underlayment, too much cushion actually causes the locking mechanisms on laminate to snap or peak under pressure. A thick pad allows the floor to bounce too much when walked upon which stresses the HDF core. This is a hard truth for many homeowners to swallow. They want that soft, carpet-like feel under their hard floors. But laminate is rigid. The locking systems are brittle. If you put a 6mm soft foam under a 7mm laminate, the joints will fail. I recommend a high-density underlayment that is no more than 2mm to 3mm thick. It should have a high compression strength. This provides a solid base that supports the joints while still providing the necessary moisture barrier and sound dampening. If you feel the floor sinking when you step, you used the wrong padding. That vertical movement is the primary killer of click-lock joints.
- Check the subfloor for high spots using a 10 foot straightedge.
- Measure the moisture content of the concrete or wood before starting.
- Acclimate the boxes of laminate in the room for at least 48 hours.
- Use spacers at every wall and vertical obstruction.
- Install T-moldings in doorways or rooms exceeding 30 feet in length.
- Ensure the underlayment is not overlapped, which creates a ridge.
“Standard industry tolerance for subfloor flatness is 3/16 of an inch over a 10 foot radius.” – NWFA Installation Guidelines
The regional climate impact on board expansion
Humidity levels in different regions dictate how much room a floor needs to move and how long it must acclimate before installation. High humidity environments require larger expansion gaps and more aggressive moisture barriers to prevent core swelling. If you live in a place like New Orleans, your floor is fighting a constant battle against moisture. If you live in Phoenix, the dry air will try to shrink those boards until the joints open up. Laminate is basically compressed sawdust and glue. It reacts to the air. If you take boards from a cold, dry warehouse and install them immediately in a humid house, they will grow. They will peak within a week. You must let the material sit in the room where it will be installed. This allows the internal moisture levels to stabilize. It is a boring step. It is a vital step. People skip it because they are in a hurry. They end up calling me to fix the mountain in their living room a month later. I tell them the same thing every time. The wood does not care about your schedule. It only cares about the physics of the room.
How to repair a peaked laminate seam
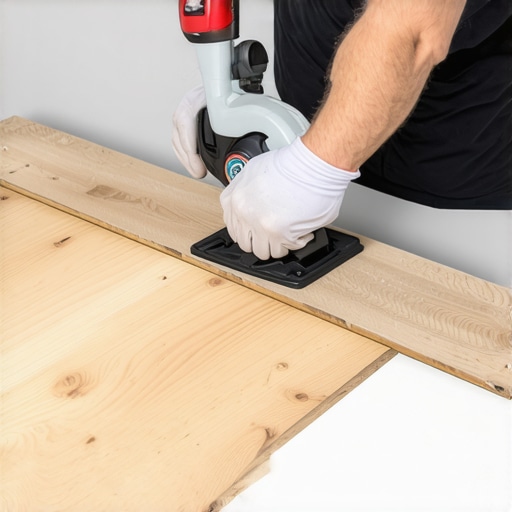
To repair a peaked seam, you must first identify where the floor is bound against a wall and trim back the edge to create an expansion gap. Once the pressure is released, the boards can often be tapped back into a flat position. You start by removing the baseboard near the peak. Check the gap. If the laminate is tight against the drywall, that is your problem. Use a oscillating multi-tool to carefully cut away 1/4 inch of the laminate edge. You will hear the floor pop as the tension is released. It is a satisfying sound. After the gap is created, you might need to use a tapping block and a mallet to settle the peak. If the boards have been peaked for a long time, the locking mechanism might be permanently deformed. In that case, you have to disassemble the floor back to that point and replace the damaged planks. It is a surgical process. It requires patience. Do not use a hammer directly on the floor. You will chip the surface. Use a pull bar for the edges. Respect the material and it will eventually lie flat again. Just make sure that gap stays open this time.