Why Your Shower Bench is Growing Mold Under the Tiles
I spent three days grinding concrete on a job last month just so the floor wouldn’t click like a castanet. That is the reality of the trade. Most guys skip the leveling compound and think the underlayment will hide the dip. It won’t. I have spent twenty five years on my knees with a moisture meter and a level, and I can tell you that a shower bench is just a subfloor with a harder job. When I walk into a bathroom and smell that damp, earthy rot, I know exactly what I am going to find behind the marble. It is usually a failure of physics and a total lack of respect for the TCNA Handbook. People treat flooring as a cosmetic choice, but it is a structural engineering challenge. If you ignore the slope or the membrane, you are not building a shower; you are building a terrarium for black mold. This guide breaks down the microscopic reasons why your bench is failing and how the chemistry of your installation determines whether your home stays healthy or becomes a biohazard.
The structural failure hiding behind your stone
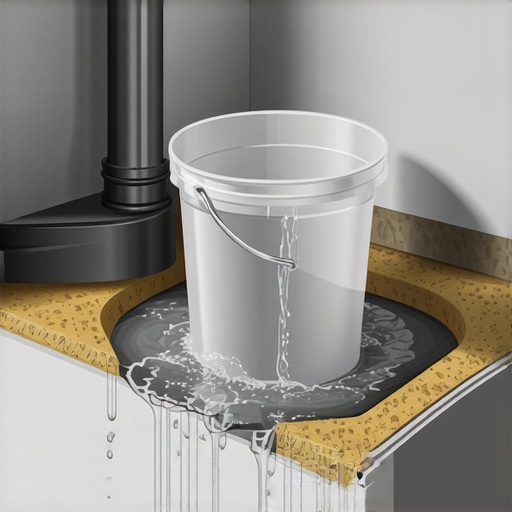
Shower bench mold growth occurs when water penetrates the grout and becomes trapped between the tile and the waterproofing layer due to improper pitch. If the bench is not sloped at a minimum of one quarter inch per foot toward the drain, the water sits and creates a stagnant pool. This moisture eventually finds a pinhole in the sealant or a crack in the thinset. Once the water reaches the wooden framing or the cement board, it cannot escape. The dark, warm environment under the tile is the perfect incubator for fungal spores. Most installers treat a bench like a piece of furniture, but it must be treated like a roof. Every horizontal surface in a wet area is a liability. If you do not have a positive slope, gravity works against you. The water will stay in the mortar bed for weeks. Over time, this leads to efflorescence and the breakdown of the adhesive bond. I have seen benches that looked perfect on the outside but were essentially bags of wet sawdust on the inside because the installer did not understand the capillary effect.
“A floor is only as good as the subfloor beneath it; deflection is the enemy of every joint.” – Master Flooring Axiom
The molecular dance of moisture and thinset
When we talk about thinset, we are talking about a chemical bond that relies on a specific hydration process. Modified thinsets use polymers to increase flexibility and adhesion. However, these polymers can re-emulsify if they are constantly submerged in standing water. This is a common issue on shower benches that lack proper drainage. The water sits in the ridges left by the trowel, and the thinset begins to soften. You might notice your grout lines turning dark or staying wet long after the shower is used. This is a sign of saturation. We see similar issues in floor leveling projects where the technician ignores the moisture vapor transmission rate of the slab. In a shower, the vapor drive is even more aggressive. Heat from the water increases the kinetic energy of the moisture molecules, forcing them deeper into the substrate. If you used a cheap, builder-grade mastic instead of a high quality modified thinset, you have essentially used sugar to hold your tiles on. Mold loves organic matter, and many cheap adhesives provide exactly the nutrients they need to thrive. I always tell my clients that the price of the tile is irrelevant if the mud holding it up is garbage. You want a high density, low absorption mortar that meets ANSI A118.15 standards. Anything less is a gamble with your subfloor.
Why gravity always wins against poor pitch
A shower bench must have a slope that is integrated into the framing itself, not just built up with extra mortar. I have seen guys try to shim their tiles to create a slope, which leaves massive voids of thinset underneath. These voids are like little caves for water to hide in. When I do a carpet install or a laminate floor, I worry about the flatness of the wood. When I do a shower, I worry about the angle of the dangle. If that bench is level, it is wrong. It needs to lean toward the floor drain so the water can migrate out of the stone and into the plumbing. Without that pitch, the water sits against the wall. This is where the mold starts. It climbs up the back of the tile and into the wall cavity. By the time you see it on the ceiling below, the framing is already soft. You have to understand that grout is not waterproof. It is a filter. It slows the water down, but it does not stop it. The real work is done by the membrane underneath. If that membrane is flat, the water stays there. It is simple math. You cannot fight gravity with a sponge.
“All shower floors must have a minimum slope of 1/4 inch per foot toward the drain to ensure proper evacuation of water and prevent subsurface saturation.” – TCNA Standards
The truth about cement backer units
Many homeowners think cement board is waterproof. It is not. It is merely water stable, meaning it will not fall apart when it gets wet like drywall does. But cement board is porous. If you do not apply a liquid or sheet membrane over it, the water will go right through it and soak your 2×4 studs. I have torn out showers where the cement board was fine, but the wood behind it was so rotten I could poke a screwdriver through it with one finger. This is why floor leveling is so critical in the planning phase. If your walls are out of plumb and your bench is not square, you end up with thick spots of mortar that take forever to dry. You want a thin, consistent bond. Think about it like an engine. If the tolerances are off, the whole thing eventually seizes up. I prefer sheet membranes like Schluter-Kerdi because they provide a consistent thickness and a guaranteed vapor barrier. Liquid membranes are okay, but most guys put them on too thin. It is like painting a wall; if you can see the color of the board through the goo, you did not use enough. You need to hit that mil thickness specified by the manufacturer or you are just wasting time. I have seen people try to use laminate underlayment in wet areas because they saw a video online. It makes my blood boil. Use the right tools for the right job.
Comparing waterproofing systems for shower benches
| System Type | Material Composition | Pros | Cons |
|---|---|---|---|
| Liquid Applied | Elastomeric Polymer | Easy for complex shapes | Hard to verify thickness |
| Sheet Membrane | Polyethylene with Fleece | Guaranteed vapor barrier | Difficult at corners |
| Traditional Mud Bed | Portland Cement and Sand | Customizable pitch | High skill requirement |
| Integrated Foam Bench | High Density EPS | Pre-sloped and waterproof | More expensive upfront |
A checklist for a leak proof shower bench
Before you lay a single tile, you need to verify the integrity of the build. Most failures happen in the prep phase. If you wait until the grout is dry to check for leaks, you are already too late. Use this checklist to ensure your bench does not become a mold factory.
- Verify the bench framing has a 1/4 inch per foot slope toward the drain before installing the board.
- Ensure all corners and transitions are reinforced with waterproof banding or fabric.
- Perform a 24 hour flood test on the shower pan and the bench surface to check for leaks.
- Check that the thinset used is rated for submerged or wet environments.
- Seal all grout lines with a high quality penetrating sealer to slow down water absorption.
- Avoid using organic mastics; they are food for mold.
The ghost in the expansion gap
One of the biggest mistakes I see is the lack of an expansion gap where the bench meets the wall. In any flooring job, whether it is carpet install or tiling a skyscraper, you have to account for movement. Materials expand and contract with temperature and humidity changes. If you grout the corner where the bench hits the wall, that grout will crack. When it cracks, water enters. You should always use a 100 percent silicone caulk in those change of plane areas. Silicon is flexible. Grout is rigid. When the house settles, the silicone stretches. The grout just breaks. People hate the look of caulk, so they force the installer to use grout. Then they wonder why their bench is leaking two years later. It is the same logic as the perimeter gap for a laminate floor. You have to give the materials room to breathe. In the swampy humidity of the Southeast, this is even more vital. The wood framing behind the tile will swell in the summer and shrink in the winter. If your tile assembly is too rigid, it will pop or crack. Once you have a crack, the mold has an open door. Don’t be the guy who values aesthetics over engineering. Use the silicone and save your subfloor.