How to Fix a Bubbling Shower Liner Without Ripping Out the Tile
The expert guide to salvaging a bubbling shower liner without a sledgehammer
Fixing a bubbling shower liner requires a precision-based approach involving adhesive injection and localized structural stabilization. Most residential contractors will tell you to rip everything out, but they are often looking for an easy payday rather than a technical solution. By identifying whether the bubble is caused by moisture vapor drive, poor thin-set coverage, or off-gassing, we can apply surgical techniques to rebond the membrane to the substrate. This process demands a moisture meter, a high-viscosity epoxy resin, and the patience of a master mechanic who has spent thirty years on his knees fixing builder-grade mistakes. We are looking at the molecular bond between the tile and the waterproofing layer, treating the shower as an engineering assembly rather than just a place to get clean.
The hidden truth about subfloor prep and shower failure
Subfloor leveling and moisture management are the primary factors that determine if a shower membrane remains stable or develops air pockets. If the substrate beneath the tile is uneven or if the moisture content exceeds three percent, the bond between the waterproofing layer and the mortar bed will eventually fail. I spent three days grinding concrete on a job last month just so the floor would not click like a castanet, and that same level of obsessive prep applies to shower pans. Most guys skip the leveling compound. They think the underlayment or the liner will hide the dip. It will not. When you have a low spot in the subfloor, the liner bridges that gap instead of sitting flush. Eventually, the weight of the water and the tile causes that bridge to flex, the adhesive shears, and you get a bubble. It is a mechanical failure born from laziness. If you are dealing with a bubble now, you are paying for the sins of the person who didn’t own a straightedge or a grinder.
The physics of the shower bubble
Hydrostatic pressure and thermal expansion create the physical conditions necessary for a liner to delaminate from its mortar bed. When water seeps through grout lines, it can become trapped between the tile and the membrane. If the shower floor is heated or even just exposed to hot water, that trapped moisture expands. This expansion creates an internal pressure that pushes the liner away from the substrate. This is why you see the bubble. It is not just air; it is a pressurized environment. I have seen liners in high-end condos in humid climates like Miami buckle because the installer did not allow the thin-set to cure properly before sealing the grout. The moisture gets locked in, the sun hits the bathroom window, and suddenly you have a pocket of steam trying to escape through the floor. It will buckle. There is no way around the physics of expansion.
“A floor is only as good as the subfloor beneath it; deflection is the enemy of every joint.” – Master Flooring Axiom
The surgical injection method for trapped air
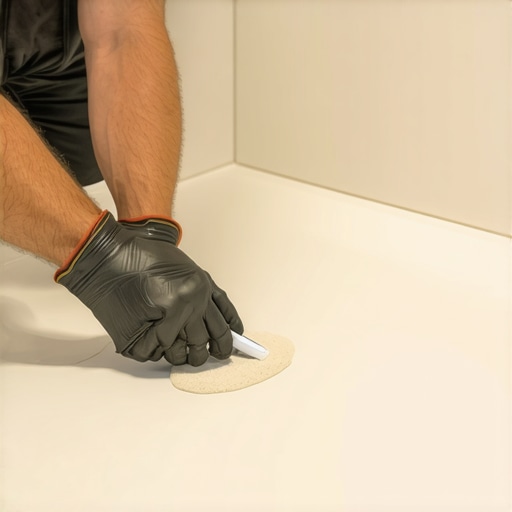
Low-viscosity epoxy injection is the most effective non-destructive repair for localized bubbling in tile showers. This involves drilling a small hole through the grout line, not the tile, and using a syringe to pump a high-strength bonding agent into the void. You first have to ensure the area is bone dry. I use a vacuum with a specialized attachment to suck any moisture out of the bubble for at least forty-eight hours. Once the moisture meter reads zero, you inject the resin. You then place a heavy weight, usually a few five-gallon buckets of thin-set, on top of the tile to compress the bubble. The resin fills the void and creates a permanent chemical bond. It is the same logic we use for floor leveling in high-traffic commercial spaces. You are not just filling a hole; you are restoring the structural integrity of the assembly. If the bubble is massive, you may need multiple injection points to ensure the air is fully displaced by the adhesive.
Membrane performance and material compatibility
| Material Type | Janka Hardness Equivalent | Moisture Resistance | Repair Difficulty |
|---|---|---|---|
| PVC Liner | Low | 98% | Moderate |
| CPE Membrane | Medium | 99% | High |
| Liquid Applied | N/A | 95% | Low |
| EPDM Rubber | Medium | 97% | High |
While most people want the thickest underlayment, too much cushion actually causes the locking mechanisms on LVP to snap under pressure, and in showers, too much flexibility leads to grout cracks. The material of your liner dictates how it reacts to adhesives. PVC liners are common in big-box stores, but they contain plasticizers that can migrate over time, making the material brittle. When a brittle liner bubbles, it is more likely to crack than a CPE membrane. Understanding the chemistry of your liner is the difference between a ten-year repair and a two-week band-aid. You need to match the injection resin to the specific polymer of the liner. A standard polyurethane might not grab onto a greasy PVC surface, whereas a modified epoxy will bite into the material and hold fast despite the moisture cycles.
Tools for the non-destructive repair checklist
- Professional grade moisture meter with pinless sensors
- High-torque drill with 1/16 inch diamond-tipped masonry bits
- Industrial vacuum with HEPA filtration for moisture extraction
- Modified epoxy resin with a minimum 24-hour cure time
- Weighted compression blocks or sandbags for pressure
- Color-matched grout or epoxy grout for hole sealing
The ghost in the expansion gap
Perimeter expansion joints are often overlooked by installers who think grout is a universal filler. In reality, every shower floor needs a flexible joint at the wall-to-floor transition. If the installer ran the tile tight against the wall, the entire floor has nowhere to go when it expands. This lateral pressure has to go somewhere, so the floor bows upward. This creates a bubble that is not actually an adhesive failure, but a structural one. If your bubble is near the wall, the fix is not injection. The fix is removing the grout at the perimeter and replacing it with a 100 percent silicone caulk. This allows the floor to breathe. It is the same reason we leave gaps in a laminate or carpet install. Materials move. If you do not give them room to move, they will find room by pushing up. I have seen solid oak floors lift four inches off the ground because an architect forgot about humidity. Your shower tiles are no different.
“Failure to provide for movement joints is the leading cause of tile installation failure in wet environments.” – TCNA Handbook G-12
Why your subfloor is lying to you
Concrete slab moisture can travel through the foundation and push against the bottom of your shower liner. This is called moisture vapor transmission. If your house is built on a high water table or if the exterior drainage is poor, the concrete is constantly damp. That vapor wants to move from the ground into your bathroom. The liner stops it, but the pressure of that vapor can cause the liner to lift. In these cases, fixing the bubble from the top is only half the battle. You have to address the hydrostatic pressure from below. I have seen guys spend thousands on high-end tile only to have it pop off because they didn’t put down a moisture barrier on the slab. It is a painful lesson to learn. You can inject all the epoxy you want, but if the earth is pushing up, the floor will eventually lose. This is where regional climate logic comes in. In a swampy area, your shower needs a different engineering profile than one in the high desert.
The 1/8 inch that ruins everything
Tolerance and slope are the metrics that separate a master from a handyman. If the shower pan is off by just an eighth of an inch over a four-foot span, water will pool. This pooling increases the dwell time of moisture on the grout. More dwell time means more water infiltration. More water infiltration means more pressure on the bond. It is a cascading failure. When I walk into a bathroom with a bubbling floor, the first thing I do is pull out a level. If the slope is wrong, the bubble is just a symptom of a larger disease. You can fix the bubble, but you also have to fix the drainage. Sometimes that means grinding down a few tiles and resealing them to create a channel for the water. It is not pretty, but it works better than a full tear-out. You have to be practical. You have to be blunt. If the floor is flat, the water stays. If the water stays, the floor fails.