How to Cut Carpet Around a Radiator Pipe Without Fraying
The physics of precision carpet cutting around mechanical penetrations
I have been on my knees for twenty-five years with a moisture meter in one hand and a high-carbon steel blade in the other. My hands smell like WD-40 and oak dust, and my joints tell the story of a thousand subfloor battles. You do not just throw carpet down and hope for the best. You architect it. Most guys skip the leveling compound. They think the underlayment will hide the dip. It will not. I spent three days grinding concrete on a job last month just so the floor would not click like a castanet once the laminate went down in the adjacent room. That same level of obsession applies to every radiator pipe you encounter. If your subfloor is not flat, your carpet will move, and if your carpet moves, your pipe cuts will fray into a mess of loose nylon fibers. Cutting carpet around a radiator pipe is not a decorative task. It is a structural engineering challenge that requires an understanding of polymer chemistry and textile tension.
The strategy for a clean pipe penetration
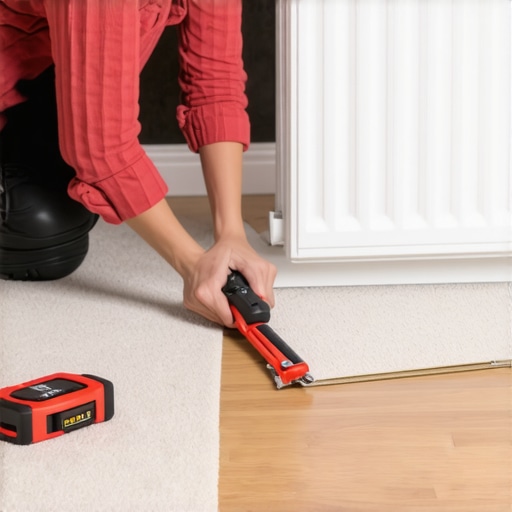
Cutting carpet around a radiator pipe requires a surgical relief slit followed by a circular bypass cut that accounts for pipe diameter. You must apply a thermoplastic or solvent-based seam sealer to the raw edges of the primary and secondary backing to prevent tuft loss. A tucked finish ensures the radiator flange hides the structural cut. This process prevents the vertical movement of the carpet from pulling fibers away from the backing over time. You are dealing with heat, vibration, and foot traffic, all of which conspire to turn a small slit into a gaping hole.
The subfloor secret that ruins your finish
Before you even touch a knife, you have to look at what is under the padding. If you are working in an old Victorian with a radiator, you are likely dealing with uneven floorboards or a crumbling screed. In my decades of experience, I have seen installers try to carpet over a dip near a pipe. As soon as a heavy radiator is reinstalled or someone walks near that pipe, the carpet sinks into the void. This tension pulls the cut away from the pipe, exposing the subfloor. I always use a high-quality floor leveling compound to ensure the area around the radiator is dead flat. This is the same principle I apply to showers or laminate jobs. If the base is not perfect, the top layer is doomed. You want the carpet to sit at a neutral tension before you make your first incision.
The anatomy of carpet fraying and fiber loss
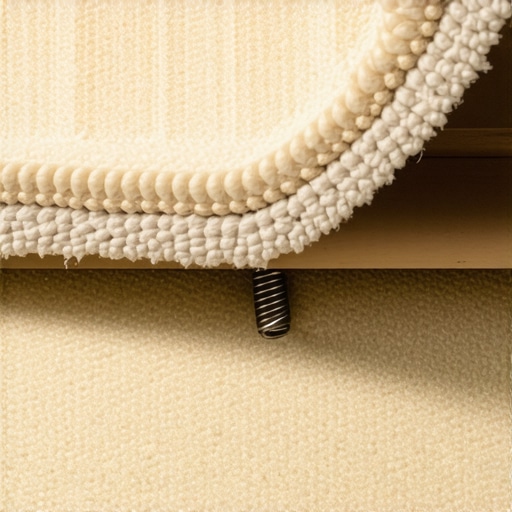
To understand how to stop fraying, you have to understand the molecular structure of the carpet. Most modern carpets are composed of a face fiber, a primary backing, and a secondary backing held together by a layer of synthetic latex. When you cut through these layers, you are breaking the physical bond that holds the tufts in place. If the latex is cheap or if the heat from the radiator pipe dries out the adhesive, the tufts will simply fall out. This is why we use seam sealers. A good seam sealer re-bonds those cut edges, creating a plasticized barrier that the pipe cannot heat-damage. I prefer a solvent-based sealer for nylon because it bites into the backing deeper than water-based alternatives. You are essentially welding the edge of the carpet.
“A floor is only as good as the subfloor beneath it; deflection is the enemy of every joint.” – Master Flooring Axiom
Tools for the mechanical carpet architect
Do not use a dull utility knife. You need a specialized carpet knife with a fresh double-sided blade. I carry a pouch of blades and swap them every few cuts. A dull blade does not cut the backing; it tears it. Tearing leads to immediate fraying. You also need a tucking tool, often called a stair tool, to drive the carpet into the crevice between the pipe and the subfloor. For the actual cut, a pair of sharp duckbill shears is necessary for trimming the microscopic stray fibers that the knife might miss. If you are working on a high-end job, you might even use a heat gun to slightly soften the backing before the cut, making it more pliable and less prone to cracking.
The geometry of the relief slit
You have to plan your path from the wall to the pipe. This is the relief slit. It should follow the grain of the carpet tufts. If you cut across the rows of fibers, you are creating a jagged edge that will never hide. I find the shortest distance from the nearest wall and follow a single row of tufts. Once you reach the pipe, you make a ‘Y’ cut or a circular relief. The ‘Y’ cut allows the carpet to wrap around the cylindrical pipe without bunching. The goal is to have the two wings of the ‘Y’ meet perfectly on the back side of the pipe. If they overlap, you get a hump. If they have a gap, you see the subfloor. It is a game of millimeters.
Comparing flooring challenges around heat sources
| Flooring Type | Heat Resistance | Cutting Difficulty | Expansion Risk |
|---|---|---|---|
| Nylon Carpet | Moderate | High | Low |
| Laminate | High | Moderate | High |
| LVP (Vinyl) | Low | Easy | Very High |
| Hardwood | Moderate | High | Moderate |
The chemical reality of heat and adhesives
Radiators get hot. This seems obvious, but many installers forget that heat accelerates the degradation of low-grade adhesives. If you use a cheap pressure-sensitive adhesive or a low-melt seam tape near a radiator, it will fail within two seasons. The constant expansion and contraction of the metal pipe also creates mechanical stress. I always ensure there is a small gap, about one-eighth of an inch, between the carpet backing and the pipe itself. This gap is then covered by a decorative pipe collar or flange. This allows the pipe to move without dragging the carpet with it. It is about isolating the flooring from the mechanical systems of the house.
The checklist for a fray free finish
- Verify subfloor levelness and apply leveling compound if any dips exceed one-eighth of an inch over six feet.
- Acclimate the carpet to the room temperature for at least 48 hours to stabilize the backing.
- Use a fresh, surgical-grade blade for every pipe penetration.
- Identify the pile direction and follow the tuft rows for the relief slit.
- Apply a bead of professional-grade seam sealer to all cut edges.
- Use a tucking tool to set the carpet firmly against the tack strip or floor.
- Install a metal or plastic radiator flange to protect the cut from dust and mechanical friction.
The ghost in the expansion gap
In many older homes, the radiator pipes are not perfectly vertical. They lean. If you cut your carpet for a perfectly vertical pipe, you will find a gap on one side by the time the carpet is stretched. You have to account for the angle of the pipe. This is where experience kicks in. I look at the pipe from two different angles before I make the cut. I also consider the stretch. Carpet is not a static material. When you use a power stretcher to hook the carpet onto the tack strips, the hole you cut for the pipe will move. I always hook the carpet near the pipe first, then make my cut, then finish the stretching. If you cut before you stretch, your hole will end up three inches away from where it needs to be. That is an expensive mistake that usually results in a patch that looks like a scar.
“Textile integrity is maintained only through the chemical bonding of the primary and secondary backings at the point of incision.” – NWFA Technical Bulletin
The 1/8 inch that ruins everything
Precision is everything in this business. If your cut is one-eighth of an inch too wide, you will see the subfloor and the client will call you back. If it is one-eighth too tight, the carpet will climb up the pipe like a vine, creating a trip hazard and a hideous bulge. I use a compass sometimes to mark the pipe diameter on the back of the carpet, but usually, I rely on the feel of the blade. You want the carpet to kiss the pipe, not squeeze it. This is especially true for laminate or hardwood, where expansion gaps are mandatory. With carpet, you have a bit more forgiveness, but not much. The sealer you apply will add a tiny bit of thickness to the edge, so you have to account for that in your initial cut.
Why your subfloor is lying to you
You might think the floor is solid, but radiators often leak. Over decades, those small drips of water rot the subfloor around the pipe. I have walked onto jobs where the plywood was so soft around the radiator that I could push a screwdriver through it. You cannot install carpet over rot. I always inspect the area, cut out any damaged wood, and replace it with new CDX plywood or a patch of high-strength concrete if it is a slab. I then use a moisture barrier. Just because it is a dry room does not mean there is no moisture. Pipes sweat. Steam radiators are notorious for creating localized high-humidity zones. If you do not address the subfloor moisture, your carpet will mold from the bottom up, and no amount of seam sealer will stop the smell.
Managing transitions and the radiator footprint
Often, the radiator is removed during the carpet install. This is the ideal scenario. It allows you to run the carpet straight through and just make a small hole for the pipe. However, if the radiator is stayed in place, you are working in a cramped, dark space. I use a headlamp to see the tuft rows clearly. The shadow cast by the radiator can trick your eyes, making you think you are cutting straight when you are actually veering off at an angle. Stay focused. The tension of the carpet under a radiator is different than in the center of the room. You have to be careful not to over-stretch the area around the pipes, or you will distort the hole you just spent twenty minutes perfecting.
Final technical considerations for a master finish
The carpet industry has changed. We are seeing more polyester blends and fewer pure wools. Polyester behaves differently under a blade. It is slipperier and the tufts are more prone to sliding out of the latex. If you are working with a high-pile shag or a deep Saxony, your cuts have to be even more deliberate. For these carpets, I sometimes use a specialized heat-sealing iron to cauterize the edges of the synthetic fibers. It sounds extreme, but it is the only way to guarantee a life-time fray-free guarantee. You want that installation to look as good in ten years as it does the day you pack up your tools and head home. That is the difference between a floor installer and a flooring architect. You build for the future, not just for the paycheck. Take the time to prep the subfloor, use the right chemicals, and respect the physics of the fiber. Your back might ache, but your reputation will be solid as a rock.