How to stop your shower from leaking into the room below
The nightmare of the phantom drip
I spent three days grinding concrete on a job last month just so the floor wouldn’t click like a castanet. Most guys skip the leveling compound. They think the underlayment will hide the dip. It won’t. When a shower leaks into the room below, it is rarely a single catastrophic event. It is a slow, methodical rot. You need to understand the physics of water migration. Water is a lazy traveler. It follows the path of least resistance, often riding along a floor joist for twenty feet before it finally decides to drop onto your dining room table. Most homeowners assume the tile is the waterproof layer. That is a dangerous lie. Tile and grout are merely the decorative skin. The real work happens in the substrate and the mechanical bond of the waterproofing system. You have to think like a drop of water. You have to find the smallest molecular gap in the sealant. If you do not respect the capillary action of moisture, your carpet install in the hallway or your expensive laminate in the bedroom will be ruined by mold growth within weeks. I have seen 3/4 inch plywood turn into wet cardboard because an installer forgot to wrap the membrane over the curb. It is a technical failure that stems from a lack of respect for subfloor engineering.
The structural lie of the shower pan
To stop a shower leak from hitting the room below, you must identify the failure point in the waterproofing assembly, which is usually found at the drain assembly or the transition between the floor and the wall. Most installers fail to realize that water will move through capillary action behind tiles if the membrane is not continuous. A shower pan is not just a plastic tray. It is a multi-layered engineering solution. If the subfloor has any deflection, the rigid tile will crack. When the tile cracks, the water finds the wooden subfloor. Then the rot begins. You have to ensure that your floor leveling is perfect. A dip of just a fraction of an inch allows water to pool. This standing water creates hydrostatic pressure that eventually forces its way through the smallest pinhole in a sealant. The National Wood Flooring Association and the Tile Council of North America have clear guidelines on this. Deflection is the enemy. If your joists are bouncing, your shower is leaking. It is that simple. You need to stiffen the subfloor before you even think about picking up a trowel.
“A floor is only as good as the subfloor beneath it; deflection is the enemy of every joint.” – Master Flooring Axiom
Where the water actually goes
Water migration through a bathroom floor typically follows the gravity line of the floor joists until it hits a junction or a penetration like a light fixture. This is why a leak in the master bathroom often appears as a wet spot in the kitchen ceiling ten feet away. You are dealing with the physics of surface tension. When the showers are running, the steam condenses on the walls and runs down into the grout lines. If the grout is not sealed or if the thin-set is poorly mixed, the water enters the cement board. Cement board is moisture-resistant, but it is not waterproof. It will hold water like a sponge and slowly release it onto the wood framing. This is where the chemistry of your adhesives matters. Using a modified thin-set with high polymer content is required for a flexible bond. Standard unmodified thin-set is too brittle. It will snap under the thermal expansion of hot water. When it snaps, it creates a microscopic highway for water to bypass your defenses.
The 1/8 inch gap that ruins everything
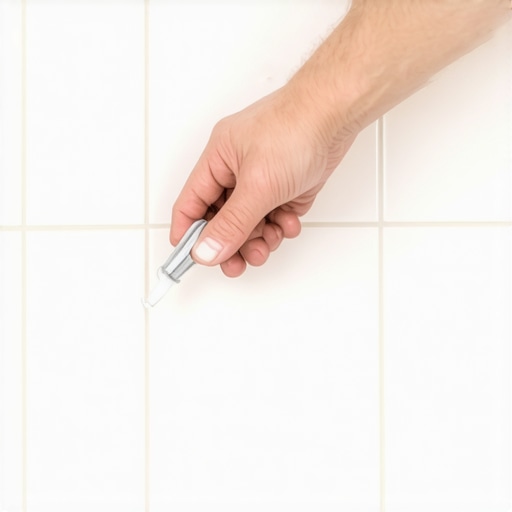
Precision in the expansion gap around the perimeter of the bathroom and the drain flange is the most significant factor in preventing long term moisture damage. Many installers tight-fit their tiles against the wall. This is a mistake. Buildings move. They breathe. If the tile has no room to expand, it will tent or crack the waterproof membrane underneath. I always leave a 1/8 inch gap and fill it with 100 percent silicone caulk. Never use grout in the corners. Grout is rigid and will crack. Silicone is an elastomer. It stretches and compresses while maintaining a watertight seal. [IMAGE_PLACEHOLDER] If you ignore this gap, you are essentially building a ticking time bomb. The same applies to the carpet install at the doorway. If the transition strip is not sealed properly, water from the bathroom floor will wick into the carpet pad. Once that pad gets wet, it stays wet. It will rot the subfloor from the top down while the shower leak rots it from the bottom up. You end up with a structural sandwich of decay.
Why thin-set chemistry fails without prep
The chemical bond between your waterproofing membrane and the thin-set requires a clean, dust-free surface with a specific pH balance to ensure the polymers can cross-link correctly. If you leave dust from the floor leveling compound on the surface, the thin-set will bond to the dust, not the floor. It is like trying to tape a dusty box. It will just peel off. I spend more time with a vacuum and a damp sponge than I do with a tile saw. You need to understand the Janka Hardness Scale of the materials you are working with as well. While Janka is usually for wood, the principle of substrate density applies everywhere. A soft subfloor will compress under the weight of a full bathtub. That compression breaks the bond of the mortar. I have seen entire floors delaminate because the installer used a cheap, non-modified mortar on a subfloor that had too much flex. You want a mortar that has a high concentration of liquid latex. This creates a rubberized matrix that can move without losing its grip on the water molecules. It is the difference between a floor that lasts fifty years and one that fails in five.
| Waterproofing System | Drying Time | Mil Thickness | Skill Level Required || — | — | — | — || Liquid Membrane | 24 Hours | 30-40 mil | Moderate || Sheet Membrane | Immediate | 8-10 mil | High || Traditional Liner | N/A | 40 mil | Expert || Cement Board Only | Never | N/A | Failure |
Liquid membranes and the physics of bonding
Liquid applied membranes provide a seamless barrier that contours to the specific geometry of your shower floor, but they require precise mil thickness to be effective. Most guys paint it on like they are doing a bedroom wall. That is wrong. You need to use a wet-film gauge. If the membrane is too thin, it will have pinholes. If it is too thick, it can skin over and trap moisture inside, leading to a gummy, unstable base. You need to achieve a continuous 30 mil thickness. That is about the thickness of a credit card. While most people want the thickest underlayment for comfort, too much cushion actually causes the locking mechanisms on laminate or LVP to snap under pressure. The same logic applies to waterproofing. You want density and consistency, not fluff. When applying the membrane, pay special attention to the fasteners. Every screw head is a potential leak point. You must pre-fill the screw divots with thin-set and then tape the seams with alkali-resistant mesh before the first coat of liquid membrane even touches the floor.
The truth about waterproof laminate and showers
Laminate flooring is never truly waterproof in a bathroom environment because the click-lock joints remain the primary vulnerability for moisture intrusion into the core. Manufacturers love to put ‘waterproof’ on the box, but that only refers to the surface. If your shower leaks, the water will get under the laminate and be trapped by the plastic underlayment. This creates a greenhouse effect. The water cannot evaporate, so it begins to break down the wood fibers in the laminate core. Within days, the edges will peak. Within weeks, the floor will smell like a swamp. If you have a leak, the first thing you must do is pull up the transition strips. Check for dampness in the subfloor. If the subfloor is wet, the floor must come out. There is no shortcut. I have seen guys try to dry it out with fans. It does not work. The moisture is trapped in the cellular structure of the wood. You are better off installing a high-quality porcelain tile with a properly sloped subfloor. It is the only way to ensure that a carpet install in the next room stays dry and the ceiling below stays white.
- Check subfloor deflection against TCNA standards
- Install a pre-slope under the waterproof liner
- Apply a minimum of two coats of liquid membrane
- Perform a 24-hour flood test before tiling
- Use 100 percent silicone in all change-of-plane joints
“A shower is a managed flood; if you don’t control the exit, the water will find its own.” – Flooring Engineering Manual
How to test your subfloor for deflection
Testing for deflection involves calculating the span of your floor joists against the species of wood and the thickness of the subfloor material to ensure it meets L/360 requirements. I don’t care if the floor feels solid when you walk on it. You need to measure. Use a string line across the room. Have someone heavy jump in the center. If that string moves more than a fraction of an inch, you have a problem. You might need to sister the joists or add a layer of 1/2 inch exterior grade plywood. Do not use OSB in a bathroom. OSB is made of wood chips and wax. When it gets wet, it swells and never returns to its original shape. Plywood has cross-laminated layers that provide much better dimensional stability. This is the foundation of your leak prevention. If the foundation is weak, the most expensive waterproofing in the world will fail. I have spent decades fixing floors that failed because someone thought a bit of floor leveling compound would fix a structural bounce. It never does. You have to fix the bones before you skin the body.