How to Fix a Chipped Laminate Plank Without Replacing It
The myth of the indestructible laminate floor
You dropped a cast-iron skillet or maybe a heavy wrench during a weekend project. Now you are staring at a jagged crater in your flooring. Most homeowners believe that once the aluminum oxide wear layer of a laminate plank is breached, the only solution is a full floor replacement. That is a lie told by big-box retailers who want to sell you another twenty cartons of material. I have spent twenty-five years with my knees on the concrete and sawdust under my nails, and I can tell you that a chip is a repairable wound, provided you understand the structural physics of the board. Most guys skip the floor leveling compound. They think the underlayment will hide the dip. It won’t. I spent three days grinding concrete on a job last month just so the floor wouldn’t click like a castanet. When the floor clicks, it flexes. When it flexes, the wear layer gets brittle and chips. Your floor is an engineered system, and a chip is often the first sign that the system is failing underfoot. Repairing it requires more than a bit of wood putty. It requires a chemical bond that can withstand the thousands of pounds of pressure exerted by human footsteps. We are going to fix that chip by looking at the HDF core and the resins that hold it together.
The physics of the laminate surface layer
Repairing a laminate chip involves restoring the protective wear layer using hard wax, acrylic resins, or burn-in sticks that mimic the original factory finish. The process prevents moisture from reaching the high-density fiberboard core, which would otherwise cause plank swelling and permanent structural damage to the flooring system. Laminate is essentially a sandwich of high-pressure materials. At the bottom, you have a balancing layer to prevent warping. In the middle, the high-density fiberboard provides the bulk and the locking mechanism. Above that is the decorative paper, which is just a high-resolution photograph of wood or stone. Finally, the top is the wear layer. This top layer is typically made of melamine resin and aluminum oxide. It is incredibly hard, but it is also brittle. When a heavy object hits it, the wear layer shatters like glass. This exposes the thirsty fiberboard underneath. If you live near high-moisture areas like showers or kitchens, that exposed core will suck up humidity and expand. Once the core expands, the chip becomes a mountain. You need to seal that wound fast. This is not like a carpet install where a bit of stretching fixes the problem. This is a rigid surface that demands a rigid solution.
“A floor is only as good as the subfloor beneath it, deflection is the enemy of every joint.” – Master Flooring Axiom
Why your subfloor is lying to you
Subfloor preparation and floor leveling are the most ignored aspects of a laminate installation, yet they are the primary cause of surface chipping. A subfloor that has low spots or high spots causes the laminate to move vertically, leading to locking joint fatigue and brittle wear layer cracks over time. I have walked onto jobs where the homeowner was complaining about chips near every transition. They thought the product was defective. I took a six-foot level and showed them a half-inch dip in the plywood. Every time they walked over that spot, the floor was bending. Laminate is designed to be a floating floor, but it is not a bridge. It cannot span a gap in the subfloor. If your subfloor is not flat to within 3/16 of an inch over a ten-foot radius, your repair will fail. The filler will simply pop out because the plank is moving while the filler is trying to stay still. This is why I always carry a bag of self-leveling underlayment and a concrete grinder. You have to address the foundation. If you are dealing with a concrete slab, moisture is your other enemy. A slab that looks dry can still be pumping water vapor into your floor. This vapor softens the HDF core, making it more susceptible to chipping when something hits it.
The 1/8 inch that ruins everything
Vertical deflection in a floating floor must be minimized to protect the locking mechanisms and the integrity of the filler used in a chip repair. Even a minor dip of 1/8 inch can cause enough plank movement to dislodge hard wax fillers and create new micro-fractures in the surrounding melamine coating. When you are looking at a chip, you are looking at a failure of the bond between the melamine and the core. If the floor is moving, that bond is under constant stress. Think about the chemistry of the repair. You are likely using a hard wax or a specialized laminate putty. These materials have different expansion and contraction rates than the original board. If the floor is stable, they can coexist. If the floor is bouncing, the filler will eventually lose its grip. This is why professional installers are so obsessed with the flatness of the floor. We are not just being picky. We are trying to prevent a callback six months down the line. You have to ensure that the underlayment you chose is not too thick either. A common mistake is using a double layer of foam underlayment to try and level the floor. This actually makes the problem worse by creating even more cushion and more movement. More movement equals more chips.
Chemical bonds and the grit of the repair
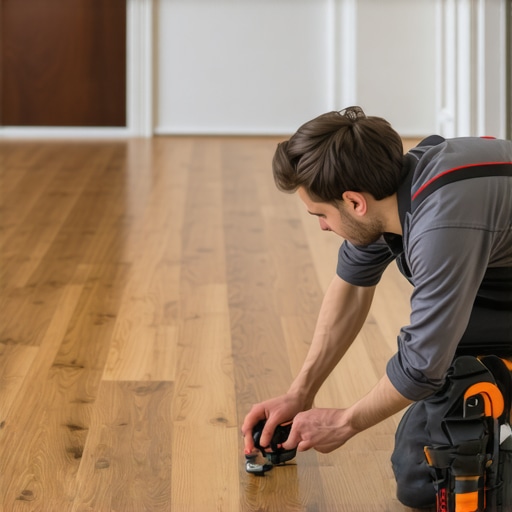
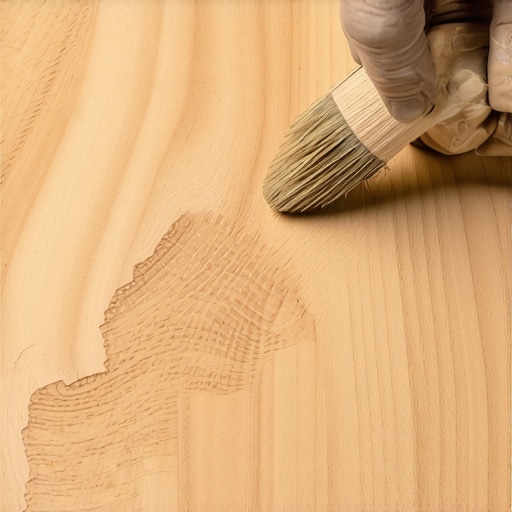
Laminate repair kits often utilize hardened waxes or epoxy-based resins to create a permanent seal over the damaged core of the flooring plank. These materials are selected for their adhesion properties and their ability to resist moisture penetration into the fibrous HDF material that comprises the bulk of the laminate board. When I approach a chip, I start by cleaning it with denatured alcohol. You have to get the oils and the household wax out of the crater. If you don’t, nothing will stick. Then, I use a battery-operated wax melter. I mix two or three colors of hard wax to match the grain of the wood. This is where the artistry comes in. You don’t just want one flat color. Real wood has depth, and a good laminate photograph mimics that depth. You need a base color, a grain color, and maybe a highlight. You melt them together into the hole, slightly overfilling it. Once it cools, you use a specialized plastic scraper to level it off. The goal is to make it flush with the wear layer. If it is too high, it will catch on a mop or a sock. If it is too low, it will collect dirt and look like a dark spot.
| Repair Method | Durability Rating | Difficulty Level | Best Use Case |
|---|---|---|---|
| Hard Wax Kit | High | Moderate | Deep chips and gouges |
| Acrylic Putty | Medium | Low | Minor scratches |
| Epoxy Resin | Very High | High | High-traffic areas |
| Plank Replacement | Ultimate | Very High | Structural joint failure |
The ghost in the expansion gap
Expansion gaps are the perimeter spaces required for laminate floors to move naturally with changes in humidity and temperature without buckling or chipping. A properly installed floor requires a 1/4 inch to 3/8 inch gap at every wall to prevent the planks from binding and causing surface tension that leads to finish failure. I have seen floors that were installed tight against the baseboards. When the summer humidity hits, the floor expands. Since it has nowhere to go, it arches up. This is called crowning. When the floor is crowned, the wear layer is under immense tension. A tiny impact that would normally do nothing will now cause a massive chip because the surface is already stressed to the breaking point. If you are repairing a chip, check your perimeter. Remove a piece of baseboard and see if the floor is touching the drywall. If it is, get a oscillating saw and cut in a gap. You might find that the floor settles down and the chip becomes easier to fill. It is all about relieving the pressure. This is the same reason we don’t install heavy cabinets on top of laminate. You are locking the floor down and preventing it from moving, which always leads to trouble.
- Inspect the subfloor for any signs of moisture or unevenness before starting the repair.
- Clean the damaged area thoroughly with a non-oily solvent like denatured alcohol.
- Color-match the filler by mixing different shades of wax to simulate natural wood grain.
- Overfill the chip slightly and allow the material to harden completely before leveling.
- Use a plastic scraper to avoid scratching the surrounding wear layer during the cleanup phase.
- Apply a sealer if the repair kit requires it to match the sheen of the original floor.
The humidity factor in laminate stability
Relative humidity levels inside a home must be maintained between 35 and 55 percent to ensure the stability of laminate flooring and the longevity of repairs. When humidity fluctuates wildly, the HDF core of the laminate planks will expand and contract, which can compromise the bond of repair fillers and adhesives. I always tell clients to keep their HVAC systems running. If you turn off the air conditioning and go on vacation in July, you are going to come back to a floor that has moved significantly. This movement is the enemy of any precision work. In dry climates, the core shrinks, and you might see gaps in the joints. In wet climates, the core swells. This constant movement is why laminate is not recommended for showers or bathrooms where standing water is common. If you do have laminate in a bathroom, you better be sure every edge is sealed with 100 percent silicone. But even then, the air humidity alone can be enough to ruin the floor over time. A chip in a high-humidity environment is an emergency. It is an open door for water vapor to destroy the plank from the inside out. Fix it now, or you will be pulling up the whole floor later.
“A floor is a performance surface, and like any machine, it requires precision tolerances to function correctly.” – Master Flooring Axiom
The regional climate expert perspective
In regions with extreme weather shifts, the durability of laminate is tested by the rate of expansion in the fiberboard core. For instance, the moist air of the coastal regions requires enhanced moisture barriers and a higher grade of underlayment to protect the locking joints from hydrostatic pressure and surface chipping. If you are in the desert, the heat can make the wear layer even more brittle. You have to adapt your technique to your environment. I have worked in places where the wood acclimation time is a full week, and others where three days is plenty. Laminate is more stable than solid wood, but it is not immune to the laws of physics. Every chip tells a story about what is happening beneath the surface. Maybe the carpet install in the next room didn’t include a proper transition strip, and the edge of the laminate is being hit by the vacuum cleaner. Maybe the floor leveling was botched by a contractor who was in a hurry. Whatever the cause, the fix starts with understanding that you are working on a structural element, not just a pretty picture. Take your time, get the chemistry right, and your repair will be invisible and permanent.