How to Fix a Hole in Your Carpet Without a Professional Kit
The physics of the carpet patch and why your kit is a lie
I once spent four hours on my knees in a high-end penthouse trying to fix a burn mark that a homeowner tried to cover with a store-bought repair kit. The kit had failed because it relied on cheap plastic circular cutters and a glue stick that had the structural integrity of room-temperature butter. The secondary backing of the carpet had been shredded, leaving the subfloor exposed and the surrounding yarns unravelling like a bad sweater. I had to explain that carpet is not just a rug. It is a tensioned membrane. When you cut a hole in it, you are breaking the structural grid of the primary backing, which is usually a woven polypropylene material designed to hold thousands of pounds of lateral force. Repairing it requires more than a sticker. It requires a surgical understanding of fiber orientation and adhesive shear strength. Most guys skip the leveling compound under the carpet pad, but I spent three days grinding concrete on a job last month just so the floor would not click or show telegraphing under the carpet. The same logic applies to a patch. If the surface beneath is not flat, your repair will catch the light and look like a mistake every time you walk past it.
The structural reality of a carpet hole
To fix a hole in your carpet without a professional kit, you must harvest a donor piece from a hidden area, align the nap direction perfectly, and use a high-strength contact adhesive or double-sided carpet tape. This process requires a sharp utility knife, a sacrificial piece of carpet, and a heavy weight to set the bond. You are essentially performing a skin graft on a structural surface. Most people assume they can just glue some fibers down, but a real repair involves replacing the entire thickness of the carpet, from the face yarns down through the primary and secondary backings. This ensures the patch sits flush with the existing installation. If you are dealing with a carpet install that was stretched tight, you have to be careful not to let the surrounding carpet pull away from the hole while you work. If the hole is near showers or bathrooms, the moisture in the air will affect how the latex in the backing behaves, potentially making the edges curl if not bonded correctly.
“A carpet patch is only as good as the donor’s nap alignment; gravity and light are the harshest judges of a repair.” – Master Flooring Axiom
Tools for the amateur carpet surgeon
The necessary tools for a successful carpet repair include a fresh utility knife blade, a piece of scrap carpet, a star roller or carpet comb, and a high-quality adhesive. Do not use a dull blade. A dull blade will tear the polypropylene backing rather than slicing through the SBR latex. You need a clean cut to ensure the edges of the donor piece butt tightly against the existing carpet. If there is even a half-millimeter gap, the repair will be visible as a dark line. I prefer using a 1/8 inch offset when cutting the backing to ensure the face yarns can be blended over the seam. This is the same level of precision I use when checking floor leveling before a laminate job. If the foundation is off, the top layer fails. You also need a vacuum to clean the subfloor before applying adhesive. Any dust or sawdust will kill the chemical bond of the glue, leading to a patch that kicks up the first time a vacuum hits it.
Finding the donor organ in the closet
Locating a suitable donor piece involves searching for remnant carpet in the back of a closet or under a baseboard where the material is identical in wear and color. You cannot just buy a similar color at the store. Carpet dye lots vary by the minute during manufacturing. Even the same brand and style from a different roll will look like a different species of animal once it is installed. Go to the deepest corner of your master closet. Use your utility knife to cut a square or circle that is slightly larger than the hole you are fixing. Be careful not to cut the pad underneath if you plan to keep it. The donor piece should be taken from an area where the pile hasn’t been crushed by foot traffic. If you use a piece of flat, matted carpet to fix a hole in the middle of a high-traffic hallway, the texture difference will be jarring. This is the fundamental rule of flooring. Material consistency is the only way to achieve a professional result.
The surgical extraction of damaged fibers
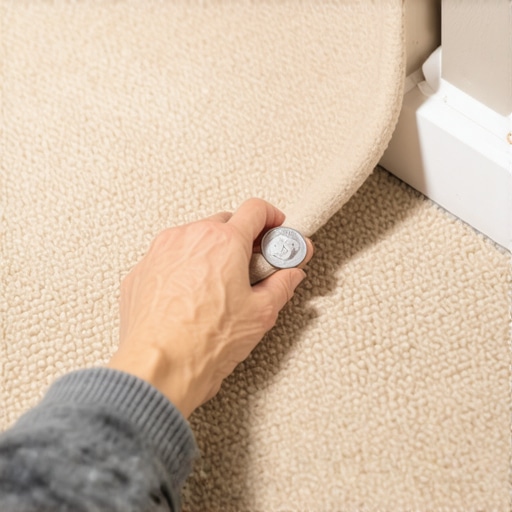
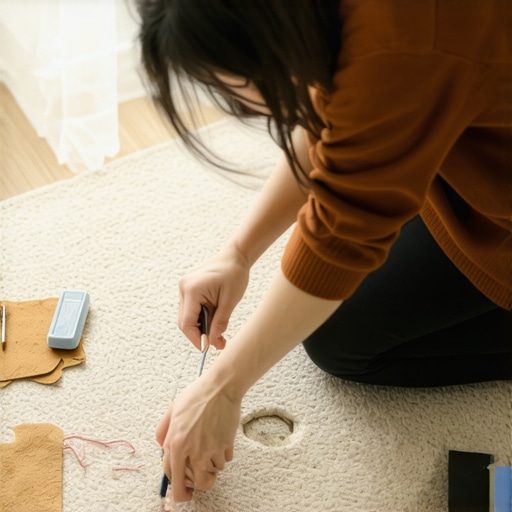
Removing the damaged section of carpet requires a steady hand and a template to ensure the resulting hole is a perfect geometric shape. I suggest using a small can or a lid as a guide. Press down firmly and cut through the backing but not into the subfloor. Once the damaged piece is removed, inspect the subfloor. If you are working over wood and there is moisture damage, you have bigger problems than a hole in the carpet. In places like Houston or New Orleans where humidity stays at eighty percent, the subfloor can rot under a small spill if the carpet was not dried properly. If you see black spots on the plywood, you need to treat that before patching the carpet. Clean the area thoroughly. The bond of your adhesive depends on the surface energy of the subfloor and the carpet backing. Any grease, dirt, or loose fibers will prevent a permanent fix.
| Repair Method | Durability Rating | Visual Integration | Required Skill Level |
|---|---|---|---|
| Professional Heat Iron | 9/10 | Excellent | High |
| High-Strength Adhesive | 7/10 | Good | Medium |
| Standard Repair Kit | 3/10 | Poor | Low |
| Double-Sided Tape | 5/10 | Fair | Low |
Alignment of the fiber grain and nap
Matching the nap direction is the most vital step in making a carpet patch disappear into the surrounding floor. Every carpet has a grain, known as the nap. If you run your hand across it, one way will feel smooth and the other will feel rough. If you install your donor piece with the nap running the wrong way, it will reflect light differently. It will look like a dark or light spot regardless of how well you cut it. I tell my apprentices to use a piece of paper with an arrow on it to track the direction on both the floor and the donor piece. This is basic physics. Light hitting a fiber at a forty-five degree angle looks different than light hitting it at ninety degrees. This attention to detail is why laminate planks must be staggered and why carpet seams must be aligned. If the nap is off, the repair is a failure. You might as well have left the hole there.
The adhesive bond and molecular sticking
Choosing the right adhesive involves understanding the chemistry of Carboxylated Styrene-Butadiene Rubber, which is the white milky substance holding the carpet together. For a DIY fix without a professional seaming iron, a high-tack contact cement or a specialized carpet seam sealer is your best bet. Apply the adhesive to the backing of the donor piece and the edges of the existing carpet hole. Wait for it to become tacky. Do not rush this. If the glue is too wet, it will soak into the face yarns and ruin the texture. Once it is tacky, press the donor piece into the hole. Use a star roller or even the edge of a blunt spoon to work the fibers of the patch into the fibers of the main carpet. You want the yarns to interlock. This creates a mechanical bond in addition to the chemical bond of the glue.
“A floor is only as good as the subfloor beneath it; deflection is the enemy of every joint.” – Master Flooring Axiom
The final blending of the scar
Blending the patch into the surrounding carpet involves grooming the fibers with a comb or a vacuum to hide the cut lines in the backing. Once the adhesive has dried for at least twenty-four hours, you can start the finishing work. Take a carpet brush and gently work the area in circular motions. This helps the individual yarns from the patch mix with the yarns from the main floor. If there are any long fibers sticking up, trim them carefully with sharp scissors. Never pull them. Pulling can unravel the twist of the yarn, which is a structural element of the carpet pile. If you have done it correctly, the patch should be integrated. If you live in a dry climate like Phoenix, the static electricity might make the patch stand up initially, but it will settle over time. If you are in a humid area, the fibers might swell slightly, so give it time to acclimate before doing a final trim.
- Select a donor piece from a hidden closet corner.
- Ensure the nap direction matches the surrounding floor exactly.
- Use a fresh utility knife blade for every single cut.
- Apply high-quality adhesive only to the backing, never the yarns.
- Weight the patch down for twenty-four hours with a heavy object.
- Groom the fibers with a comb to hide the seam lines.
When the subfloor ruins the repair
A carpet patch will fail if the subfloor is uneven or if there is structural movement in the floor joists. If you have a dip in your floor, the patch will eventually sink or lift, creating a visible ring. This is why floor leveling is so important in every flooring trade. Whether you are installing laminate, tile, or carpet, the foundation must be flat within 3/16 of an inch over a ten-foot radius. If your house is settling, that patch might pop out or show a gap as the carpet stretches and moves. Flooring is a dynamic system. It expands and contracts with temperature and humidity. If you are patching carpet in an area prone to moisture, like near showers, you must use a waterproof adhesive. Standard latex glue will re-emulsify if it gets wet, and your patch will simply float away.
The regional impact on carpet integrity
Climate plays a massive role in how carpet fibers and backings behave during a repair. In the swampy humidity of the South, the polypropylene backings are more flexible, which makes cutting easier but makes the nap more prone to shifting. In the cold, dry air of the North, the SBR latex becomes brittle. If you try to cut a patch in a freezing house, you risk cracking the backing. Always make sure the room is at a normal living temperature before starting. This is the same reason we acclimate hardwood or laminate for forty-eight hours. The materials need to reach equilibrium with the environment. If you ignore the physics of the room, the room will reject your repair. I have seen patches that looked great in the winter open up like a canyon in the summer because the installer didn’t account for thermal expansion of the subfloor and the resulting stretch in the carpet backing.