The ‘Wet Sponge’ Test for Shower Waterproofing Integrity
I once walked into a house where a 15,000 dollar wide plank walnut floor was cupping so bad it looked like a potato chip because the installer did not check the crawlspace humidity. That is a nightmare that stays with you. It is the same reason I spent three days grinding concrete on a job last month just so the floor would not click like a castanet. Most guys skip the leveling compound. They think the underlayment will hide the dip. It won’t. I have spent 25 years on my knees with a moisture meter and a level. I see a floor as a performance surface, not a decoration. This is especially true in showers where water is the ultimate enemy of the structure. The wet sponge test is not just a trick, it is a diagnostic requirement for anyone who values their reputation. We are going to look at the physics of subfloors and the chemistry of adhesives to understand why this matters.
The structural lie of the perfect tile job
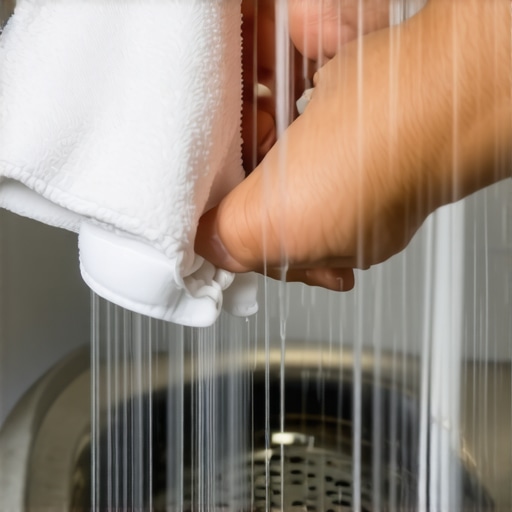
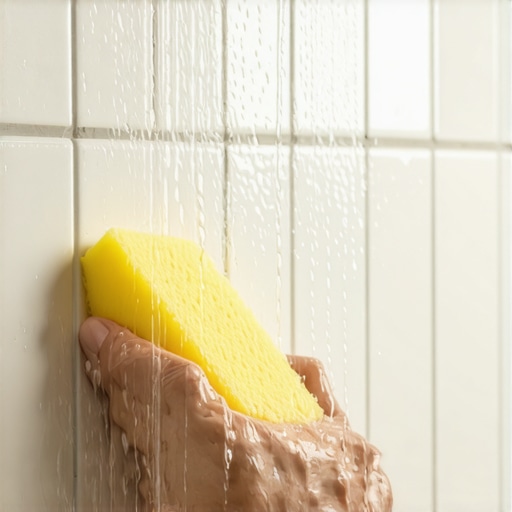
The structural integrity of a shower installation depends entirely on the waterproof membrane and the substrate’s porosity. Using a wet sponge allows an installer to identify high-absorption areas, sealant contaminants, or pinholes in a liquid-applied membrane before thinset is ever mixed or applied to the surface.
[IMAGE_PLACEHOLDER]
When you look at a substrate, you see a flat surface. I see a microscopic landscape of pores and capillaries. If you are prepping for a shower or even a high end laminate floor leveling project, you have to understand how the material breathes. If you take a wet sponge and swipe it across your waterproofing membrane, the water should bead or stay on the surface for a specific duration. If the water vanishes instantly, your substrate is too thirsty. It will suck the moisture out of your thinset before the cement can properly hydrate. This leads to a weak bond, which leads to loose tiles, which leads to leaks. This is the molecular reality of a failed shower. Most people worry about the color of the grout. I worry about the polymer chains in the modified thinset. A standard ANSI A118.4 thinset needs that water to stay in the mix to form a crystalline structure. If the subfloor steals that water, the crystal growth is stunted. You end up with a brittle chalky mess instead of a rock solid bond.
“A floor is only as good as the subfloor beneath it; deflection is the enemy of every joint.” – Master Flooring Axiom
Why your subfloor is lying to you
A subfloor often hides structural deficiencies like deflection, excessive moisture, and out-of-level dips that ruin laminate or tile. You must use a ten foot straightedge to verify that the floor leveling meets the TCNA requirement of less than 1/8 inch deviation over 10 feet for large format tile.
I have seen guys try to install a carpet install over a floor that was so wavy it looked like the Atlantic Ocean. While carpet is forgiving, your subfloor is still telegraphing those issues. When we talk about showers, the stakes are higher. The subfloor is the foundation of the entire waterproofing system. If you have a plywood subfloor, you need to check the joist spacing. If those joists are 24 inches on center, you have too much bounce. You will crack your grout lines in a week. I always recommend a double layer of exterior grade plywood or a high quality cement board. But even then, the boards must be fastened with the correct screws. Drywall screws are not enough. They will snap. You need corrosion resistant floor screws. The chemistry of the fasteners matters just as much as the chemistry of the adhesive. When we use a wet sponge on the subfloor, we are also looking for oils or waxes. If someone spilled a soda or a chemical on that floor six months ago, it is still there. The sponge test will show a change in surface tension where the contaminant sits. If you do not grind that out, your floor will fail.
The microscopic physics of the capillary break
A capillary break is a physical barrier designed to stop moisture migration through porous materials like concrete or mortar. In shower construction, this prevents wicking from the wet area into the dry wall or adjacent flooring like laminate or hardwood to prevent rot.
Water moves through capillary action. It is the same force that pulls water up into a tree. In a shower, water can travel through the mortar bed and up the wall studs if you do not have a proper break. This is why I am a stickler for the TCNA Handbook. I have seen showers where the installer did everything right but forgot the capillary break at the curb. Two years later, the carpet install in the master bedroom is moldy because water wicked through the grout and under the door frame. It is a slow motion disaster. We use the wet sponge to verify that our liquid membranes are thick enough. If you see the substrate color through the membrane when it is wet, it is too thin. You need a specific mil thickness. For most liquid membranes, you are looking for about 15 to 20 mils dry. That is about the thickness of a credit card. If you are thinner than that, you have a sieve, not a waterproof barrier. I tell my apprentices to treat every shower like they are building a boat. If you would not put it in the ocean, do not put it in a bathroom.
| Material Type | Perm Rating | Required Acclimation | Key Benefit |
|---|---|---|---|
| Sheet Membrane | 0.01 | None | Superior Vapor Retarder |
| Liquid Membrane | 0.50 | 12-24 Hours | Continuous Coverage |
| Cement Board | 12.0 | None | Dimensional Stability |
| Solid Hardwood | N/A | 7-14 Days | Longevity |
How the wet sponge reveals the invisible failure
The wet sponge test identifies surface contaminants and pinholes in waterproofing layers by highlighting absorption patterns. If the membrane shows dark spots during the test, it indicates insufficient coverage where moisture can penetrate the substrate and cause mold growth or structural rot.
I remember a job in a high rise where the previous guy used a cheap bucket of mastic instead of thinset. In a wet area. I wiped a sponge across the wall and the tiles literally started falling off. Mastic is basically organic glue. It never truly dries in a wet environment. It just turns back into mush. That is why I hate big box discount retailers that sell all in one kits to DIYers without explaining the chemistry. You need a polymer modified mortar. The polymers are like tiny rubber bands that stretch when the house moves. Houses always move. They breathe with the seasons. In the winter, the wood shrinks. In the summer, it expands. If your mortar is not flexible, it will snap. The wet sponge test helps you ensure the substrate is ready to receive that flexible bond. If the sponge leaves a film, you need to clean the floor again. I keep a gallon of denatured alcohol and a stack of clean rags in the truck for this exact reason. Cleanliness is not about aesthetics, it is about the bond. A single thumbprint of oil can ruin a five dollar tile and a five thousand dollar reputation.
“Standardization in the tiling industry is the only thing standing between a dry home and a lawsuit.” – TCNA Technical Bulletin
The 1/8 inch that ruins everything
A deviation of 1/8 inch over a ten foot span is the maximum allowable tolerance for subfloor levelness in modern flooring installations. Exceeding this limit leads to lippage in tile, locking mechanism failure in laminate, and excessive wear on carpet install seams due to uneven foot traffic.
It will buckle. I have said that a thousand times. People buy this beautiful waterproof LVP and think they can install it over a mountain range. It is waterproof, sure, but it is not bulletproof. If the floor has a dip, every time you step on it, the locking tongue and groove moves. Eventually, that plastic snaps. Then you have a gap. Then dirt gets in. Then the floor is ruined. The same thing happens with showers but the consequences are worse. If your shower floor is not sloped correctly, at least 1/4 inch per foot, the water will sit. It will find a pinhole. We use the wet sponge to check the slope too. Watch how the water moves. Does it head straight for the drain or does it pool in the corner? If it pools, I am not laying tile. I am pulling up the mud bed and doing it again. It is painful. It is expensive. But it is the only way to do it right. I have spent three days grinding concrete just to get a floor flat enough for a simple laminate. It is not fun work. It is dusty and loud and my back hurts. But when I click that floor together and it feels like a solid piece of granite, I know it will last thirty years. That is what being a pro is about.
- Check subfloor moisture levels with a pin-type meter.
- Verify floor flatness using a 10 foot straightedge.
- Clean all dust and debris using a HEPA vacuum.
- Apply primer if using a self leveling underlayment.
- Perform the wet sponge test to check for membrane pinholes.
- Ensure 95 percent thinset coverage for all wet area tiles.
- Allow 24 hours of cure time before walking on newly set tile.
The physics of a shower floor are unforgiving. Water molecules are tiny. They find the path of least resistance through gravity and capillary action. While most people want the thickest underlayment, too much cushion actually causes the locking mechanisms on LVP to snap under pressure. It is the same logic with shower membranes. You want the right thickness, not the most thickness. I have seen guys double up on membranes thinking it would be safer. All they did was create a moisture sandwich where mold could grow between the layers. You follow the manufacturer’s specs or you don’t do the job. My shop smells like floor wax and old oak dust because I respect the materials. I respect the NWFA standards. I respect the fact that a floor is the hardest working part of a house. It takes the weight of the furniture, the heat of the sun, and the spills of the kitchen. If you treat it like a decoration, it will fail you. If you treat it like an engineering challenge, it will stand the test of time. Next time you are about to tile a shower, grab a sponge. It might just save your house.