How to Stop Your Laminate From Caking with Dirt in the Grooves
The physics of the bellows effect in laminate joints
Laminate dirt accumulation in grooves occurs because of vertical deflection caused by an unlevel subfloor. When you walk across a floating floor, the boards depress into the underlayment. This movement acts like a bellows, sucking ambient dust and skin cells into the tongue and groove joint. This is not a cleaning issue. It is a structural failure of the floor leveling process. Most guys skip the leveling compound. They think the underlayment will hide the dip. It won’t. I spent three days grinding concrete on a job last month just so the floor wouldn’t click like a castanet. That job was for a homeowner who complained about black lines between her boards. It wasn’t mold. It was years of debris packed into a gap because the floor moved every time she walked to the fridge. When that joint opens and closes, it creates a vacuum. It pulls the dirt down, and once it is in there, a vacuum cleaner cannot reach it. You are effectively tamping the dirt into a solid mass with every step you take. This is why floor leveling is the most ignored yet vital part of any flooring project.
“A floor is only as good as the subfloor beneath it; deflection is the enemy of every joint.” – Master Flooring Axiom
The microscopic reality of HDF core expansion
The core of your laminate is high density fiberboard which reacts to regional humidity by expanding and contracting its wood fibers. When the fibers swell, the joint tightens. When they shrink during a dry winter or in a desert climate, the joint opens just enough to allow micro-particles of grit to enter. These particles are often harder than the melamine resin surface of the floor. As the boards move, these particles act like sandpaper, grinding away the factory seal on the edges of the planks. This is where the caking begins. Once the seal is broken, moisture from your mop enters the raw HDF core. This causes the edges to swell slightly, creating a tiny lip that catches even more dirt. You are no longer looking at a flat surface. You are looking at thousands of tiny valleys that act as grease traps for every piece of lint and dust in your home. This is especially prevalent in areas near showers where high humidity cycles are frequent. If you did not use a vapor barrier over a concrete slab, the moisture is coming from below, pushing the salts and minerals through the joints and creating a sticky residue that anchors dirt in place.
Why traditional cleaning methods make the sludge worse
Wet mopping a laminate floor with a dirty joint creates a liquid slurry that flows into the grooves and hardens into a cake. Most homeowners use too much water and a soap based cleaner. The water emulsifies the dust into a paste. The soap leaves a sticky residue. When the water evaporates, it leaves behind a concentrated plug of dirt and surfactant. This plug is now chemically bonded to the textured edge of the laminate plank. It is a vicious cycle. You see a dirty line, so you mop harder with more water. This pushes the slurry deeper. You need to understand that laminate is a photographic layer protected by aluminum oxide. It is non porous. But the joint is the Achilles heel. If you are cleaning a laminate floor, you should be using a damp microfiber pad and a pH neutral evaporate. Anything else is just feeding the cake. If you have recently finished a carpet install in an adjacent room, the fibers from that carpet will migrate into these gaps through static electricity, adding reinforcement to the dirt plug.
The structural secret to a debris free surface
Achieving a debris free floor requires a subfloor flatness of 3/16 of an inch over a 10 foot radius to prevent joint movement. If your subfloor has a dip, the click lock mechanism will eventually fatigue and fail. Once the mechanical lock is loose, the gap is permanent. I have seen floors where the homeowner spent $5,000 on high end laminate but $0 on floor leveling. Within six months, every joint was a black line of filth. The solution is not more scrubbing. The solution is ensuring the floor is dead flat before the first plank is laid. We use self leveling underlayment that has a high compressive strength, usually over 3,000 PSI, to ensure that the laminate has a rock solid foundation. When the floor does not move, the joints stay closed. When the joints stay closed, the dirt stays on the surface where it can be swept away. It is basic mechanical engineering applied to a living space. If you are installing over a crawlspace, you must ensure your joists are not bouncing. Deflection is the primary driver of the bellows effect.
| Property | Standard HDF Core | Premium Water Resistant Core | Installation Impact |
|---|---|---|---|
| Density | 800 kg/m3 | 950 kg/m3 | Higher density resists joint fatigue |
| Swell Rate | 18 percent | 8 percent | Lower swell prevents edge lippage |
| Joint Type | Standard Click | Pressed Bevel | Bevels hide micro gaps but trap more dust |
| Static Rating | Moderate | Anti-Static Treated | Treated floors do not pull dust into joints |
Technical maintenance and the static problem
Laminate floors are highly prone to the triboelectric effect where walking generates a static charge that attracts dust to the micro-gaps. This is why you see the dirt concentrating specifically in the grooves and not the center of the plank. The aluminum oxide particles in the wear layer are excellent insulators, which means the charge stays on the surface for a long time. In a dry house, your floor is basically a giant magnet for dust. To stop the caking, you have to break the static bond. Use an anti-static floor treatment specifically designed for laminate. This reduces the attraction. Also, check your vacuum. If you are using a vacuum with a beater bar, you are likely flicking dirt into the grooves rather than sucking it out. Use a hard floor attachment with soft bristles that can reach slightly into the bevel without scratching the surface. This is a surgical approach to cleaning. You are trying to remove the dry particulates before they have a chance to be emulsified by moisture. If you live in a region with high clay content in the soil, this grit is particularly abrasive and will ruin the joints faster than simple household dust.
A checklist for preventing groove contamination
- Verify subfloor flatness using a 10 foot straight edge before starting the install.
- Apply a 6 mil polyethylene vapor barrier over all concrete substrates.
- Use a moisture meter to ensure the subfloor is within 3 percent of the flooring material.
- Vacuum with a soft brush attachment at least twice a week to remove dry grit.
- Avoid all steam mops as they force moisture into the core and cause edge swelling.
- Maintain indoor humidity between 35 and 55 percent to minimize wood fiber movement.
- Ensure all transition strips are installed with proper expansion gaps to prevent buckling.
“Deflection is the hidden killer of floating floors; if it moves, it fails.” – Master Flooring Axiom
Correcting existing dirt caked joints
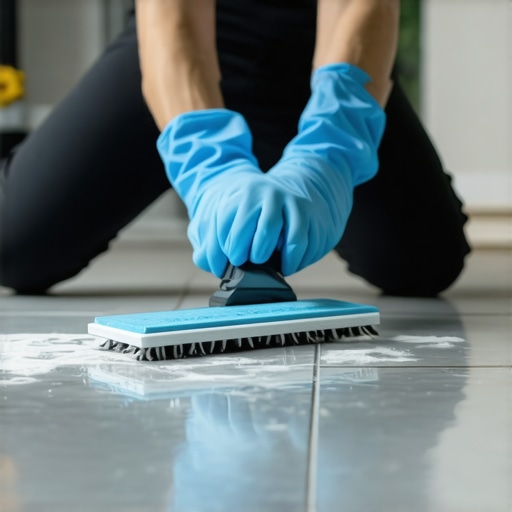
To remove existing cake from laminate grooves you must use a soft nylon brush and a dry vacuum before applying any liquid cleaner. Do not use a metal pick or a screwdriver. You will chip the melamine and the floor will be ruined. I tell people to use an old toothbrush and a shop vac with a narrow nozzle. Work in small sections. Break up the dry cake manually. Vacuum it out. Only after the visible dirt is gone should you use a very lightly dampened cloth to wipe the area. If the dirt is deeply embedded, it may be because the tongue and groove have already started to delaminate. In that case, no amount of cleaning will fix the visual appearance of the black line. The shadow you see is actually the dark HDF core showing through the gap. This is common in cheap laminate where the decor paper does not wrap into the joint. If you are in the middle of a carpet install nearby, keep the door closed. The dust from the padding and the tack strips is incredibly fine and will find its way into every open joint in your laminate. The final walk through of a job should always involve a low angle light test to check for these gaps. If I see light reflecting off a gap, I know it is a future dirt trap. I will pull the floor back to that point and fix the subfloor before I move on. That is the difference between a pro and a handyman.