Why Your Shower Corner Grout Is Turning Black and Slimy
The physics of the corner joint and the failure of surface seals
I spent three days grinding concrete on a job last month just so the floor wouldn’t click like a castanet, and that same obsessive attention to detail applies to your shower. I recently walked into a bathroom where the homeowner was convinced they had a ghost. Every morning, a new patch of black slime appeared in the corner of their custom walk-in shower. They had scrubbed it with bleach until their lungs burned, but the slime returned within forty-eight hours. When I took a utility knife to the corner joint, the blade sank into the wall like it was cutting through warm butter. The shower looked beautiful from six feet away, but behind the tile, the framing was rotting. The black slime wasn’t a cleaning issue. It was a structural engineering failure. Most installers treat grout as a structural element when it is actually a rigid mineral bridge. When that bridge meets a change of plane, such as where two walls meet or where a wall meets the floor, the house moves and the grout snaps. Once it snaps, you have a microscopic highway for water and organic debris.
The biological reality of shower corner contamination
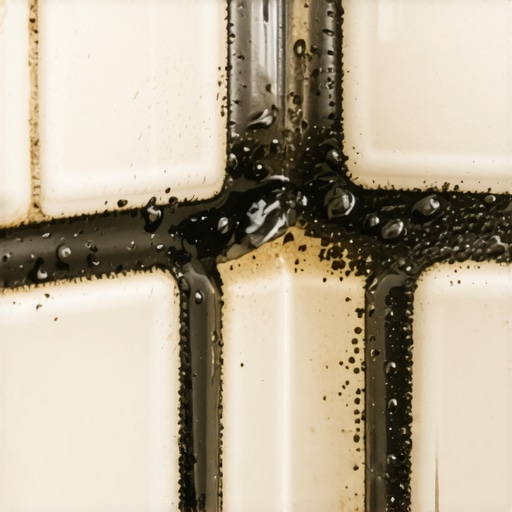
Black and slimy grout in shower corners is caused by the accumulation of Serratia marcescens bacteria and fungal colonies like Aureobasidium pullulans. These organisms thrive on soap residue, skin cells, and high humidity trapped within porous grout lines or failing sealant joints that lack proper ventilation and drainage. Most people assume the black stuff is just dirt. It is not. It is a living, breathing biofilm. Grout is essentially a hard sponge. It is made of cement and sand, which contains millions of microscopic voids. When you wash yourself, you are shedding lipids, proteins, and dead skin. These organic materials flow into the corner where gravity and surface tension pull them into the pores of the grout. If that corner was grouted instead of being filled with a flexible sealant, the natural expansion and contraction of your home has likely created a hairline fracture. This crack acts as a reservoir. It holds water long after you have stepped out of the shower. This stasis is the perfect incubator for microbial growth. The slime you feel is the protective matrix the bacteria builds around itself to survive your attempts at cleaning.
Why your subfloor and framing dictate grout health
Shower grout health is directly tied to the deflection and structural integrity of the subfloor and wall framing. Excessive movement in the joists or wall studs causes grout to crack at the change of plane, allowing moisture to penetrate the assembly and feed microbial growth behind the tile surface. We have to talk about the physics of the assembly. A shower is not a static box. It is a collection of different materials including wood, cement board, thin-set, and ceramic. Each of these materials has a different coefficient of expansion. When the wood studs behind your tile absorb a little humidity, they swell. When they dry, they shrink. This movement is constant. If your installer filled the corners with standard cementitious grout, they violated the basic laws of tile physics. The Tile Council of North America is very clear about this. You cannot have a rigid joint at a change of plane. When the house shifts even a fraction of a millimeter, the grout fails. Once the seal is broken, capillary action pulls water deep into the wall. This is why the slime keeps coming back. You are cleaning the surface, but the colony is living deep inside the wall cavity, feeding on the damp wood and the paper backing of the drywall if the wrong materials were used.
“A floor is only as good as the subfloor beneath it; deflection is the enemy of every joint.” – Master Flooring Axiom
The chemistry of the failed sealant
Failing shower seals occur when cheap latex caulk or improper grout is used in corners instead of 100 percent silicone sealant. Silicone provides the necessary flexibility to handle structural movement while its non-porous surface prevents the organic buildup that leads to black slime and mold colonization. Many builders use color-matched caulk that is primarily acrylic or latex. They do this because it is easy to tool and easy to clean up with water. However, latex caulk is a food source for mold. Over time, the moisture in the shower leaches the plasticizers out of the caulk, causing it to shrink and pull away from the tile. This creates a pocket. In the industry, we call this a shadow gap. It is a space where water sits and rots. 100 percent silicone is different. It is an inorganic material. Bacteria cannot eat it. It remains flexible for decades. If you have slime in your corners, look closely at the material. If it feels like hard plastic or if it is crumbling, it is not silicone. It is a failure of material selection that is now costing you in maintenance and potential structural repair.
Technical comparison of joint materials
Understanding the difference between materials is the only way to fix the problem permanently. Not all fillers are created equal. Use the following table to understand what belongs in your shower corners.
| Material Type | Flexibility Rating | Porosity Level | Best Use Case |
|---|---|---|---|
| Sanded Grout | Zero | High | Large floor joints only |
| Unsanded Grout | Zero | Extreme | Wall tile joints under 1/8 inch |
| Epoxy Grout | Low | Near Zero | Commercial kitchens and high-stress areas |
| Acrylic Caulk | Medium | Low | Baseboards and dry area trim |
| 100% Silicone | Extreme | Zero | Shower corners and changes of plane |
The microscopic zoom into biofilm formation
Biofilm formation in shower corners begins with a primary layer of bacteria that adheres to the grout surface using extracellular polymeric substances. This matrix traps nutrients and protects the colony from household cleaners, allowing it to grow into a visible black or pink slime layer. When you look at your grout through a magnifying glass, it looks like the surface of the moon. It is full of craters. Every time you use a bar of soap, you are coating those craters in tallow and fats. This is the buffet for Serratia marcescens. This specific bacteria is often responsible for that pinkish-orange stain that eventually turns black as other fungi move in. The reason it feels slimy is that the bacteria is literally building a shield. This is why a quick spray with a daily shower cleaner does nothing. You have to mechanically break that shield. But if the grout is porous, you can never reach the bottom of the crater. The only solution is to remove the organic material and then seal the surface so the craters are filled with a protective resin.
The permanent fix checklist
If you are tired of scrubbing and want to fix the root cause of the black slime, follow this technical protocol. This is how a professional restores a shower environment.
- Remove all old grout and caulk from the corner joints using a carbide tipped oscillating tool or manual grout saw.
- Clean the open joint with 99 percent isopropyl alcohol to remove all residual oils and soap film.
- Treat the substrate with an antimicrobial solution to kill any spores living behind the tile.
- Ensure the shower is completely dry for at least 48 hours using a heavy duty fan or dehumidifier.
- Apply a high quality 100 percent silicone sealant that meets ASTM C920 standards.
- Tool the silicone with a soapy finger or a specialized tool to ensure a concave profile that sheds water.
- Allow the silicone to cure for a full 24 hours before exposing it to moisture.
Structural movement and the ghost in the expansion gap
Structural movement in residential buildings is an inevitable force that ruins shower grout when expansion joints are ignored. Every shower must have a flexible transition at the corners to accommodate the natural settling and thermal expansion of the building materials. I often see tile jobs where the installer was a master of the layout but a novice of the physics. They tight-joint the corners and pack them with grout. Within a year, the house settles. The corner joint is the first thing to go. You will see a vertical crack that looks like a hair. This crack is deep. It goes all the way to the waterproofing membrane. If the installer used a cheap topical membrane or, heaven forbid, just a vapor barrier behind the cement board, that water is now sitting on your wall plates. The slime is just the messenger. It is telling you that the shower is no longer a sealed system. A proper expansion gap is at least 1/8 inch wide and filled entirely with silicone. This allows the walls to move independently without breaking the waterproof seal.
“Movement joints are not optional; they are the difference between a ten-year shower and a fifty-year shower.” – Tile Installation Standard
The failure of the weep hole system
Failing weep holes in a traditional mortar bed shower can lead to stagnant water beneath the tile, causing persistent mold and black slime in the corners. When the path to the drain is blocked, water saturates the setting bed and creates a permanent breeding ground for bacteria. This is a deep structural issue. In a traditional shower pan, there is a liner buried deep under a bed of sand and cement. The water that soaks through the grout is supposed to travel down to that liner and flow through weep holes in the drain assembly. If the installer dumped a bunch of thin-set over those weep holes, the water has nowhere to go. It sits in the sand bed like a swamp. Eventually, the water wicks up the corners of the walls. This is why the bottom six inches of your shower corners are always the nastiest. No amount of surface cleaning will ever fix a clogged weep hole. You are fighting an underground ocean. If you have persistent slime despite perfect silicone joints, your shower pan might be holding a gallon of rotting greywater.
Chemistry of maintenance without destroying the bond
Cleaning shower grout requires a pH-neutral cleaner to avoid degrading the cementitious bond or the integrity of the silicone seal. Harsh acidic cleaners can etch the grout and create more surface area for mold to attach, worsening the problem over time. I see people using vinegar and lemon juice because they read about it on a blog. Stop doing that. Vinegar is an acid. Acid dissolves the lime in your grout. Every time you clean with vinegar, you are making the grout more porous. You are making it a better home for the slime. You need to use an alkaline cleaner or a specialized oxygen-based cleaner. These will break down the organic lipids without eating the grout itself. Also, stay away from stiff wire brushes. You want a nylon brush. Wire brushes create microscopic scratches in the tile glaze and the grout surface, providing even more hiding spots for bacteria. Maintenance is about removing the food source, not destroying the architecture of the shower.
Final technical considerations for a healthy shower
You have to respect the chemistry of your bathroom. The black slime is a symptom of a larger environmental issue. If your bathroom has poor ventilation, the humidity stays high for hours after your shower. This provides the water the bacteria needs to survive. You should be running an exhaust fan for at least thirty minutes after every shower. Better yet, use a squeegee. It takes thirty seconds to pull the water off the walls and into the drain. By reducing the standing water, you are cutting off the lifeblood of the biofilm. Flooring is a performance surface. It requires the right materials, the right physics, and the right maintenance. If you treat your shower like a piece of engineering, it will stay clean. If you treat it like a decoration, nature will eventually take it back. Take the time to dig out those failed joints and replace them with the correct silicone. Your lungs and your home’s framing will thank you. Do not let a 1/8 inch gap ruin your investment. It is the small details that keep the rot away.