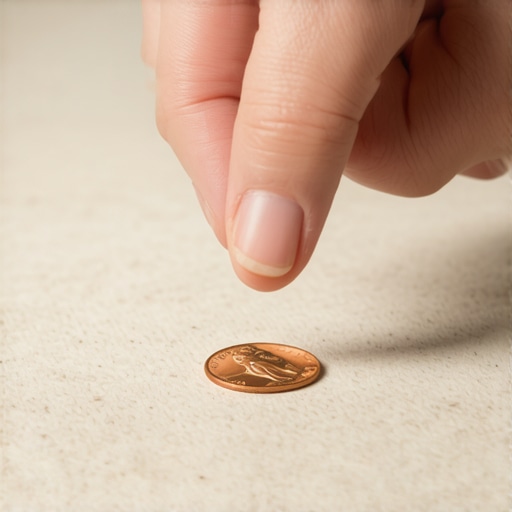
The Penny Test for Checking Carpet Pad Density
I have spent twenty-five years on my knees with a moisture meter and a level. I have seen the same mistakes repeated across three decades. People focus on the carpet because it is what they see, but the carpet is just the skin. The pad is the muscle, and the subfloor is the bone. If you put a high-end silk-blend carpet over a cheap, low-density pad, you are just throwing money into a landfill. One of the simplest ways to tell if your installer is trying to pull a fast one with a low-grade underlayment is the penny test. It is not just about the coin, it is about the physics of compression and the structural integrity of the polyurethane cells. Most guys want to get in and out, but I am the one who gets called back when the floor starts to feel like a swamp. I once spent three days grinding concrete on a job last month just so the floor would not click like a castanet. Most guys skip the leveling compound. They think the underlayment will hide the dip. It will not. I had a client who bought the most expensive laminate on the market, but the subfloor was out of level by half an inch. Within six months, the locking mechanisms had snapped off like dry twigs because the floor was constantly flexing into that void. That is the reality of the trade. If you do not respect the physics of the subfloor, the finish material will fail every single time.
The gravity of the penny test
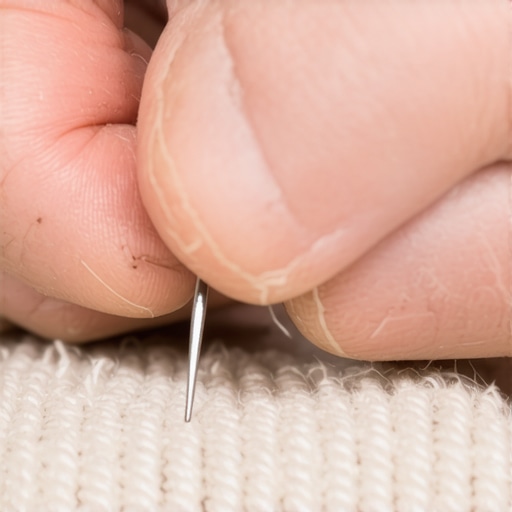
The penny test measures carpet pad density by applying localized pressure to evaluate resistance. A high density pad prevents the penny from sinking deeply, indicating the foam cells are tightly packed. This test is a field diagnostic for determining if a pad meets the minimum 6.5 pound density required for residential traffic. You take a copper penny and press it edge-wise into the pad. If the penny disappears into the foam with minimal pressure, the density is likely below five pounds. This is what we call builder-grade garbage. It feels soft for the first month, then it collapses under the weight of foot traffic. You want to feel a firm push-back. In the flooring world, soft is the enemy of longevity. A pad that is too soft allows the carpet backing to stretch and flex. Every time you step on it, the carpet fibers are pulled against the primary backing. This lead to delamination, which is when the top of your carpet starts to ripple like waves on a lake. Once that happens, the carpet is ruined. You can try to re-stretch it, but you are just masking a systemic failure of the underlayment. Real pros look for an eight-pound density for stairs and high-traffic hallways. Anything less is a disservice to the homeowner.
“A floor is only as good as the subfloor beneath it; deflection is the enemy of every joint.” – Master Flooring Axiom
The science of rebound and cell structure
Carpet pad density is determined by the weight of the material per cubic foot. An eight-pound pad weighs exactly eight pounds per cubic foot. This density is achieved by compressing shredded pieces of high-grade polyurethane foam, known as rebond, into a solid mass. The chemical bond of the adhesive used to hold these pieces together determines the rebound rate. When you examine the pad under a magnifying glass, you can see the individual cells of the foam. In a high-density pad, these cells are small and thick-walled. In a cheap pad, the cells are large and thin-walled, filled mostly with air. When you apply the penny test, you are testing the tensile strength of these cell walls. If the walls are too thin, they rupture under the localized pressure of the penny. This is the same thing that happens under the leg of a sofa or a dining room table. A low-density pad will develop permanent indentations where the foam has literally exploded at a microscopic level. This is why you see those permanent divots in old carpet. It is not the carpet that has failed, it is the cellular structure of the pad. We use the ASTM D3574 test in laboratories to measure this, but the penny test is the grunt’s version of that science. It works because the surface area of a penny’s edge is small enough to concentrate force, mimicking the heel of a shoe.
Why your subfloor is lying to you
Floor leveling is an essential process that compensates for the natural settling and imperfections of a concrete or plywood subfloor. A subfloor may look flat to the naked eye, but once you put a ten-foot straightedge on it, the truth comes out. Dips and humps are the primary cause of flooring failure. For a carpet install, a dip can lead to a hollow feel. For laminate or LVP, a dip is a death sentence. Concrete slabs are notorious for being uneven. Most people do not realize that concrete is a liquid when it is poured. It follows the laws of gravity and the quality of the screed job. If the slab has a high moisture content, it can also cause the leveling compound to de-bond. I always use a calcium chloride test or an RH probe before I even think about mixing a bag of leveler. If the slab is pumping out water vapor, that vapor will get trapped under your carpet pad or laminate underlayment. It turns into a petri dish of mold and mildew. This is especially critical near showers or bathrooms where the moisture levels are already elevated. You need a vapor barrier that is rated for the specific hydrostatic pressure of your slab. Do not trust the guy who says he can just lay the floor over the old slab without checking the levels first. He is just trying to get to his next job.
| Pad Type | Density (lb/ft³) | Application | Penny Test Result |
|---|---|---|---|
| Builder Grade | 3 – 5 | Low traffic closets | Deep sink, easy compression |
| Standard Residential | 6 – 6.5 | Bedrooms | Moderate resistance |
| High Performance | 8 | Living rooms, hallways | Firm resistance, no bottoming out |
| Commercial Grade | 10+ | Stairs, heavy traffic | Extremely rigid, minimal sink |
The ghost in the expansion gap
Expansion gaps are the spaces left around the perimeter of a room to allow flooring materials to expand and contract with temperature changes. For laminate and hardwood, this gap is the difference between a floor that lasts forty years and a floor that buckles in the first summer. Wood is a hygroscopic material. It breathes. When the humidity goes up, the boards grow. If they hit a wall, they have nowhere to go but up. This creates a peak in the middle of the floor. I have seen floors lift six inches off the subfloor because some hack jammed the boards tight against the baseboards. You need at least a quarter inch, sometimes a half inch depending on the run of the floor. This gap is later hidden by baseboards or quarter-round molding. It is a structural necessity, not an aesthetic choice. People hate the look of T-moldings in doorways, but they are there for a reason. They allow the floor to move independently in different zones. If you lock a floor down by putting a heavy kitchen island on top of it, you have killed its ability to breathe. The floor will eventually tear itself apart at the weakest joint. This is the structural reality of floating floors. They are not attached to the subfloor, they are sitting on top of it like a massive, heavy sheet. Any friction or restriction will cause a failure.
The structural trap of over cushioning
While most people want the thickest underlayment, too much cushion actually causes the locking mechanisms on LVP and laminate to snap under pressure. This is a contrarian point that many homeowners struggle to understand. They think a thicker pad means a softer, more comfortable floor. In reality, a thick, soft underlayment creates a trampoline effect. When you step on a seam, the boards deflect downward. Because the pad is too soft, the boards bend too far. The tongue and groove joints are made of HDF or plastic. They have a limited range of motion. When you exceed that range, the tongue snaps off. Now you have a floor that moves and squeaks every time you walk on it. For laminate, you want a high-density, thin underlayment. It should be firm enough to support the joint but resilient enough to provide some sound dampening. We look for the IIC (Impact Insulation Class) rating. A higher IIC means less noise is transmitted to the room below. But you never sacrifice density for thickness. I would rather see a 2mm high-density rubber underlayment than a 6mm cheap foam. The rubber will support the floor for twenty years. The foam will be flat in two.
“Consistency in subfloor preparation is the only insurance policy an installer truly has.” – NWFA Technical Guidelines
The pre installation checklist for a professional result
- Check subfloor for levelness using a 10-foot straightedge
- Perform moisture testing on concrete slabs using RH probes
- Verify the density of the carpet pad using the penny test and weight verification
- Ensure all transitions and door casings are undercut for a clean fit
- Clean the subfloor of all debris, drywall mud, and protruding nails
- Verify that the flooring material has been acclimated to the room temperature for 48 hours
- Confirm the vapor barrier is properly taped and sealed at the seams
Moisture dynamics and the shower interface
The transition between a carpeted area and a tiled shower requires a specialized moisture management strategy. Showers are high-moisture environments that create a localized humidity spike. If the carpet pad is butted right up against a shower curb without a proper transition, it will act like a wick. It will pull moisture from the bathroom into the carpeted bedroom. This leads to the rot of the tack strip and a nasty smell that you can never get rid of. You need a solid transition, usually a marble or metal threshold, that is sealed with a high-grade silicone. This prevents the capillary action of the carpet fibers and the porous pad. I always recommend using a synthetic fiber pad in areas adjacent to bathrooms because they do not support mold growth as easily as a rebond pad. Rebond is made of shredded foam scraps and is held together by an adhesive that can break down if it stays wet. If you are doing a full renovation, ensure the floor leveling compound used in the bathroom is waterproof or rated for wet areas. Most guys use the same stuff they use in the living room, which is a mistake. Standard gypsum-based levelers will turn to mush if they get saturated by a leaking shower pan. Always check the chemistry of your materials before you pour.
The final professional verdict
The penny test is a small part of a larger engineering challenge. A floor is a system of layers that must work in harmony. From the chemical bond of the leveling compound to the cellular structure of the carpet pad, every detail matters. If you cut corners on the things you cannot see, the things you can see will suffer. Do not let a fast-talking contractor tell you that the underlayment is not important. It is the most important part of the job. It is the difference between a floor that is a quiet, solid surface and one that is a noisy, flexing disaster. Take the time to check the density. Take the time to level the floor. Your knees, your back, and your wallet will thank you in ten years when the floor still looks and feels like it was installed yesterday. Flooring is not about aesthetics, it is about structural integrity and the physics of the home.