How to Repair a Burnt Spot in Your Carpet
I once walked into a luxury suite where a cigarette had fallen onto a bespoke wool carpet. The owner was frantic. They thought the entire ten thousand dollar installation was a total loss. I just looked at them and reached for my utility knife. They winced when I cut out a circle. But twenty minutes later, you couldn’t find the seam if you had a magnifying glass and a flashlight. That is the difference between a handyman and an installer. We do not just fix things. We perform structural transplants. Most people treat carpet like a rug. It is not a rug. It is a complex engineering system of primary backings, secondary backings, latex bonds, and twisted polymer filaments. When you burn it, you are not just discoloring the surface. You are melting a chemical structure. You are fusing molecules of nylon or polyester into a solid, useless block of plastic. You cannot wash that away. You have to remove the damaged area and integrate a new piece without breaking the tension of the surrounding tufts.
The anatomy of a scorched fiber
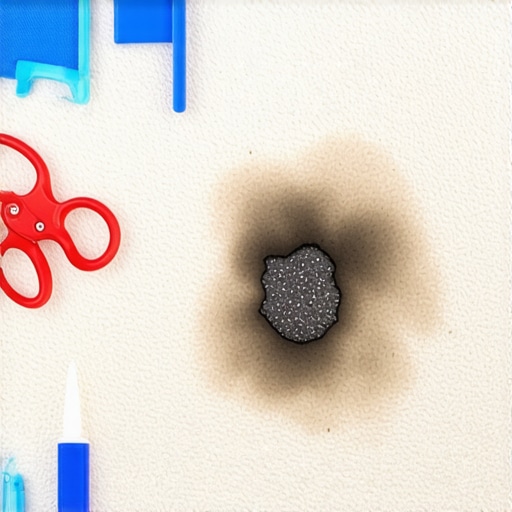
A burnt spot in your carpet requires the physical removal of damaged synthetic polymers and the insertion of a matching donor piece. To fix a burn, you must identify the fiber type, cut out the melted section using a carpet cookie cutter, and bond a new piece using specialized adhesives. When an iron or a coal hits a synthetic carpet, it reaches the glass transition temperature of the fiber immediately. Nylon melts at roughly four hundred and twenty degrees Fahrenheit. Polyester is even more sensitive. Once that heat penetrates, the individual filaments fuse together. This creates a hard, reflective scab. It looks dark because the light no longer bounces off the individual sides of the triangular fiber. It just hits a flat plane of melted plastic. You can try to snip off the tips if the burn is shallow. I call this the barber method. But if the heat reached the primary backing, you are looking at a full thickness repair. The structural integrity of the latex bond that holds the tufts to the grid is gone. If you leave it, the surrounding carpet will eventually start to shed its yarn. It will fray. It will fail. You have to be aggressive.
“A floor is only as good as the subfloor beneath it; deflection is the enemy of every joint.” – Master Flooring Axiom
The hidden donor site in your closet
Finding a perfect match for a carpet repair requires sourcing fibers from a low visibility area such as a closet or behind a baseboard. The donor piece must have the same dye lot, wear pattern, and pile direction as the area where the burn occurred for a stealthy repair. Never trust a scrap piece left in the attic for five years. That piece has not seen sunlight or foot traffic. It will be too vibrant. It will look like a bright patch on an old pair of jeans. I always go into the back of the master closet. I pull the carpet away from the tack strip and cut my donor piece from there. I then replace that closet piece with a scrap that does not quite match. No one cares about the back of a closet. They care about the middle of the living room. You need to look at the pile direction. Every carpet has a grain. It is called the nap. If you install your patch backwards, the light will hit it differently. It will look like a different color even if it is from the same roll. I use a piece of paper to check the grain. I slide it across the carpet. If it moves smoothly, that is the direction of the nap. I mark that direction on the back of my donor piece with a sharpie. Accuracy is everything.
| Fiber Type | Melting Point | Resilience Rating | Recommended Repair Method |
|---|---|---|---|
| Nylon | 420-450 F | High | Surgical Patching |
| Polyester | 480-500 F | Moderate | Full Thickness Removal |
| Polypropylene | 320-330 F | Low | Total Replacement |
| Wool | Charred only | Very High | Shearing and Re-tufting |
Surgical removal of the melted mass
Removing a burnt carpet spot requires a sharp professional utility knife and a steady hand to cut through the backing without damaging the padding. Precision is mandatory to ensure the hole is a perfect circle or square that matches the replacement piece exactly. I do not use those cheap snap-off blades. I use high carbon steel trapezoid blades. They need to be sharp enough to shave with. When you cut into the carpet, you are not just cutting fabric. You are cutting through a polypropylene mesh and a layer of heavy latex. If your blade is dull, it will drag. It will pull the fibers. This creates a fuzzy edge that will never hide. I use a carpet star tool or a small piece of pipe as a template. I press down hard. I cut in one continuous motion. You want the wall of the hole to be vertical. If you bevel the cut, the patch will either sink or sit too high. It has to be a perfect plug. Think of it like an engine piston. It needs a tolerance of less than a millimeter. If you see the padding underneath, check if it is scorched too. If the pad is melted, it will be hard. A hard spot under a soft carpet feels like a rock under your foot. I cut out the bad pad and tape in a new square. Details matter.
Adhesive chemistry for a permanent bond
The success of a carpet patch depends on the chemical bond between the new backing and the subfloor or padding. Using a high strength thermoplastic hot melt tape or a pressure sensitive adhesive ensures the patch does not shift under foot traffic. Most DIY guys use double sided tape. That is a mistake. Double sided tape dries out in three years. Then the patch kicks out when you run the vacuum over it. I use a specialized carpet seam sealer on the edges. This prevents the primary backing from unraveling. It is like putting glue on the end of a rope. Then I use a heat iron or a high grade adhesive disc. You want the patch to become part of the floor. If the subfloor is concrete, moisture is your enemy. Concrete breathes. It releases vapor. If you use the wrong glue, that vapor will emulsify the adhesive. The patch will float away. I always check the slab with a moisture meter before I commit to a glue. If the moisture is over five percent, I use a synthetic resin adhesive that can handle the alkalinity of the concrete. You are building a bridge. It needs to hold weight.
- Identify the grain of the carpet before cutting.
- Use a fresh high carbon steel blade for every cut.
- Seal the edges of the hole with latex seam sealer.
- Vacuum the area to lift the surrounding pile.
- Comb the fibers together after the adhesive sets.
- Weight the patch down for at least six hours.
The 1/8 inch that ruins everything
Misaligning a carpet patch by even a fraction of an inch will cause a visible seam that catches light and dirt. Precision in the alignment of the backing grids is the only way to achieve a repair that is invisible to the naked eye. If you look at the back of a carpet, it is a grid. You have the warp and the weft. When you drop in your donor piece, those grids must align with the existing carpet. If you are off by a hair, the tufts will overlap. This creates a ridge. That ridge will wear down faster than the rest of the floor. Within six months, you will have a bald line around your repair. It will look like a scar. I use a row spreader to find the gaps between the tufts. I make sure my patch sits exactly in those gaps. This is why carpet installers have bad knees. We spend hours staring at these tiny squares of plastic. But it is the only way. I have seen guys try to use wood glue or super glue. Those glues get brittle. When you walk on them, they crack. They make a crunching sound. A floor should be silent. It should be a soft, resilient surface that absorbs energy. If your repair makes noise, you have failed the engineering test.
“Deflection is the silent killer of every floor covering, from the hardest stone to the softest textile.” – Master Flooring Axiom
Physical properties of synthetic polymers
The molecular structure of modern carpet fibers determines how they respond to heat damage and subsequent repair techniques. Understanding the difference between nylon six and nylon six six allows an installer to choose the correct bonding agent and finishing tool. Nylon 6,6 is more resilient. It has a tighter molecular structure. It resists crushing better than regular nylon. When you are blending a patch in a high traffic area, you have to account for the crush. If the rest of the room is five years old, the fibers are likely flattened. Your new donor piece from the closet will be standing tall. I use a carpet pile groomer to mechanically stress the new piece. I want to break down those polymer chains just enough so they match the rest of the room. It sounds counterintuitive to damage a new piece of carpet. But you are matching the wear. You are performing a localized aging process. I also look at the dtex of the yarn. That is the mass in grams per ten thousand meters of fiber. If the dtex does not match, the patch will have a different density. It will feel different under a bare foot. Most homeowners do not notice dtex. But their feet do. The sensory experience of a floor is just as important as the visual one. If the transition feels like a bump, the repair is a failure. You want a single, continuous plane of performance.