The Mixing Bucket Mistake That Makes Floor Leveler Fail
The concrete grind that saved a laminate job
Most guys skip the leveling compound. They think the underlayment will hide the dip. It won’t. I spent three days grinding concrete on a job last month just so the floor wouldn’t click like a castanet. My hands were vibrating for hours after I turned off the machine. The air smelled of burnt diamond segments and pulverized lime. I had a mask on, but you can still taste the grit of a bad subfloor. The homeowner wanted to save money by skipping the prep. I told them that the floor is a structural system, not a rug. If the base moves, the finish breaks. I saw the results of a failed pour at a site nearby. The installer used a dirty bucket. He didn’t realize that the dried residue from the previous mix acted as a catalyst. It caused the new batch to flash set. The leveler never slumped. It sat there like a pile of wet sand. That mistake cost him five thousand dollars in demolition and wasted material. I don’t make those mistakes because I respect the chemistry of the bucket. I respect the NWFA standards that dictate flatness. If your subfloor has a dip greater than three sixteenths of an inch over ten feet, your luxury vinyl or laminate is doomed. The locking mechanisms are nothing but thin plastic tongues. They cannot handle the vertical deflection of a hollow spot. I grind the high spots and I fill the low spots. It is a game of millimeters. It is the difference between a floor that lasts thirty years and one that fails in thirty days. People want the pretty wood. They do not want to pay for the ugly concrete work. But the concrete is what matters. Without it, you are just laying expensive trash over a broken foundation.
The dirty bucket catalyst that ruins chemical bonds
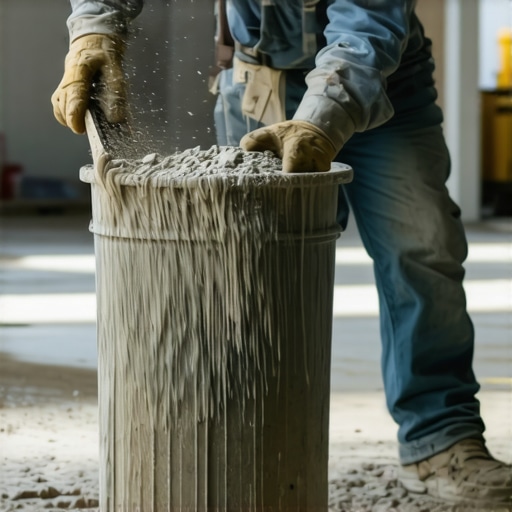
A dirty mixing bucket causes floor leveler failure by introducing cured particles that trigger premature crystallization in the new batch. This contamination disrupts the polymer cross-linking process, leading to reduced flowability, lumps, and a weak structural bond that eventually cracks under the pressure of foot traffic and furniture weight. You see it all the time with lazy crews. They finish a pour, leave a thin film of self leveling underlayment in the bucket, and let it dry. When they toss in the next bag and hit it with the mixer, those dried flakes break loose. In the world of chemistry, these are known as seeds. They give the new liquid something to grow on immediately. This is not a slow process. It is a chemical chain reaction. The leveler starts to thicken before it even hits the floor. You lose your healing time. The edges do not melt into each other. You end up with ridges that look like a frozen ocean. I have seen guys try to trowel those ridges out. It never works. You are fighting physics at that point. I keep a dedicated wash station. Every bucket is scrubbed until it looks new. If it is not clean enough to eat out of, it is not clean enough for my leveler. The polymers in high end products like Mapei or Ardex are sensitive. They are designed to stay liquid for a specific window. When you introduce old contaminants, you are essentially shortening that window by half. The result is a floor that looks like a topographical map of the moon. It is a nightmare for a laminate install or a carpet install. A carpet installer will feel every bump through the pad. A laminate plank will simply bridge over the bump and then snap when someone walks on it. Do not be the guy who thinks a dirty bucket is just a tool. It is a chemical reactor.
| Product Type | Average Compressive Strength (PSI) | Typical Cure Time for Foot Traffic | Maximum Thickness Per Lift |
|---|---|---|---|
| Standard Gypsum Based | 2,000 – 3,500 | 4 – 6 Hours | 2 Inches |
| High Strength Cementitious | 4,000 – 6,000 | 2 – 4 Hours | 1.5 Inches |
| Fiber Reinforced SLU | 5,000+ | 3 Hours | 1 Inch |
The physics of water to powder ratios and slump
Maintaining the exact water to powder ratio is essential because excess water causes the aggregate to settle at the bottom while polymers float to the top. This separation results in a chalky surface that lacks the shear strength required to support heavy flooring materials like tile or hardwood. I weigh my water. I do not use a dirty gallon jug with a Sharpie line on it. I use a digital scale. If the bag calls for five point seven quarts, it gets exactly that. If you add too much water, the leveler looks great when it is wet. It flows like a dream. But as it cures, the water has to go somewhere. It evaporates. If there was too much of it, it leaves behind microscopic voids. The surface becomes dusty and soft. You can scratch it with a fingernail. If you try to glue a floor to that, the glue will stick to the dust, not the leveler. I have walked onto jobs where I could peel the leveler off the floor like a scab. That is the result of over watering. Conversely, if you do not use enough water, the material will not level. It will be too viscous. You will spend all your time with a rake trying to move it around. By the time you get it flat, the surface has already skinned over. This is especially dangerous in showers. If you are trying to level a subfloor before building a shower pan, any lack of structural integrity will lead to cracked grout lines later. I have a saying. The bucket does not lie. If the mix looks wrong in the bucket, it will be wrong on the floor. I treat the mixing process like an architect treats a blueprint. It is the law of the job site.
“A floor is only as good as the subfloor beneath it; deflection is the enemy of every joint.” – Master Flooring Axiom
The ghost in the expansion gap
An expansion gap is a mandatory void left at the perimeter of a room to allow for the natural movement of flooring materials due to temperature and humidity changes. Without this gap, the floor will bind against the walls, causing the planks to buckle, peak, or pull apart at the joints. I once saw a solid oak floor that had pushed a baseboard two inches off the wall. The installer had wedged the boards tight against the drywall. When the summer humidity hit, that wood had nowhere to go but up. It looked like a mountain range in the middle of the dining room. You cannot fight the power of expanding wood fibers. They will move the house before they compress themselves. I use spacers every single time. For laminate, you need at least a quarter inch. For solid hardwood, I usually go with a half inch. People worry about the gap showing. That is what baseboards and shoe moldings are for. They are not just decorative. They are functional covers for the movement zone. I also look at the climate. In a high humidity environment, that gap needs to be respected even more. If you are doing a carpet install, the tack strips need to be placed properly so they do not interfere with the transition. I see guys cramming carpet into the gap where the wood should be moving. It creates a hard point. Hard points are where floors go to die. I leave the room for the floor to breathe. It is a living thing. If you choke it, it will rebel. I have spent too many days pulling up buckled planks because someone forgot to leave a finger’s width of space at the edges.
- Verify the subfloor moisture content using a calibrated pinless meter.
- Grind down all high spots and ridges in the concrete slab.
- Apply a high quality primer to the substrate to prevent pinholes in the leveler.
- Use a high shear mixing paddle to ensure no dry clumps remain in the mix.
- Check the floor for flatness using a ten foot straight edge.
- Maintain a consistent room temperature to prevent the leveler from drying too fast.
Wet area failures and the shower floor connection
Leveling a floor for a shower installation requires a specific understanding of pitch and waterproof membranes to ensure that water migrates toward the drain. Improper leveling at the entry point often leads to water pooling or a failure of the curb seal, resulting in structural rot over time. Showers are the ultimate test of an installer. You aren’t just making it flat; you are making it shed water. If the subfloor outside the shower is not level, the glass door won’t hang right. You’ll have a gap at the bottom that lets water spray all over your new laminate or tile. I have seen beautiful bathrooms ruined because the installer didn’t check the level of the joists before they started the pan. The water would run away from the drain toward the back corner. That is a total tear out. There is no fixing that with a bit of caulk. You have to understand the TCNA handbooks. They give you the math for the slope. If you ignore the math, you are just guessing. And guessing in a wet area is a recipe for mold. I use a laser level for everything. I want to know where the high point of the entire floor is before I even open a bag of thin set. It tells me how much I need to build up the rest of the room. When you are transitioning from a tile shower to a laminate bedroom, that transition point is a weak spot. If the leveling isn’t perfect, you’ll have a lip. A lip is a trip hazard and a place for moisture to collect. I spend more time with my laser than I do with my trowel. That is how you get a floor that people don’t even notice. And in this business, a floor that goes unnoticed is a perfect floor.
“Substrate preparation is the most critical and often overlooked component of a successful flooring installation.” – NWFA Technical Manual
The 1/8 inch that ruins everything
A deviation of just one eighth of an inch can cause a floating floor to feel bouncy or lead to the premature failure of the clicking system. This small gap creates a hollow sound and allows the planks to rub against each other, which eventually wears down the protective finish at the seams. I hate the sound of a hollow floor. It sounds cheap. It sounds like a DIY job gone wrong. When a homeowner walks across a room and they hear that ‘click-clack’ sound, they know something is wrong. Usually, it is because there is a low spot in the concrete. The plank is bridging over a tiny valley. Every time you step on it, the plank bends down to touch the floor. That bending stresses the joint. Do that ten thousand times and the joint snaps. Now you have a gap. Dirt gets in the gap. The floor starts to move even more. I have seen $10 per square foot wood ruined by a $0.50 low spot. I use a string line if I don’t have my laser. I pull it tight across the floor. If I can slide a nickel under the string, it is too low. I mark the floor with a pencil. I create a map of the dips. Then I fill them. I don’t care if it takes an extra day. I want to sleep at night knowing that the floor is solid. Most guys just want to get paid and get out. They hide the mistakes under the underlayment. But I know they are there. I can feel them through my boots. I make sure my subfloors are like glass. When I lay a plank down, it stays put. No movement. No noise. Just a solid surface that feels like it was grown there. That is the difference between a mechanic and a hack. I have sawdust under my nails because I do the work that others skip. I grind. I level. I measure. And then I lay the floor.